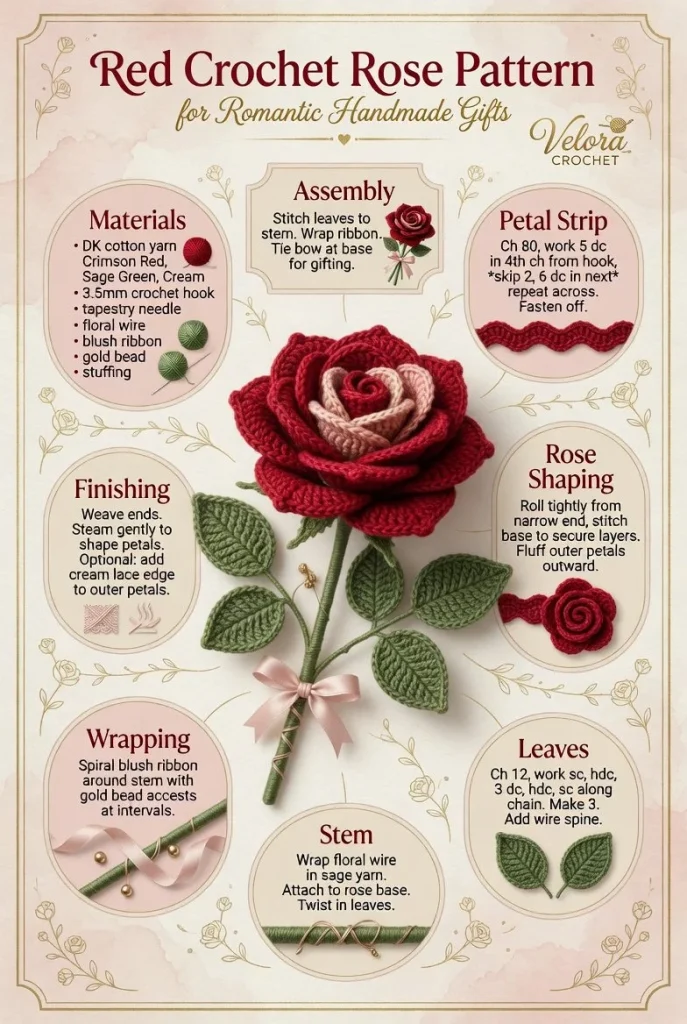
Creating a lovely crochet rose with layered petals is a delightful project that can add a romantic touch to any bouquet or serve as a beautiful decoration. This versatile pattern allows you to craft a stunning rose perfect for gifts, brooches, or just to enhance your home decor. With a rolled flower shape and optional green leaves and stem, this crochet project is sure to impress.
Materials
- Red worsted weight yarn
- Green worsted weight yarn (for leaves and stem)
- 4.0 mm crochet hook
- Darning needle
- Scissors
- Floral wire (optional, if you’d like a sturdy stem)
Abbreviations
- MR: magic ring
- ch: chain
- sc: single crochet
- hdc: half double crochet
- dc: double crochet
- inc: increase
- sl st: slip stitch
Petals
Start by creating the petal strips to form the base of your rose.
- Ch 5.
- Row 1: In the second ch from the hook, make 1 sc, 1 hdc, and 3 dc. Turn your work.
- Row 2: Ch 1, 2 dc in each stitch across (total: 10 dc). Turn.
- Row 3: Ch 1, 1 sc in the first dc, 1 hdc in the next dc, 2 dc in the next—repeat from * across. Turn.
- Row 4: Ch 1, 1 sc in the first stitch, 1 hdc in the next stitch, 1 dc in the next, 2 dc in the next—repeat from * across (total: 16 dc).
Continue this process until you have five petal strips made in total.
Rose Shaping
Now, it’s time to shape your rose.
- Take one petal strip and roll it to form the center of the rose.
- Secure the roll by sewing it together with the darning needle.
- Add the remaining petal strips one by one around the center, sewing them discreetly in place as you go.
- Adjust the petals to achieve a natural look, pulling them slightly apart for that luscious layered effect.
Leaves
To create the leaves to accompany your rose, follow these simple steps:
- Ch 6.
- Row 1: In the second ch from the hook, 1 sc, 1 hdc in the next, 2 dc in the next; turn your work.
- Row 2: Ch 1, 2 dc in each stitch across (total: 6 dc). Cut the yarn and leave a long tail for sewing.
Fold the piece in half and sew the edges together to give it a leaf shape. Make as many leaves as you desire for your rose.
Stem
For an optional stem, you can crochet a simple chain:
- Ch 25 (or longer, as per your preference).
- Use green yarn to make it blend well with the leaves.
- For added sturdiness, you can insert a floral wire into the chain.
Wrapping
To finish your rose, wrap the base where the petals meet. This can be done with floral tape or remaining yarn from the project to give it a neat look.
Finishing
Once everything is securely in place, you can add any additional details. Maybe a contrasting yarn for wrapping around the stem or more leaves for a fuller appearance. Take a moment to gently reshape the petals, ensuring they maintain that beautiful, open look.
Assembly
To assemble the complete bouquet or decoration, just place the rose on the stem as desired and group several together if you’re making a bouquet. You can add a ribbon at the base to hold them together for an elegant finish.
Tips for the Best Result
- For those new to crocheting, try to keep your tension consistent while making the petals to maintain an even shape.
- Don’t hesitate to try different colors for a unique bouquet that matches your decor or gift-giving theme.
- If you’re planning to add several roses together, consider varying the sizes slightly for a more natural look.
Crocheting this stunning rose is a wonderful way to showcase your skills and create a thoughtful gift or bright home accent. The delicate details and layered petals will make it a cherished piece, whether used for Valentine’s Day or any special occasion. For more inspiration, check out this beginner-friendly crochet rose flower pattern.



