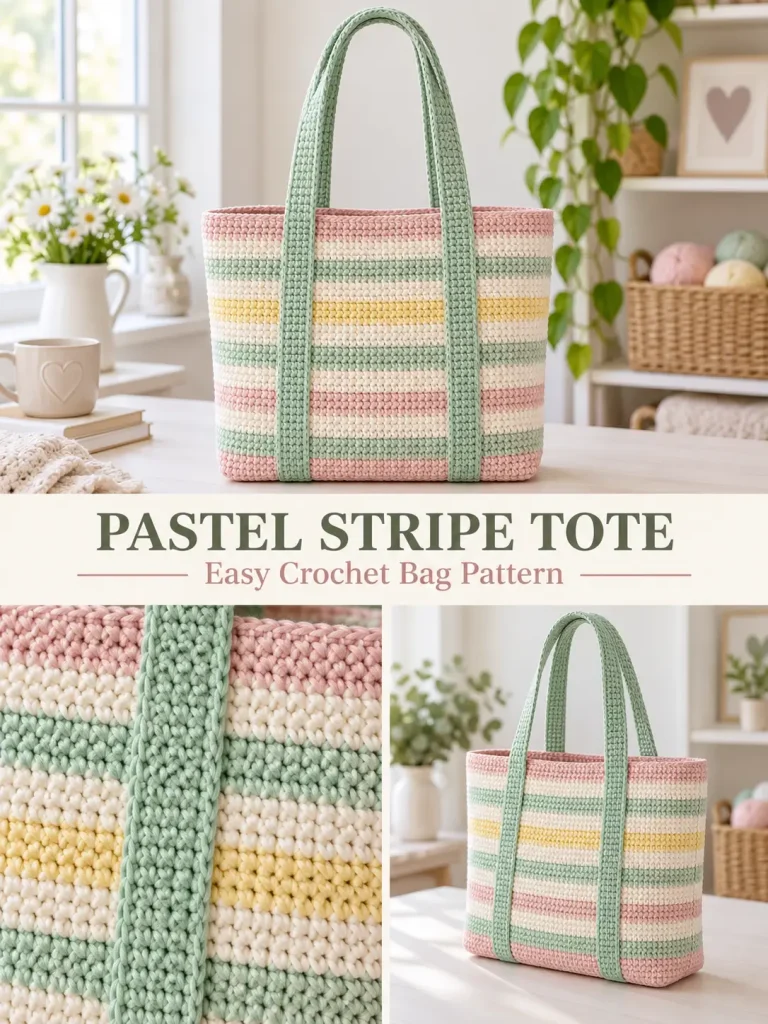
This cheerful crochet tote combines soft pastel stripes, a roomy rectangular shape, and extra-long crocheted handles for an everyday bag that feels both practical and polished.
The body is worked from a simple rectangular base, then crocheted upward in continuous rounds. The long handles are made separately and sewn securely down the outside of the bag for extra strength.
Materials
- Medium weight #4 cotton or cotton-blend yarn
- Approximately 700–850 yards total
- 5 mm crochet hook
- Yarn needle
- Scissors
- Stitch markers
- Measuring tape
Suggested Colors
For the soft striped look shown in this project, use:
- Cream
- Soft mint
- Blush pink
- Pale yellow
You can also use scrap yarn or choose four colors that coordinate with your wardrobe.
Skill Level
Easy / Confident Beginner
Finished Size
Approximately:
- 15 inches wide
- 12½ inches tall
- 4 inches deep
- 25–27 inch handle drop
The exact size can vary slightly depending on yarn, hook size, and tension.
Abbreviations — US Terms
ch – chain
sc – single crochet
st(s) – stitch(es)
sl st – slip stitch
BLO – back loop only
Gauge
Approximately:
14 single crochet stitches = 4 inches
15 single crochet rows = 4 inches
Gauge does not have to be exact, but try to create a firm fabric so the finished tote holds its shape.
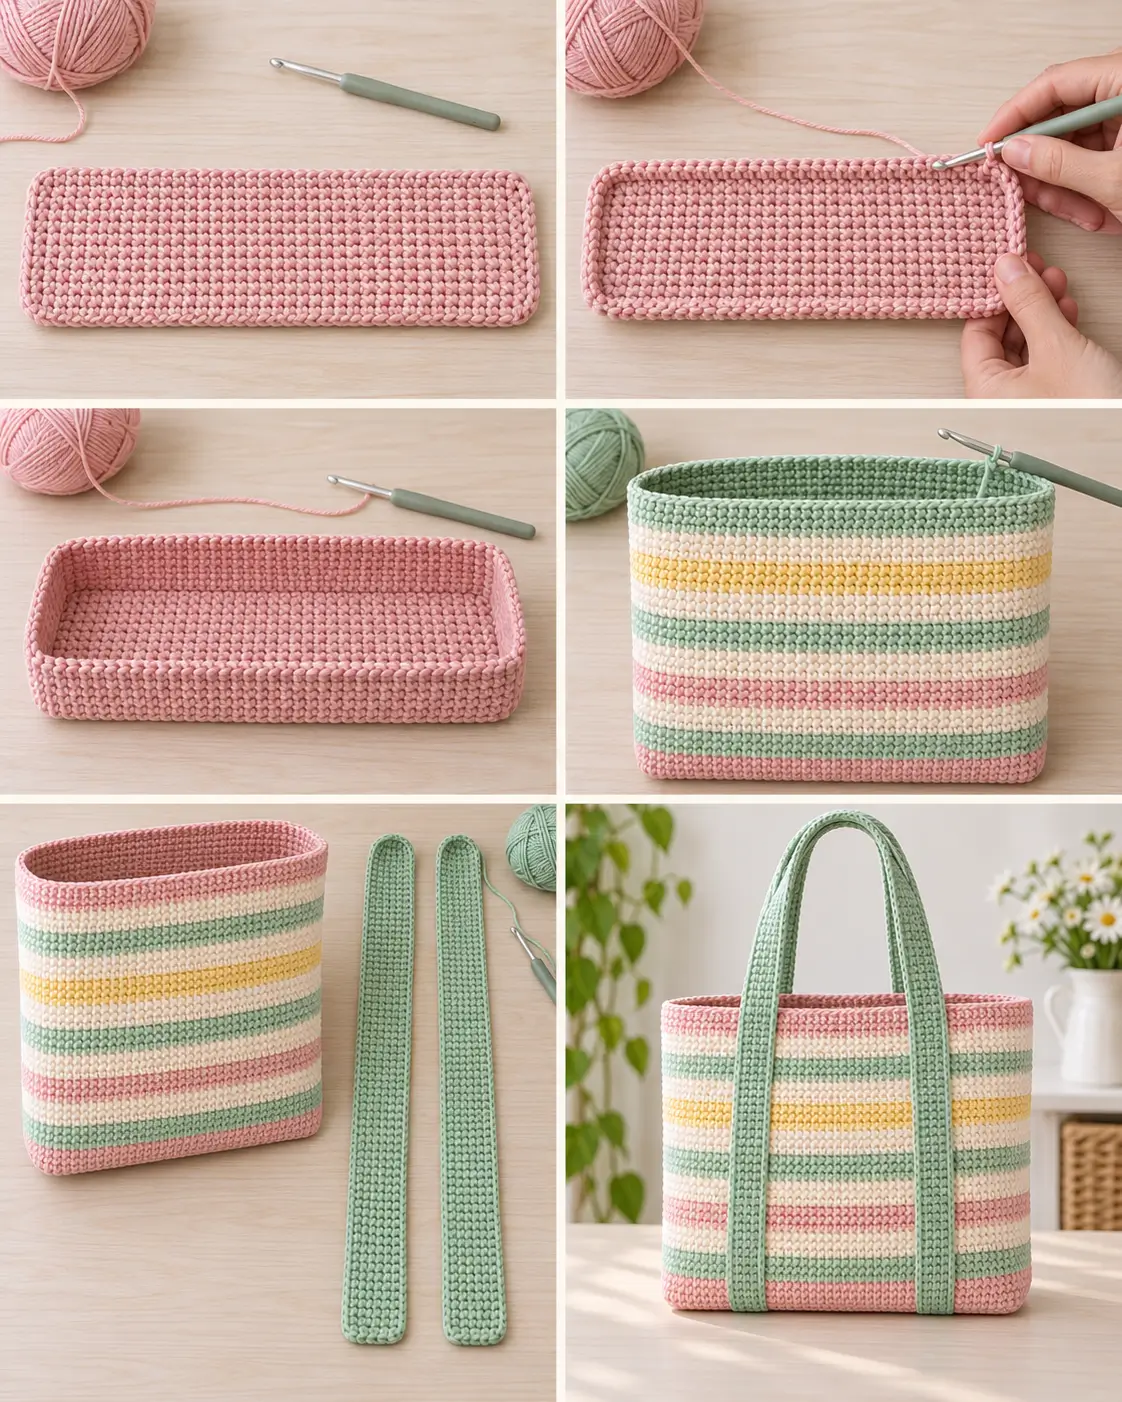
PART 1: Crochet the Rectangular Base
Use blush pink yarn.
Foundation
Chain 51.
Row 1
Single crochet in the second chain from the hook and in every chain across.
50 sc
Chain 1 and turn.
Rows 2–14
Single crochet in every stitch across.
50 sc
Chain 1 and turn after each row.
After Row 14, your base should measure approximately:
14–15 inches long × 4 inches wide
Do not fasten off.
PART 2: Crochet Around the Base
You will now work around all four sides of the rectangle.
This creates the foundation for the tote body.
Setup Round
Work:
- 1 sc in each of the 50 stitches across the first long edge
- approximately 14 sc evenly along the short edge
- 1 sc in each of the 50 stitches across the opposite long edge
- approximately 14 sc evenly along the final short edge
You should have approximately:
128 stitches
Place a stitch marker in the first stitch.
From this point forward, work in continuous rounds unless otherwise stated.
PART 3: Create the Bottom Edge
For the first body round, work in the back loop only.
Round 1
Sc BLO in every stitch around.
128 sc
Working through the back loops creates a subtle fold line between the flat base and the upright sides.
Rounds 2–4
Sc in every stitch around.
Continue using blush pink.
PART 4: Crochet the Striped Body
Continue working 128 single crochet stitches in every round.
Change colors at the beginning of the indicated rounds.
For clean color changes, finish the final stitch of the previous round using the new color.
Stripe Sequence
Rounds 1–4
Blush Pink
Rounds 5–8
Soft Mint
Rounds 9–12
Cream
Rounds 13–16
Blush Pink
Rounds 17–20
Cream
Rounds 21–24
Soft Mint
Rounds 25–28
Cream
Rounds 29–32
Pale Yellow
Rounds 33–36
Cream
Rounds 37–40
Soft Mint
Rounds 41–44
Cream
Rounds 45–48
Blush Pink
This produces the soft irregular pastel stripe arrangement rather than a rigid repeating rainbow.
After Round 48, check the bag height.
The body should measure approximately:
12–13 inches from the bottom
If you want a taller bag, continue for another 4-round stripe before making the top edge.
PART 5: Strengthen the Top Edge
Continue with blush pink.
Top Edge Round 1
Sc in every stitch around.
Top Edge Round 2
Sc in every stitch around again.
Slip stitch into the next stitch.
Fasten off and weave in the ends.
The extra rounds help make the opening slightly firmer.
PART 6: Crochet the Long Handles
The handles in this tote are intentionally wide and long.
Instead of attaching tiny handles only at the top edge, the straps extend well down the outside of the bag. This distributes the weight and gives the tote its distinctive look.
Make 2 identical straps using soft mint yarn.
Strap Foundation
Chain 8.
Row 1
Sc in the second chain from the hook and across.
7 sc
Chain 1 and turn.
Row 2
Sc in every stitch across.
7 sc
Chain 1 and turn.
Continue
Repeat Row 2 until the strap measures approximately:
48–52 inches long
The exact length depends on how much handle drop you prefer.
Before fastening off, hold the strap against the bag to check the length.
Fasten off, leaving a long sewing tail.
Make the second strap exactly the same length.
PART 7: Position the Handles
Lay the tote flat.
Position the first strap vertically on the front of the bag.
Place it approximately:
3½–4 inches from the side edge
Allow the strap to extend from near the bottom of the bag, upward past the opening, and form a long loop above the bag.
Bring the opposite end of the same strap back down the front approximately 3½–4 inches from the opposite side.
This creates one large U-shaped handle.
Repeat with the second strap on the back of the tote.
Important
Before sewing, make sure:
- both handles are the same height
- the straps are not twisted
- the strap ends reach the same distance toward the bottom
- front and back straps line up evenly
Use stitch markers or safety pins to hold them in place.
PART 8: Sew the Handles Securely
Thread matching mint yarn onto a yarn needle.
Sew along both long edges of each strap where it overlaps the bag.
Begin near the bottom and continue upward until approximately 1 inch below the top edge.
Do not sew the section that forms the actual carrying loop.
Repeat along the opposite edge of the strap.
For extra strength, sew horizontally across the lower end of each strap several times.
Repeat for all four strap sections.
This method spreads the weight over a much larger portion of the tote than attaching handles only to the top row.
Optional Reinforced Handles
Cotton crochet straps can stretch after regular use.
For a more structured tote, sew a strip of cotton webbing or non-stretch ribbon along the underside of each handle.
Keep the reinforcement slightly narrower than the crocheted strap so it remains mostly hidden.
Optional Fabric Lining
A fabric lining is especially useful for larger crochet totes.
It helps prevent:
- stretching
- small objects poking through stitches
- distortion when carrying heavier items
You can also add interior pockets while making the lining.
A simple rectangular cotton lining works well with this bag.
Optional Magnetic Closure
Before attaching the lining, add a magnetic snap near the center of the opening.
This gives the tote a more finished handbag-style closure without changing the crochet pattern.
How to Make the Bag Smaller
For a smaller everyday tote, start with a shorter base.
For example:
Chain 43 instead of 51.
Crochet approximately 12 rows for the base.
Then work evenly around the rectangle and follow the same striped construction.
How to Make the Bag Larger
For a larger market or beach tote, increase both dimensions of the base.
Try a rectangle approximately:
17 inches × 5 inches
Then continue the body until it measures around 14–15 inches tall.
Keep the handles wide enough to support the larger bag.
Best Yarn for a Crochet Tote
Cotton is particularly useful for this project because it creates a sturdy fabric with good stitch definition.
A cotton-acrylic blend can make the tote lighter and softer.
For a bag that will carry heavier items, choose yarn that feels firm rather than very stretchy.
Color Ideas
The stripe pattern is easy to customize.
Try:
Coastal
Navy, cream, light blue, and sand.
Spring Pastels
Mint, blush, lavender, and cream.
Neutral
Cream, beige, taupe, and soft brown.
Modern
Black, cream, camel, and olive.
Scrap Yarn Version
Use a different coordinated color for each four-round stripe.
This is also a useful way to turn leftover yarn into a practical project.
Beginner Tips
Keep the same number of stitches in every body round.
Move your stitch marker upward after each round.
Do not accidentally crochet into the joining slip stitch when changing colors.
Weave in color-change ends as you work instead of leaving all of them until the end.
Check both straps carefully before sewing them permanently into place.
Use cotton or another relatively firm yarn if you want the tote to maintain its rectangular shape.
Why the Long Handles Work So Well
One of the most useful details of this tote is the handle construction.
Instead of concentrating all the bag’s weight on four small attachment points, the wide straps are sewn vertically along a large section of the bag.
That makes the handles more secure while also creating a strong decorative feature on the front and back.
Easy Pastel Striped Crochet Tote
This tote uses simple crochet techniques but produces a finished bag with plenty of visual impact.
The combination of a structured rectangular base, soft pastel stripes, wide mint handles, and roomy proportions makes it useful as a:
- everyday tote
- crochet project bag
- market bag
- library bag
- beach tote
- gift
- yarn bag
Best of all, almost the entire project is made with straightforward single crochet, making it approachable for beginners who are ready to crochet their first larger bag.



