Introduction
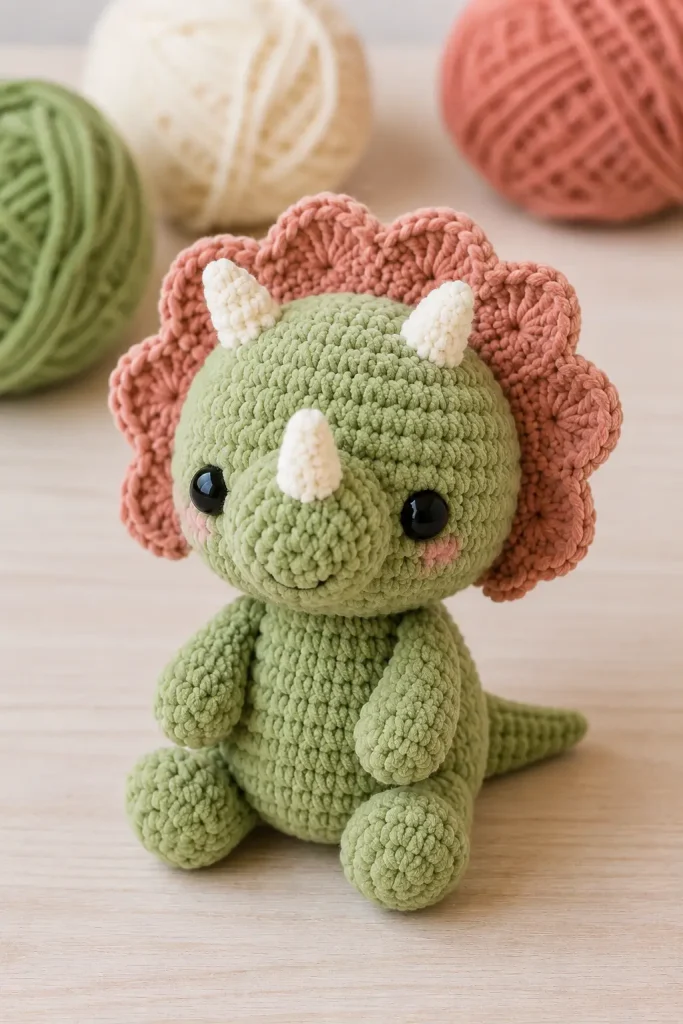
A handmade dinosaur always has a special kind of charm, but a tiny triceratops feels especially lovable. With its rounded head, soft little body, three tiny horns, and signature frill, this amigurumi dinosaur is the kind of crochet project that makes people smile before it is even finished.
This free triceratops amigurumi pattern is perfect for crocheters who enjoy cute stuffed animals, nursery-friendly handmade toys, and beginner-friendly dinosaur crochet projects with a little extra detail. The finished plush has a sweet personality, a soft rounded shape, and enough character to become a favorite gift for kids, dinosaur fans, or anyone who collects handmade amigurumi.
The design is inspired by a classic triceratops shape, with a large head, small body, short arms and legs, a little tail, cream-colored horns, and a scalloped head frill. The original tutorial notes that the finished dinosaur is approximately 6.5 inches tall when made with worsted-weight yarn and a 4 mm hook.
Description
This triceratops crochet pattern creates a small, soft dinosaur plush with a rounded amigurumi style. The body is compact and cuddly, while the head is slightly larger to give the toy a cute baby-dinosaur look. The face is shaped with a two-piece beak, two safety eyes, and three small cream horns that make the dinosaur instantly recognizable.
The frill is one of the most beautiful details in this pattern. It sits behind the horns and frames the top of the head with a scalloped edge. This gives the plush texture, shape, and personality without making the project feel too complicated.
The finished amigurumi triceratops works beautifully as a handmade gift, baby shower present, nursery decoration, dinosaur-themed shelf sitter, or soft crochet toy. You can make it in classic green and cream, or switch the colors to pastel yellow, dusty blue, soft pink, lavender, sage, or earthy brown for a fresh custom version.
Materials
- Worsted-weight yarn in green for the main dinosaur body
- Worsted-weight yarn in cream for the horns
- 4 mm crochet hook
- 12 mm black safety eyes
- Polyester fiberfill stuffing
- Tapestry needle
- Scissors
- Stitch marker
- Straight pins for assembly
For a baby-safe version, use embroidered eyes instead of plastic safety eyes.
Skill Level
This pattern is best for confident beginners to intermediate crocheters.
You should be comfortable with:
- Working in continuous rounds
- Single crochet
- Increases
- Decreases
- Slip stitches
- Half double crochet
- Double crochet
- Treble crochet
- Back loop only stitches
- Sewing amigurumi pieces together
- Light shaping and stuffing
The original pattern uses U.S. crochet terms and works the rounds continuously rather than joining after every round.
Abbreviations
- MR: magic ring
- ch: chain
- sc: single crochet
- inc: increase
- dec: decrease
- sl st: slip stitch
- hdc: half double crochet
- dc: double crochet
- trc: treble crochet
- BLO: back loops only
- st: stitch
- sts: stitches
- R: round
- rep: repeat
- FO: fasten off
Pattern Notes Before You Begin
Use a stitch marker at the beginning of every round so your stitch count stays accurate.
Stuff the head and body firmly, but do not overstuff smaller pieces such as the arms, horns, and tail.
The horns are made in cream yarn and are not stuffed, which helps them stay small and neat.
The head and body are made separately, then sewn together. This gives the dinosaur a clean amigurumi shape and helps the head sit properly.
Use pins before sewing every piece. The triceratops has several small details, and pinning helps keep everything symmetrical.
Step-by-Step Crochet Guide
Head
The head is worked in green yarn and shaped as a large rounded amigurumi piece. It begins with a small starting round, then increases evenly to create the full head shape.
Work the head in continuous rounds.
Start with 6 stitches in the round.
Increase evenly over several rounds until the head becomes wide and rounded.
Work several plain rounds to build height.
Continue increasing until the head reaches its widest point.
Work even rounds to create the main face area.
Begin decreasing gradually to close the back and bottom of the head.
Before closing completely, place the safety eyes between the upper front rounds of the head. The original tutorial places 12 mm eyes between rounds 16 and 17, spaced about 13 stitches apart.
Stuff the head as you decrease so the shape stays smooth and firm.
Do not sew the final opening closed yet. Leave it ready for joining to the body later.
Body
The body is also worked in green yarn. It is smaller than the head and shaped into a compact oval.
Start with 6 stitches in the round.
Increase evenly until the body reaches a rounded width.
Work several plain rounds to build the middle section.
Decrease gradually to shape the top of the body.
Stuff the body firmly.
Leave a long yarn tail for sewing.
The original pattern notes that the final round of the head and body line up evenly, making them easy to sew together with a whipstitch.
Top Beak
The top beak is made in green yarn as a small rounded piece that is flattened before sewing.
Begin with a small round.
Increase evenly for several rounds.
Work one plain round to give the piece a little height.
Fasten off with a long tail.
Do not stuff the beak.
Flatten the piece and sew the open edge closed to create a neat flat base.
This piece is later sewn to the front of the head to form the upper part of the triceratops snout.
Bottom Beak
The bottom beak is also made in green yarn, but it starts from a foundation chain to create an oval shape rather than a round one.
Chain a small foundation.
Work along one side of the chain.
Rotate your work and crochet along the other side of the chain.
Continue shaping the oval with increases.
Work one plain round.
Fasten off with a long tail.
Do not stuff.
Flatten and sew the open edge closed.
This bottom beak is placed directly below the top beak to complete the snout shape.
Sewing the Beak to the Head
Place the top beak on the front of the head first. It should sit across the middle-front face area, curving gently downward at the corners.
Pin it in place before sewing.
Sew only around the outer edge so it lies flat against the head.
Place the bottom beak directly under the top beak.
Pin it so the two pieces meet neatly and create a soft rounded snout.
Sew the bottom beak in place using small, secure stitches.
Knot the yarn tails together where possible, then weave them into the head.
This step gives the triceratops its gentle dinosaur face, so take your time with placement.
Frill
The frill is one of the main features of this amigurumi triceratops.
It is worked in rows instead of rounds.
Start with a long foundation chain.
Work single crochet across the chain.
Increase across the next row to widen the frill.
Create the scalloped edge using a combination of slip stitches, single crochet, half double crochet, double crochet, and treble crochet.
Fasten off with a long tail for sewing.
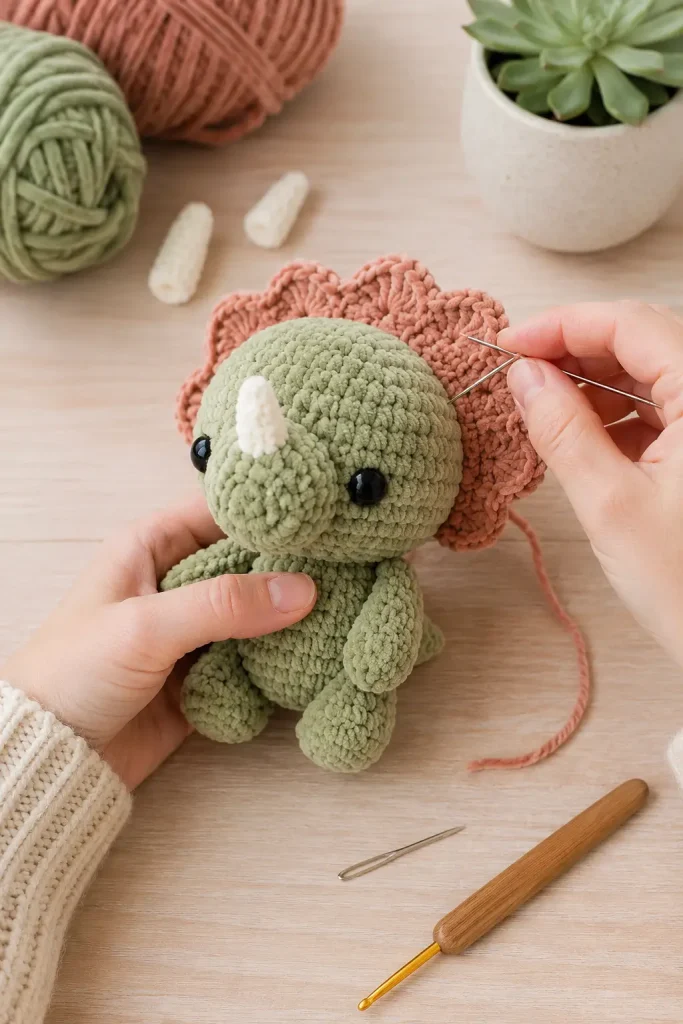
Place the frill centered across the top and back of the head.
Pin it carefully so both sides are even.
Sew the bottom edge of the frill to the head.
The scalloped edge should remain visible and slightly raised, creating the classic triceratops silhouette.
Top Horns
Make two horns using cream yarn.
Each horn begins with a small round and gradually increases to form a short cone shape.
Do not stuff the horns.
Fasten off with a long tail for sewing.
Position the two horns in front of the frill on top of the head.
Angle them slightly outward for a natural triceratops look.
Pin before sewing.
Sew securely around the base of each horn.
Weave the yarn tails into the head.
Front Horn
The front horn is also made in cream yarn and is slightly smaller.
Work a small cone shape with gradual increases.
Do not stuff.
Fasten off with a long tail.
Position the front horn on top of the beak.
The horn should point forward and slightly upward.
Sew securely around the base and weave in the end.
Legs
Make two legs using green yarn.
The legs begin with an oval foundation chain, which creates a foot shape.
Work around both sides of the chain.
Continue in rounds to build the foot and leg.
Work one round in the back loops only to help define the foot edge.
Shape the leg with decreases, then increase again to form the upper thigh.
Stuff each leg lightly.
Do not overstuff, because the legs need to sit neatly against the body.
Flatten the top opening and sew it closed.
Leave a long tail for sewing.
Sewing the Legs to the Body
Place the legs on each side of the lower body.
Before sewing, set the dinosaur on a flat surface to check if it can sit properly.
Pin both legs in place.
Sew the flat edge of each leg to the body.
Add a few extra stitches along the lower thigh area for stability.
Weave the yarn tails through the body and knot securely if needed.
The legs should help the triceratops sit upright.
Arms
Make two arms using green yarn.
Start with a small round.
Increase slightly.
Work one back-loop-only round to define the arm shape.
Continue with several plain rounds.
Decrease to narrow the arm.
Work a few final rounds to create the small front limb.
The arms are not usually stuffed, but you can add a tiny amount of stuffing if you prefer a fuller look.
Flatten the opening and sew it closed.
Leave a long tail for sewing.
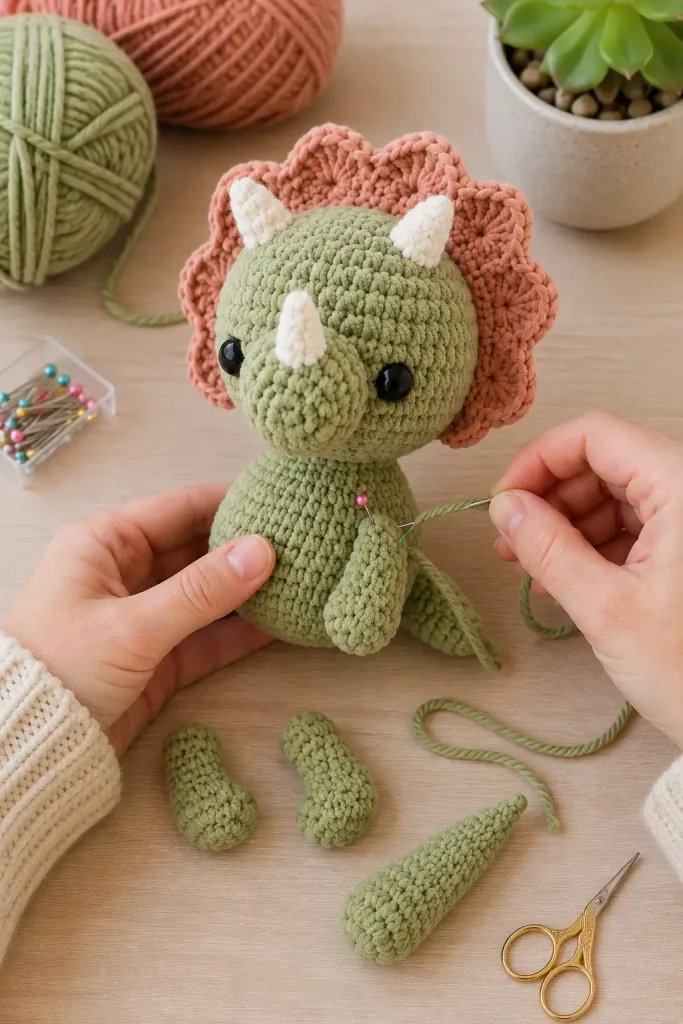
Sewing the Arms to the Body
Position the arms on the front of the body.
They should sit slightly angled and low enough that the tips touch the ground when the dinosaur is sitting.
Leave a small space between the two arms.
Pin the arms in place.
Sew securely using small whipstitches.
Weave in all yarn tails.
Tail
The tail is made in green yarn and shaped as a small tapered cone.
Start with a small round.
Increase gradually over several rounds.
The tail should widen as it grows.
Stuff lightly.
Fasten off with a long tail.
Position the tail at the back of the body, centered between the legs.
It should sit low enough to touch the ground and help balance the dinosaur.
Pin in place and sew securely.
Add a little extra stuffing before closing the final section if needed.
Weave in the yarn tail.
Face
The face is simple and sweet.
The safety eyes create most of the expression, while the beak and horn placement give the dinosaur its triceratops personality.
Optional details:
- Add a tiny embroidered smile with black yarn.
- Add small pink blush stitches beside the eyes.
- Embroider eyes instead of using safety eyes for a child-safe version.
- Use a small highlight stitch on each eye if you embroider them.
Keep the expression soft and simple so the dinosaur stays cute and gentle.
Final Assembly Checklist
Before calling your triceratops finished, check each section carefully.
The head should be firmly attached to the body.
The beak should sit centered on the face.
The frill should be even on both sides.
The two top horns should be balanced.
The front horn should sit securely on the beak.
The legs should allow the dinosaur to sit upright.
The arms should touch or nearly touch the surface.
The tail should be centered at the back.
All yarn tails should be woven in securely.
Shape the plush gently with your hands once everything is sewn together.
Tips for a Beautiful Finish
Use the same yarn weight throughout the dinosaur so the proportions stay balanced.
Keep your tension consistent, especially on the frill and horns.
Stuff the head slowly and evenly. A well-stuffed head gives the triceratops a clean rounded shape.
Do not overstuff the horns, arms, or legs. Smaller pieces usually look better when they stay soft and easy to sew.
Use pins for every assembly step. Even small placement changes can affect the final look.
When sewing the frill, attach only the lower edge so the scalloped top stays dimensional.
For a softer nursery look, use pastel green, cream, pale yellow, or powder blue.
For a realistic dinosaur-inspired look, try olive green, moss green, clay orange, or warm tan.
Color Variations
Classic Green Triceratops
Use green for the body and cream for the horns. This gives the dinosaur a traditional prehistoric look.
Pastel Nursery Triceratops
Use pastel yellow, mint, or lavender for the body with cream horns. This version is perfect for baby gifts and nursery decor.
Earthy Dinosaur
Use sage, olive, or warm brown yarn for a natural woodland-style dinosaur.
Plush Jumbo Triceratops
Use blanket yarn with a larger hook to create a bigger, extra-cuddly plush toy. Increase the eye size to match the larger body.
Baby-Safe Triceratops
Use cotton yarn, embroider the eyes, and sew every detail securely. Avoid plastic pieces for young children.
Common Mistakes to Avoid
Do not skip stitch markers. Continuous rounds can shift easily, especially when working small amigurumi pieces.
Do not sew pieces without pinning first. Pinning helps you check symmetry.
Do not overstuff the legs. Firm legs can become difficult to sew flat against the body.
Do not place the tail too high. A low tail helps the dinosaur sit correctly.
Do not rush the frill. The scalloped edge is a key part of the triceratops design.
FAQ
Is this triceratops amigurumi pattern beginner-friendly?
Yes, it is suitable for confident beginners. The basic pieces use simple amigurumi shaping, but the beak, frill, horns, and assembly require patience.
What yarn is best for this crochet dinosaur?
Worsted-weight yarn works well for a small classic amigurumi. Plush yarn can be used for a larger cuddly version, but it may make small details like horns and frill stitches less defined.
Can I make this dinosaur bigger?
Yes. Use thicker yarn and a larger hook. Keep the same pattern structure, but choose larger safety eyes or embroider bigger eyes to match the scale.
Can I make it without safety eyes?
Yes. Embroidered eyes are a great option, especially if the finished toy is for a baby or toddler.
Why is the frill worked in rows?
Working the frill in rows makes it easier to create a wide scalloped shape that can be sewn neatly to the back of the head.
Conclusion
This free triceratops amigurumi pattern is a charming dinosaur crochet project with so many lovable details. From the rounded head and tiny horns to the scalloped frill, short arms, chunky legs, and little tail, every piece adds personality to the finished plush.
It is a wonderful beginner crochet project for anyone ready to practice shaping, sewing, and adding character to amigurumi animals. Make it in classic green, soft pastels, or cozy earthy colors, and you will have a handmade dinosaur that feels sweet, playful, and full of life.
Save this crochet dinosaur tutorial for your next cozy project, gather your yarn and hook, and enjoy creating a tiny triceratops that is sure to brighten any handmade collection.




Need videos easy to follow. All the patterns looks beautiful 😍.
Do you have a more detailed pattern? Like by rows.