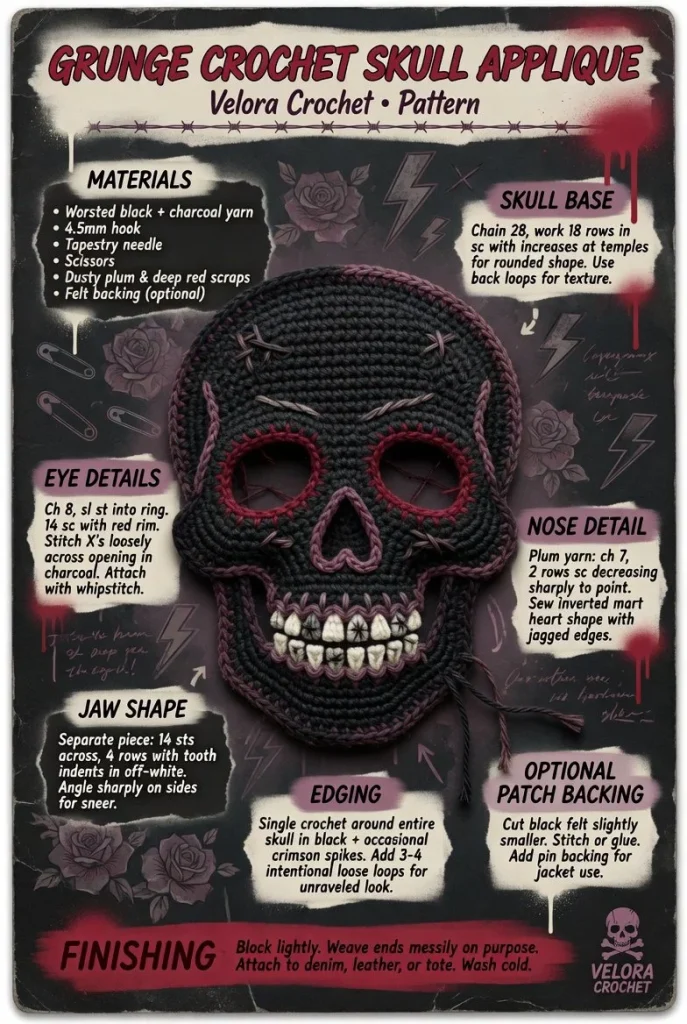
Creating a grunge-inspired crochet skull applique is a fantastic way to add an edgy, handmade touch to your favorite bags, jackets, hats, or even wall decor. This charming little skull boasts distinct eye holes, a simple jaw, and a dark aesthetic that perfectly suits alternative styles. It’s a fun and quick DIY crochet project that allows you to showcase your creativity while experimenting with textures and personalities in your work.
Materials
- Worsted weight yarn in black and white (or your chosen colors for a customized look)
- 4.0 mm crochet hook (G/6)
- Scissors
- Yarn needle
- Stitch markers (optional)
Abbreviations
- MR: magic ring
- ch: chain
- sc: single crochet
- hdc: half double crochet
- dc: double crochet
- inc: increase
- dec: decrease
- sl st: slip stitch
Skull Base
To start the skull base, make a magic ring:
- Round 1: Ch 1, work 6 sc into the ring. Pull the ring tight. (6)
- Round 2: Inc in each stitch around. (12)
- Round 3: Sc in next stitch, inc in next stitch repeat around. (18)
- Round 4: Sc in next 2 stitches, inc in next stitch repeat around. (24)
- Round 5-7: Sc in each stitch around. (24)
Eye Details
Now let’s add some personality with the eye details:
- Using white yarn, attach it into the desired position on the skull.
- Eye Hole (make 2): Ch 2, 5 sc in second ch from hook. Join with sl st to first sc. (5)
- Using your black yarn, sew or attach over the white to create depth.
Nose Detail
For the nose detail:
- Using black yarn, create an inverted triangle shape.
- Nose: Ch 2, 3 sc in the second ch from the hook. Fasten off.
Position your nose above the mouth area, and secure it with a few stitches.
Jaw Shape
To emphasize the jaw shape:
- With your black yarn, attach to the base of the skull.
- Jaw: Ch 6, sc in second ch from hook and in the next 4 chains, turn.
- Sc back across the row for added definition.
Edging
To give your skull a finished look, add an edging:
- Begin on the bottom edge of the skull.
- Sl st around the entire piece ensuring to keep the stitches even, which adds a polished touch.
Optional Patch Backing
If you’d like to create a patch backing for your skull to attach it more securely to fabric:
- Cut a piece of felt in the same shape as your skull.
- Sew it to the back with a few secure stitches.
Finishing
After all your details are in place, weave in any loose ends using your yarn needle. The final piece should feel both edgy and stylish—perfect for those alternative aesthetics.
Tips for the Best Result
- Keeping your tension consistent will ensure a clean-looking crochet skull; don’t pull too tight, or it may lose its shape.
- You can experiment with different hook sizes and yarn weights to achieve various textures and effects.
- Before finishing, consider adding some additional embellishments like studs or beads for extra flair!
This grunge crochet skull applique serves as a fantastic way to personalize your items or even makes for a thoughtful handmade gift. Feel free to explore different color combinations to make each skull unique, reflecting your personal style. You can even make several and create a fun mini collection to mix and match! If you’re interested in exploring more crochet projects, check out this sakura flower crochet applique pattern for a contrasting design your friends will love. Enjoy your crochet journey!



