Ice Pop Cat Amigurumi Crochet Pattern
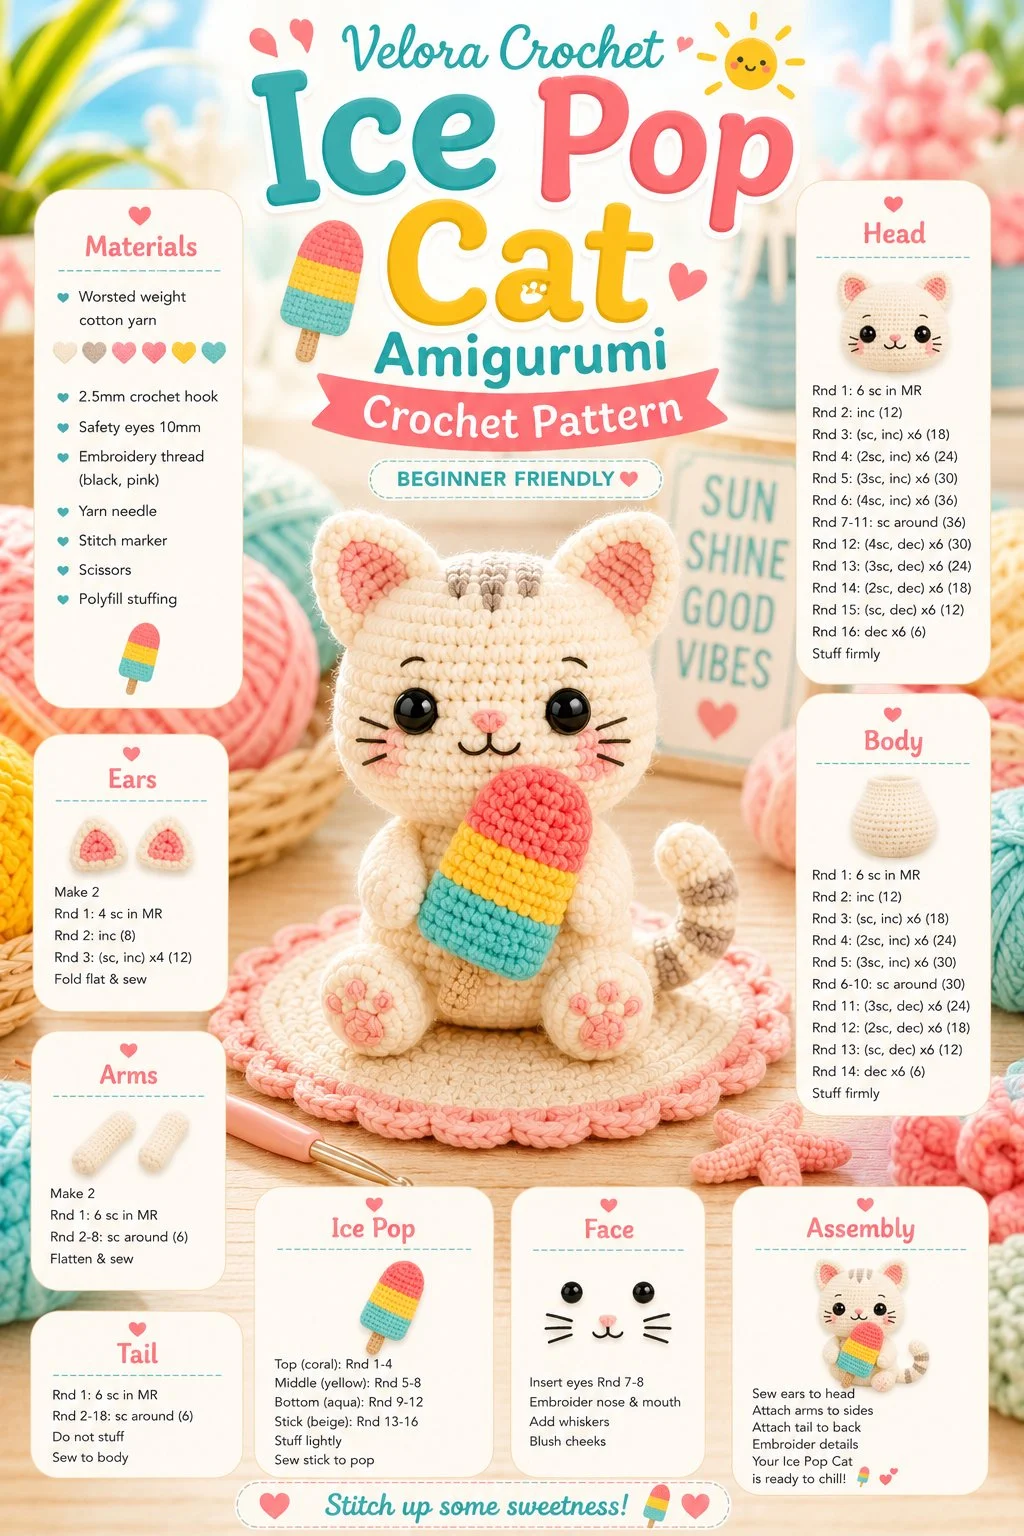
Creating a charming plush cat that holds a tiny ice pop is a delightful project perfect for summer! This little crochet creation brings joy and is a great addition to any handmade collection. Follow along as we outline the materials needed and the step-by-step instructions to craft this adorable tiny companion.
Materials
- Yarn in various colors (main body, ice pop, and details)
- Crochet hook (3.5 mm or appropriate size for your yarn)
- Stuffing
- Yarn needle
- Scissors
- Stitch markers (optional)
Abbreviations
- MR: magic ring
- ch: chain
- sc: single crochet
- inc: increase
- dec: decrease
- sl st: slip stitch
Instructions
Head
- Begin with a magic ring and work 6 sc into the ring. Pull the ring tight.
- Round 1: Inc in each stitch (12 sts).
- Round 2: 1 sc, inc repeat around (18 sts).
- Round 3: 2 sc, inc repeat around (24 sts).
- Rounds 4-6: Sc in each stitch around (24 sts).
Ears
- Make 2 triangle ears using the following:
- Start with a magic ring and work 4 sc into the ring.
- Round 1: Inc in each stitch (8 sts).
- Round 2: 1 sc, inc repeat twice, then sc in last 4 (12 sts).
- Round 3: 2 sc, inc repeat 3 times (15 sts).
- Finish off and leave a long tail for sewing.
Body
- Continue from the head: Sc in the next 24 sts from the head.
- Rounds 1-4: Sc in each stitch around (24 sts).
- Fill the body with stuffing as you go along.
Arms
- Create 2 small arms:
- Start with a magic ring and work 5 sc into the ring.
- Rounds 1-2: Sc in each stitch around (5 sts).
- Lightly stuff before closing.
Tail
- For the curled tail, start with a foundation chain of 15.
- Sc back along the chain, working in each stitch.
- Finish with a slip stitch and sew into a curled shape.
Ice Pop
- Begin with a magic ring and work 4 sc into it.
- Rounds 1-3: Inc in each stitch to shape it round (12 sts).
- Change colors for your desired ice pop design and finish with a small “stick” of yarn at the base.
Face Details
- Use contrasting yarn to add whiskers and a small nose.
- Secure safety eyes, or embroider eyes for a friendly face.
Assembly and Finishing
- Attach the ears to the top of the head, ensuring they are symmetric.
- Position and sew the arms on either side of the body.
- Attach the tail at the back and sew securely.
- Finally, hold the ice pop to the paws and sew it in place.
If you’re looking for a similar project, check out this cute crochet cat pattern that offers more adorable options.
Tips for the Best Result
- Ensure you are not overstuffing the head; it can make the shape too round instead of keeping the cat’s cute form.
- Use stitch markers to keep track of your rounds, especially when working on the head and body shapes.
- Play with color combinations for the ice pop to make it vibrant and lively!
This little cat plush will not only be a fun addition to your collection but also a heartwarming handmade gift for friends or family. Explore different color combinations and transformations to make each one unique!