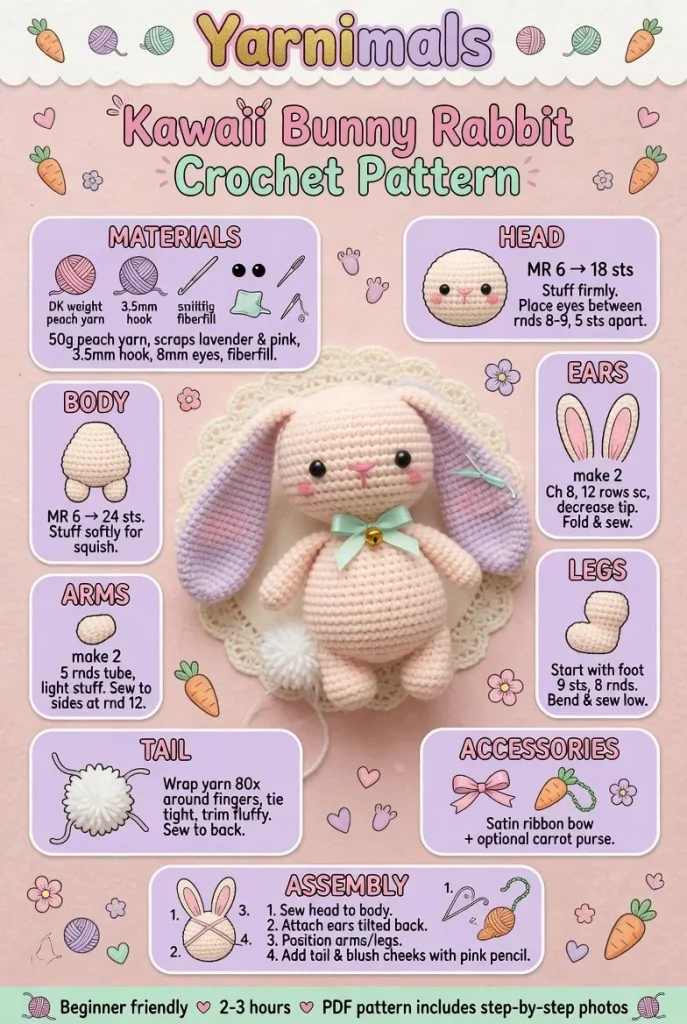
Creating a charming handmade plush can bring so much joy, and this crochet pattern for a delightful Yarnimals character is no exception! With its adorable kawaii features and soft texture, this plushie is suitable for beginners and makes for an excellent gift or a fun addition to your collection.
Materials
- Worsted weight yarn in:
- Main color: Light pink
- Accent color: White
- Details: Black for the eyes, and a soft yellow for the clothing
- Crochet hook: Size H (5.0 mm)
- Stitch marker
- Fiberfill stuffing
- Yarn needle for weaving ends and sewing parts together
Abbreviations
- MR: magic ring
- ch: chain
- sc: single crochet
- hdc: half double crochet
- dc: double crochet
- inc: increase
- dec: decrease
- sl st: slip stitch
Body
- Starting with the main color (light pink), create a magic ring.
- Round 1: 6 sc in the ring (6)
- Round 2: inc in each stitch around (12)
- Round 3: sc in next stitch, inc repeat around (18)
- Round 4: sc in next 2 stitches, inc repeat around (24)
- Rounds 5-10: sc in each stitch around (24)
- Round 11: sc in next 2 stitches, dec repeat around (18)
- Round 12: sc in next stitch, dec repeat around (12)
- Begin stuffing the body with fiberfill.
- Round 13: dec around (6). Fasten off and weave in the ends.
Head
- Using light pink yarn, create a magic ring.
- Round 1: 6 sc in the ring (6)
- Round 2: inc in each stitch around (12)
- Round 3: sc in next stitch, inc repeat around (18)
- Rounds 4-7: sc in each stitch around (18)
- Begin to stuff the head.
- Round 8: sc in next stitch, dec repeat around (12)
- Round 9: dec around (6). Fasten off and leave a long tail for sewing.
Ears (make 2)
- Using light pink, ch 7.
- Row 1: sc in 2nd ch from hook, sc in next 4 stitches, 3 sc in last stitch (turning for the other side of the chain), sc in next 4 stitches (10)
- Fasten off, leaving a long tail for sewing.
Arms (make 2)
- Using light pink, ch 6.
- Row 1: sc in 2nd ch from hook, sc in next 4 stitches (5)
- Rows 2-3: sc in each stitch across (5).
- Fasten off, leaving a long tail for attaching to body.
Legs (make 2)
- Using light pink, ch 6.
- Row 1: sc in 2nd ch from hook, sc in next 4 stitches (5)
- Rows 2-5: sc in each stitch across (5).
- Fasten off, leaving a long tail for attachment.
Tail
- Using light pink, ch 12.
- Row 1: sc in 2nd ch from hook, sc in next 10, 3 sc in last stitch (turning).
- sc in next 10 back to the start (22)
- Fasten off and leave a long tail for sewing.
Clothing
- For the yellow outfit, ch 22.
- Row 1: dc in 3rd ch from hook, dc in next 20 (20).
- Rows 2-3: ch 2, turn, dc in each stitch across (20).
- Fasten off, leaving a long tail for attaching.
Assembly and Finishing
- Sew the head to the body securely using the tail left from the head.
- Attach the ears symmetrically on top of the head.
- Sew on the arms and legs to the body, ensuring a cute pose.
- Attach the tail to the back side of the body.
- Embroider or sew on the facial features using black yarn to add eyes, a sweet smile, and any other details.
Tips for the Best Result
- Keep your stitches tight to prevent gaps in the plush body.
- When stuffing the head, make sure not to overstuff, as this can affect the shape.
- Use a stitch marker to keep track of your rounds, especially as you work through the body and head.
In conclusion, this adorable character is perfect for a handmade gift or just to brighten up your crochet collection. Experiment with different yarn colors for a unique twist, or make several variations to share with friends! Enjoy the process of bringing your Yarnimal to life!



