Introduction
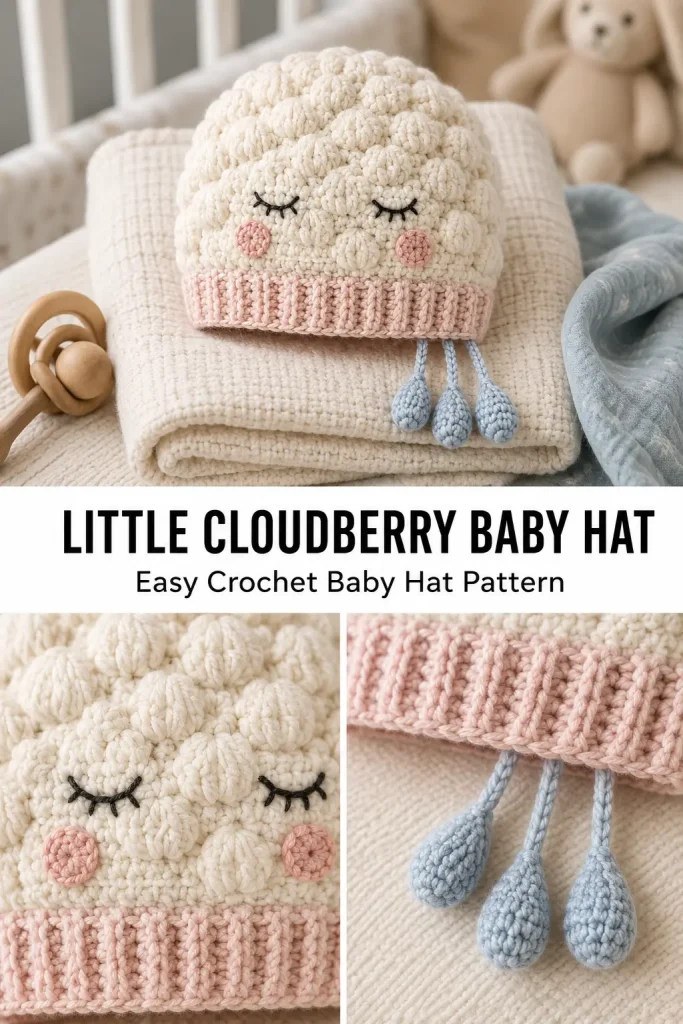
There is something so dreamy about a baby hat that looks like it came from a soft storybook sky. The Little Cloudberry Baby Hat is a cozy, original crochet baby hat pattern with a rounded cloud-like crown, a sweet berry-inspired color palette, and tiny dangling raindrop accents that make it feel gentle, playful, and memorable.
This design was created for moms who love handmade pieces that feel soft, unique, and photo-ready without being too complicated. It has a sweet nursery look, but it is still practical enough for baby gifts, spring outfits, cozy walks, newborn photos, or a handmade keepsake basket.
The pattern uses simple crochet shaping, soft puff-like texture, a folded ribbed brim, and small decorative accents. It is a beginner-friendly crochet project for anyone comfortable working in rounds and sewing on small details.
Description
The Little Cloudberry Baby Hat is a soft crochet baby beanie with a rounded crown, gentle puff-stitch cloud texture, and a cozy ribbed brim. The main hat is worked in a pale cloud cream or soft sky blue shade, while the brim can be made in blush pink, berry cream, or warm ivory for a sweet “cloudberry” look.
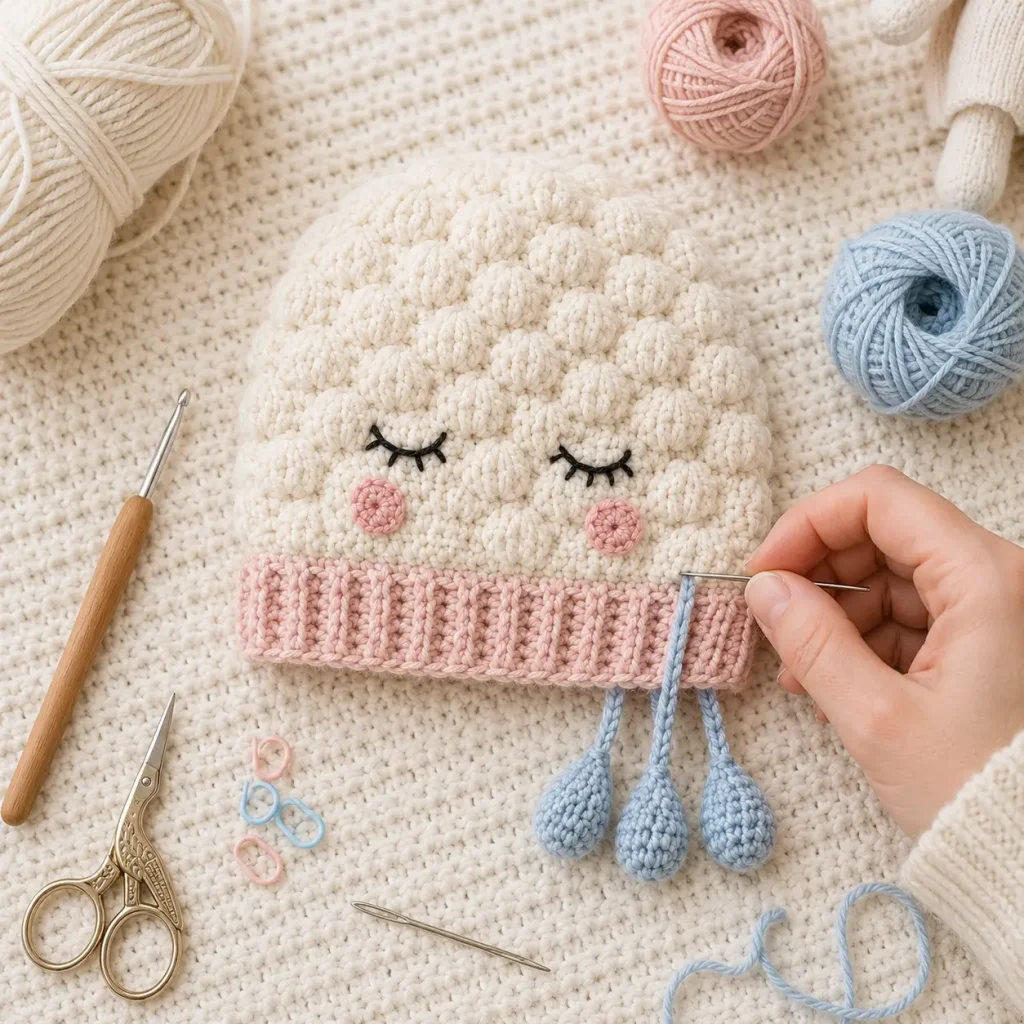
The special detail is a set of tiny dangling crochet raindrops attached to one side of the brim. These are kept small, soft, and lightweight so the hat still feels baby-friendly. A tiny embroidered sleepy face can be added to the front for an extra adorable finish, but the hat also looks beautiful without the face.
This crochet baby hat pattern makes a lovely handmade baby shower gift, newborn photo prop, nursery accessory, or boutique-style market item. It feels fresh and original while staying simple enough to actually make.
Materials
- Worsted weight yarn in soft cloud cream, pale sky blue, or warm ivory for the main hat
- Worsted weight yarn in blush pink or berry cream for the brim
- Small amount of pale blue yarn for the raindrops
- Small amount of black or dark gray embroidery yarn for the optional sleepy eyes
- Small amount of soft pink yarn for optional cheeks
- 5 mm crochet hook
- 4 mm crochet hook for raindrops
- Yarn needle
- Stitch marker
- Scissors
- Measuring tape
Finished Size
This pattern is written for approximately 0–6 months.
Finished measurements:
- Circumference: about 15 inches
- Height from crown to brim edge: about 6 inches
Baby sizes can vary, so measure if possible. To make the hat taller, add one extra body round before the brim.
Gauge
Using worsted weight yarn and a 5 mm crochet hook:
- 8 hdc stitches x 6 rows = about 2 inches
Gauge is important for baby hats. If your hat is too small, use a larger hook. If it is too large, use a smaller hook.
Abbreviations
- MR: magic ring
- ch: chain
- sc: single crochet
- hdc: half double crochet
- dc: double crochet
- puff: puff stitch
- inc: increase, 2 stitches in the same stitch
- sl st: slip stitch
- st: stitch
- sts: stitches
- BLO: back loop only
- FO: fasten off
Stitch Explanation
Puff Stitch
Yarn over, insert hook into the stitch, yarn over and pull up a loop. Repeat this two more times in the same stitch. You should have 7 loops on your hook. Yarn over and pull through all loops. Ch 1 to secure.
Keep puff stitches soft and even. Do not pull too tightly, or the cloud texture will flatten.
Pattern Notes
This hat is worked from the crown down.
The ch 1 at the beginning of each round does not count as a stitch.
Join each round with a sl st to the first stitch.
The puff stitches are used lightly so the hat stays soft and wearable.
The brim is worked in back-loop-only single crochet to create a cozy ribbed texture.
The raindrops are made separately and sewn securely to one side of the brim.
For baby items, avoid beads, buttons, or any hard decorations. Keep all accents soft and sewn on firmly.
Step-by-Step Instructions
Body
Use main hat color and 5 mm hook.
Round 1
Make a MR.
Ch 1, work 8 hdc into the ring.
Pull ring closed and join with sl st to first hdc. (8)
Round 2
Ch 1.
Work 2 hdc in each st around.
Join with sl st. (16)
Round 3
Ch 1.
Repeat around: hdc in next st, 2 hdc in next st.
Join with sl st. (24)
Round 4
Ch 1.
Repeat around: hdc in next 2 sts, 2 hdc in next st.
Join with sl st. (32)
Round 5
Ch 1.
Repeat around: hdc in next 3 sts, 2 hdc in next st.
Join with sl st. (40)
Round 6
Ch 1.
Repeat around: hdc in next 4 sts, 2 hdc in next st.
Join with sl st. (48)
The crown is now complete.
Round 7
Ch 1.
Hdc in each st around.
Join with sl st. (48)
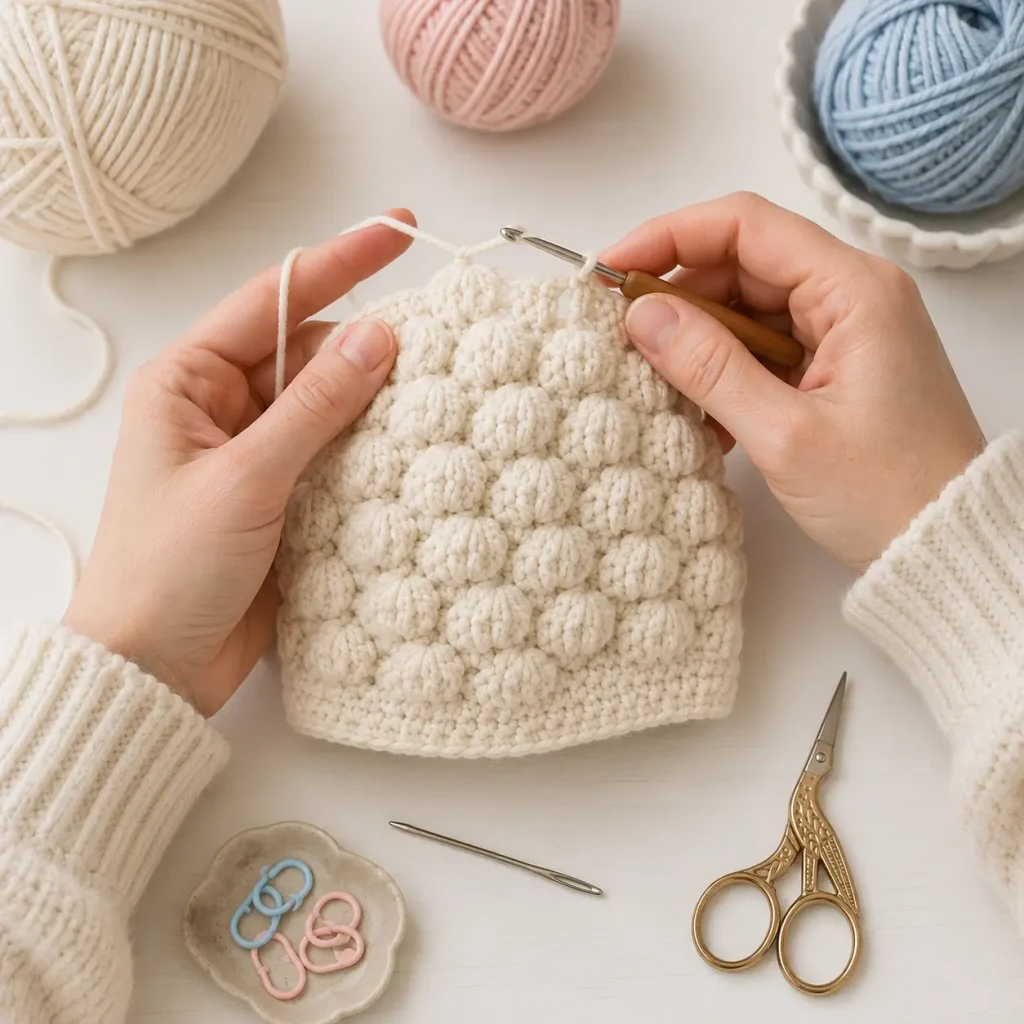
Round 8: Cloud Texture Round
Ch 1.
Repeat around: sc in next 3 sts, puff in next st.
Join with sl st. (48)
You will have 12 puff stitches around the hat.
Round 9
Ch 1.
Hdc in each st and each puff stitch around.
Join with sl st. (48)
Round 10: Soft Cloud Texture Round
Ch 1.
Sc in next st, puff in next st.
Repeat around: sc in next 3 sts, puff in next st.
End with sc in remaining sts as needed to complete the round.
Join with sl st. (48)
This staggers the puff stitches slightly so the cloud texture looks natural.
Round 11
Ch 1.
Hdc in each st and each puff stitch around.
Join with sl st. (48)
Round 12
Ch 1.
Hdc in each st around.
Join with sl st. (48)
Check the height before starting the brim. The hat should measure about 5 inches from the crown to the lower edge.
Brim
Switch to blush pink, berry cream, or your chosen brim color.
Round 13
Ch 1.
Sc in each st around.
Join with sl st. (48)
Round 14
Ch 1.
Sc in BLO of each st around.
Join with sl st. (48)
Round 15
Ch 1.
Sc in BLO of each st around.
Join with sl st. (48)
Round 16
Ch 1.
Sc in BLO of each st around.
Join with sl st. (48)
FO and weave in the end.
The brim should look soft, lightly ribbed, and comfortable.
Arms
This baby hat pattern does not include arms.
Legs
This baby hat pattern does not include legs.
Ears
This baby hat pattern does not include ears.
Tail
This baby hat pattern does not include a tail.
Raindrop Accents
Make 3 using pale blue yarn and a 4 mm hook.
Raindrop 1
Ch 5.
Starting in 2nd ch from hook: sl st, sc, hdc, 4 dc in last ch.
Continue on the opposite side of the chain: hdc, sc, sl st.
FO, leaving a long tail for sewing.
Raindrop 2
Ch 4.
Starting in 2nd ch from hook: sl st, sc, 4 dc in last ch.
Continue on the opposite side of the chain: sc, sl st.
FO, leaving a long tail for sewing.
Raindrop 3
Ch 5.
Starting in 2nd ch from hook: sl st, sc, hdc, 4 dc in last ch.
Continue on the opposite side of the chain: hdc, sc, sl st.
FO, leaving a long tail for sewing.
Dangling Strands
Use pale blue yarn.
Cut 3 short strands:
- Strand 1: about 4 inches
- Strand 2: about 5 inches
- Strand 3: about 4.5 inches
Attach one raindrop to the end of each strand.
Tie or sew the upper end of each strand to one side of the brim, spacing them close together but not overlapping.
For baby safety, sew each strand securely and keep them short. If the hat is for everyday baby wear, you may choose to sew the raindrops directly to the brim instead of letting them dangle.
Face
The face is optional.
Use black or dark gray embroidery yarn.
Place the face centered on the front of the hat, just above the brim.
Embroider two small sleepy eyes using short curved stitches.
Use soft pink yarn to add tiny blush stitches under the eyes.
Keep the face very small and gentle so the hat stays soft and elegant.
Assembly
Lay the hat flat with the front facing up.
Choose one side of the brim for the raindrop accents.
Sew the three dangling strands securely to the inside edge of the brim.
Attach the raindrops to the strand ends if you have not already done so.
Weave in all yarn ends carefully.
If you added the sleepy face, check that the embroidery is neat and secure.
Gently shape the puff stitches with your fingers so the texture looks soft and cloud-like.
Tips & Variations
Use soft baby yarn or a washable acrylic blend for comfort and easy care.
For a dreamy sky version, use pale blue for the hat body, ivory for the brim, and white raindrops.
For a berry-sweet version, use cloud cream for the hat, blush pink for the brim, and pale blue raindrops.
For a gender-neutral version, use warm ivory, soft beige, and muted sage accents.
If you want more texture, add another puff stitch round before the brim.
If you want a simpler hat, skip the puff stitch rounds and work all body rounds in hdc.
For a safer everyday baby version, sew the raindrops flat to the side of the brim instead of making them dangle.
To make the hat taller, add one extra hdc round before starting the brim.
To make the hat slightly bigger, add another increase round after Round 6, then work even rounds to the desired height.
FAQ
Is this Little Cloudberry Baby Hat beginner-friendly?
Yes. The main hat uses basic hdc rounds, and the puff stitches are simple once you practice them. The small raindrops require a little shaping, but they are quick to make.
What yarn works best for this crochet baby hat?
Soft worsted weight baby yarn, acrylic yarn, or cotton-blend yarn works well. Choose something washable and gentle for baby accessories.
Can I make this hat without the dangling raindrops?
Yes. You can skip the raindrops for a simpler cloud hat, or sew the raindrops flat to the brim for a safer everyday option.
Can I resize this pattern?
Yes. To make it smaller, stop increasing earlier and work to the desired height. To make it larger, add another increase round and adjust the body length.
Is this hat safe for babies?
For photo props and supervised wear, the dangling raindrops are a sweet detail. For everyday baby use, keep the strands very short or sew the raindrops directly to the hat. Always attach decorations securely.
Conclusion
The Little Cloudberry Baby Hat is a soft, dreamy crochet baby hat pattern made for cozy gifts, nursery photos, and sweet handmade moments. With its cloud-like texture, gentle ribbed brim, tiny raindrop accents, and optional sleepy face, it feels original, lovable, and perfect for moms who adore thoughtful baby accessories.
Make it in sky blue, cream, blush, or warm neutral colors, and enjoy creating a soft little hat that feels like a tiny piece of handmade weather magic.



