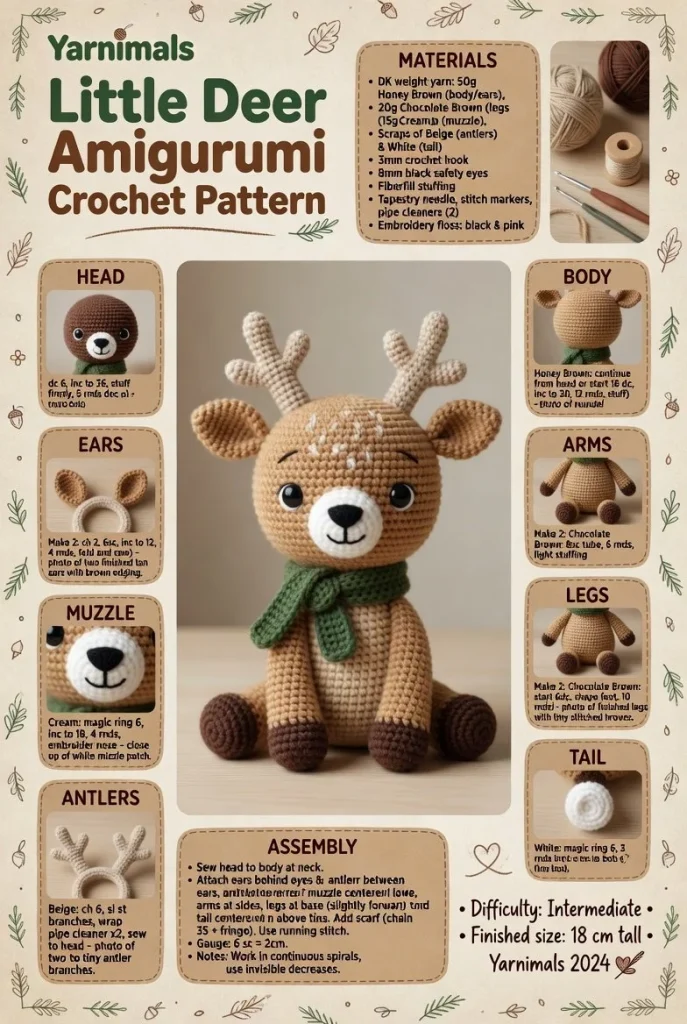
A delightful addition to your handmade crochet collection, this Yarnimals crochet pattern will guide you in creating an adorable and charming plush character that’s perfect for both play and décor. This soft, beginner-friendly crochet project is crafted with love, making it an exceptional gift for friends, family, or even yourself.
Materials
- Worsted weight yarn in the following colors:
- Main color (for the body)
- Accent color (for ears, tail, or details)
- Contrasting color (for facial features, if needed)
- Crochet hook (size H/8 or 5 mm)
- Fiberfill stuffing
- Safety eyes or yarn for facial details
- Tapestry needle for sewing
- Scissors
- Stitch markers (optional)
Abbreviations
- MR: magic ring
- ch: chain
- sc: single crochet
- inc: increase
- dec: decrease
- sl st: slip stitch
Instructions
Head
- Start by creating a magic ring (MR) with your main color.
- Round 1: 6 sc in MR (6).
- Round 2: Inc in each stitch around (12).
- Round 3: Sc in next stitch, inc around (18).
- Rounds 4-6: Sc in each stitch (18).
- Round 7: Sc in next 2 stitches, dec around (12).
- Insert safety eyes between rounds 5 and 6, spaced evenly.
- Round 8: Dec around (6).
- Fasten off, leaving a long tail for sewing. Do not stuff this part yet.
Body
- Start with another magic ring in the main color.
- Round 1: 6 sc in MR (6).
- Round 2: Inc in each stitch around (12).
- Round 3: Sc in next stitch, inc around (18).
- Rounds 4-8: Sc in each stitch (18).
- Round 9: Sc in next 2 stitches, dec around (12).
- Round 10: Dec around (6).
- Stuff the body securely but not overstuffed, then fasten off.
Ears
- Using the accent color, make a magic ring (MR).
- Round 1: 5 sc in MR (5).
- Round 2: Inc in each stitch around (10).
- Round 3: (Sc, inc) repeat (15).
- Fasten off, leaving a long tail for sewing. Make two ears.
Tail
- Using the accent color, chain 10.
- Row 1: Sc in 2nd ch from hook and across (9).
- Continue with sc evenly for about 5 more rows.
- Fasten off, leaving a long tail for attachment.
Assembly and Finishing
- Sew the head to the body, making sure it fits snugly.
- Attach the ears to the top of the head, spacing them properly for a cute look.
- Sew the tail to the back of the body.
- Embellish with any additional features such as a scarf or collar using your contrasting color if desired.
- Weave in all loose ends securely.
Tips for the Best Result
- When sewing the pieces together, ensure symmetry for a polished look.
- Use safety eyes or craft your own facial features with yarn for a personalized touch.
- Consider slightly stuffing the head, but don’t overdo it to maintain the character’s shape.
- Mark your rounds or rows with stitch markers to keep your place as you work through the pattern.
- Have fun experimenting with various colors to create unique characters!
In conclusion, creating this adorable crochet plush is not only satisfying but also opens the door to many variations. Feel free to use different color combinations or accessories to make your plush character truly one-of-a-kind, perfect as a handmade gift or a delightful addition to your collection. If you’re looking for more fun projects, check out this easy crochet pattern for some added inspiration!



