Little Mushroom Bunny Amigurumi Crochet Pattern
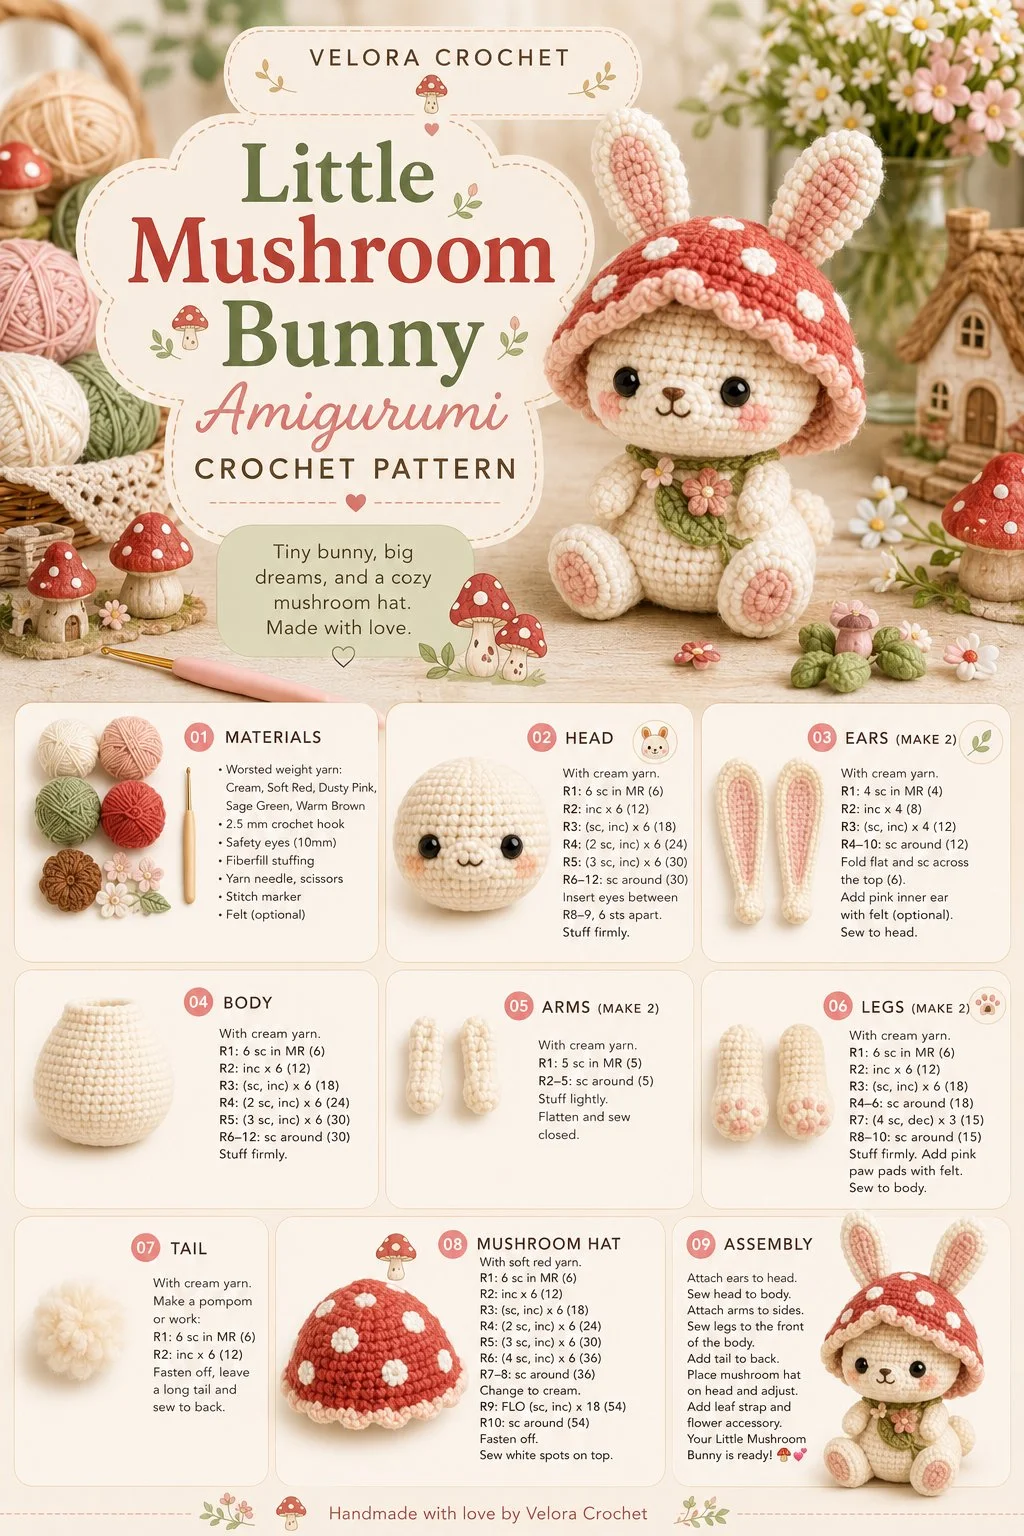
Create a whimsical and cozy addition to your crochet collection with this enchanting bunny plush adorned with a delightful mushroom hat. This easy crochet project captures the essence of cottagecore style, making it a perfect handmade gift or charming decor piece. Let’s dive into the materials needed and the step-by-step instructions to bring this adorable bunny to life.
Materials
- Medium-weight yarn in your favorite colors (white for the bunny, red or pastel for the mushroom)
- Crochet hook (size G/4.0mm)
- Safety eyes (10mm)
- Stuffing (fiberfill)
- Tapestry needle
- Scissors
- Stitch markers (optional)
Abbreviations
- MR: magic ring
- ch: chain
- sc: single crochet
- inc: increase
- dec: decrease
- sl st: slip stitch
Instructions
Head
- Start with a magic ring.
- Round 1: 6 sc in MR (6).
- Round 2: inc in each stitch around (12).
- Round 3: sc in next stitch, inc in next; repeat around (18).
- Round 4-8: sc in each stitch around (18).
- Round 9: sc in next stitch, dec; repeat around (12).
- Start stuffing the head gently, ensuring not to overstuff.
- Round 10: dec around (6).
- Fasten off and leave a long tail for sewing.
Ears
Make 2:
- Start with a magic ring.
- Round 1: 6 sc in MR (6).
- Round 2: inc in each stitch (12).
- Round 3: sc in next stitch, inc; repeat around (18).
- Round 4: sc in each stitch (18).
- Round 5-6: sc in next 3 stitches, dec; repeat around (12).
- Fasten off and leave a tail for sewing. Add a little stuffing if desired.
Body
- Start with a magic ring.
- Round 1: 6 sc in MR (6).
- Round 2: inc in each stitch around (12).
- Round 3: sc in next stitch, inc; repeat around (18).
- Round 4-10: sc in each stitch (18).
- Round 11: sc in next stitch, dec; repeat around (12).
- Round 12: dec around (6).
- Stuff the body well as you go. Fasten off and leave a tail.
Arms
Make 2:
- Start with a magic ring.
- Round 1: 6 sc in MR (6).
- Round 2-6: sc in each stitch around (6).
- Fasten off and leave a tail for sewing. Lightly stuff the arms if you choose.
Legs
Make 2:
- Start with a magic ring.
- Round 1: 6 sc in MR (6).
- Round 2-6: sc in each stitch around (6).
- Fasten off and leave a tail for sewing. Lightly stuff the legs if desired.
Tail
- Start with a magic ring.
- Round 1: 6 sc in MR (6).
- Round 2: inc around (12).
- Round 3-4: sc in each stitch (12).
- Fasten off and leave a tail for sewing.
Mushroom Hat
- Start with a magic ring.
- Round 1: 6 sc in MR (6).
- Round 2-3: sc in each stitch (6).
- Change color to create a cap (red or pastel).
- Round 4: inc around (12).
- Round 5: sc in next stitch, inc; repeat around (18).
- Fasten off and leave a tail for sewing.
Face Details
- Attach safety eyes to the head before finishing.
- Use scrap yarn to create a cute little nose and mouth.
Assembly
- Sew the head onto the body securely.
- Attach the ears to the top of the head, ensuring they are symmetrical.
- Position the arms on opposite sides of the body and sew in place.
- Attach the legs underneath the body and secure.
- Sew the tail onto the back of the body.
- Finally, place the mushroom hat on the head and secure it gently.
Tips for the Best Result
- Use a stitch marker to keep track of your rounds, especially for the body and head.
- Gently shape the bunny as you go for an even look, especially for the ears and limbs.
- When sewing pieces together, a whip stitch can secure them well without being too noticeable.
Conclusion
This adorable bunny plush with its charming mushroom hat invites warmth and whimsy into your crochet projects. It’s perfect for gifting to loved ones or enjoying as a lovely home decoration. Feel free to experiment with different colors for the mushroom cap, creating a unique twist on this delightful pattern. Happy crocheting!