Lucky Ladybug Flower Amigurumi Crochet Pattern
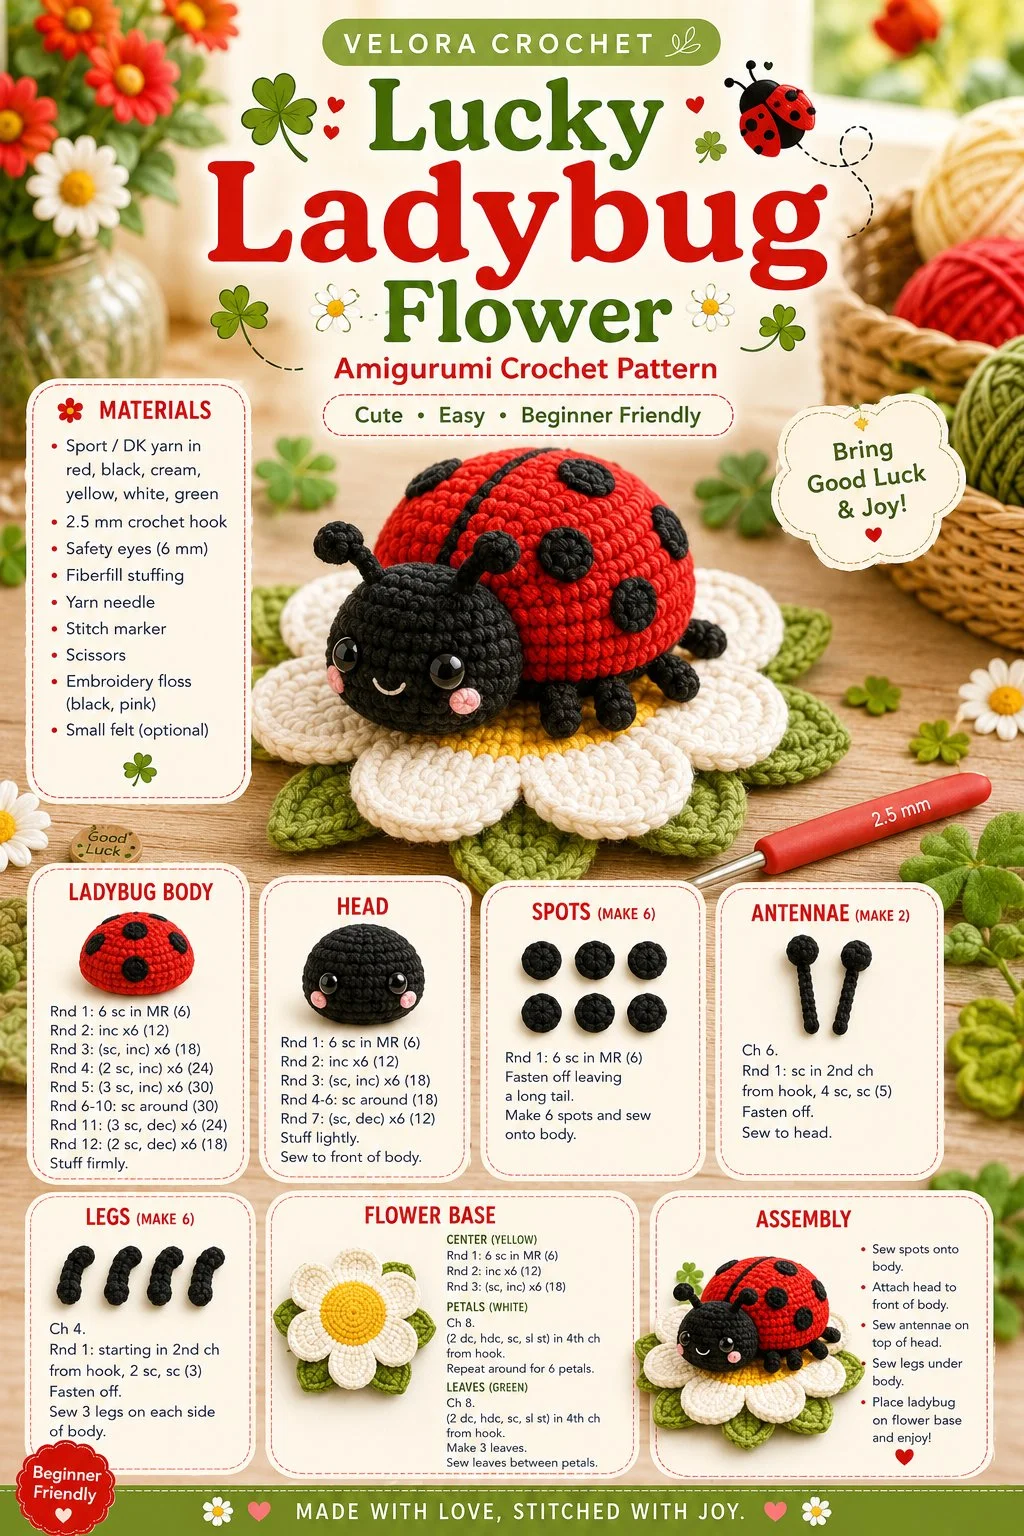
Spring is the perfect time to brighten up your home with cheerful decorations, and this delightful ladybug resting on a mini crochet flower is a charming project that adds a touch of whimsy to any space. With a round red body, adorable black spots, a tiny head, and cute antennae, this handmade piece captures the essence of luck and nature just in time for the warmer months.
Materials
- Red yarn (worsted weight)
- Black yarn (worsted weight)
- Green yarn (for the flower)
- Light pink yarn (for the flower center)
- 3.5mm crochet hook (or size needed to achieve gauge)
- Fiberfill stuffing
- Yarn needle
- Stitch marker
- Scissors
Abbreviations
- MR: magic ring
- ch: chain
- sc: single crochet
- inc: increase
- dec: decrease
- sl st: slip stitch
Ladybug Body
- Start with a magic ring using red yarn.
- Round 1: 6 sc in MR (6).
- Round 2: inc in each stitch around (12).
- Round 3: sc in next stitch, inc in next; repeat around (18).
- Round 4-7: sc in each stitch around (18).
- Round 8: sc in next 2 stitches, dec; repeat around (12).
- Round 9: sc in next stitch, dec; repeat around (6).
- Fasten off, leaving a long tail for sewing.
Head
- Start with a magic ring using red yarn.
- Round 1: 6 sc in MR (6).
- Round 2: inc in each stitch around (12).
- Round 3: sc in each stitch around (12).
- Fasten off, leaving a long tail for sewing.
Spots
- Using black yarn, create 6 small circles with a magic ring:
- Round 1: 6 sc in MR (6).
- Fasten off, leaving a tail for sewing.
These small circles will be sewn onto the ladybug’s body. Place them evenly around as desired.
Antennae
- Using black yarn, chain 5, then sl st in the second chain from the hook.
- Chain 2, then sc in the next chain.
- Fasten off, leaving a long tail to attach the antennae to the head.
Make two antennae in total.
Legs
- Using black yarn, chain 4.
- Row 1: sc in each chain (4).
- Fasten off, leaving a tail for attaching.
Make six legs total.
Flower Base
- Start with a magic ring using green yarn.
- Round 1: 10 sc in MR (10).
- Round 2: inc in next stitch, sc in next; repeat around (15).
- Round 3: sc in next 2 stitches, inc; repeat around (20).
- Round 4: sc in each stitch around.
- Fasten off, leaving a tail for sewing.
Face Details
Using black yarn, embroider two small eyes onto the head prior to assembly. You can also add a tiny smile for extra charm.
Assembly
- Attach the head to the top of the ladybug body using the long tail.
- Sew the spots onto the body, positioning them artistically.
- Attach the antennae securely to the top of the head.
- Secure the legs to the sides of the ladybug body, spacing them as desired.
- Sew the flower base to the bottom of the ladybug, ensuring it sits flat.
Tips for the Best Result
- When adding facial details, it’s helpful to lightly mark where the eyes and mouth will go before committing.
- Make sure to stuff the ladybug enough for a nice, rounded shape, but avoid overstuffing to keep it manageable while you sew on the parts.
- Use stitch markers to keep track of your rounds, especially when working on the head and body.
Conclusion
This ladybug plush is such a fun and creative crochet project, perfect for a handmade gift or lovely spring decor. You can experiment with color variations in the flowers or create a whole garden of them! Embrace your crochet skills and enjoy the process of bringing this little lucky charm to life. Happy crocheting!