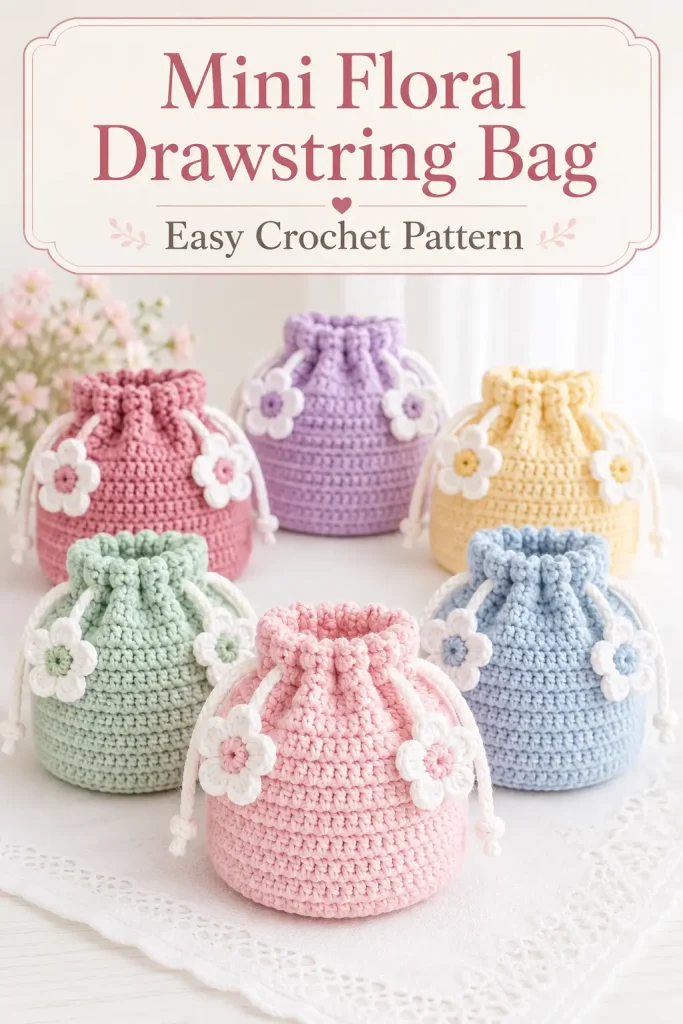
This mini floral drawstring bag is a sweet little crochet accessory that is perfect for small everyday items. It has a simple pouch body, soft drawstring ties, and cute crochet flowers attached at the sides for a pretty handmade finish.
The finished bag is small enough for earbuds, coins, lip balm, jewelry, small gifts, or party favors. It is also a lovely stash-busting crochet project because you can make the pouch and flowers in many pastel colors.
This is an original crochet pattern inspired by the visible mini flower drawstring bag design. It is written to help you make the same style of small crochet pouch with a drawstring closure and flower details, without copying a copyrighted or paid pattern.
Description
This mini crochet drawstring bag has a small rectangular pouch shape with a rounded base and straight sides. The body is worked in simple double crochet rounds, making it quick and beginner-friendly. Near the top, two drawstrings are woven through the stitches so the bag can close by pulling both sides. Each drawstring end is decorated with a small white crochet flower, giving the bag its cute floral look. The sample style uses pastel colors such as pink, purple, yellow, mint, and blue for the pouch, with white flowers and matching flower centers.
Materials
- Medium weight yarn for the bag body
- White yarn for the flower petals
- Small amount of matching or contrasting yarn for flower center
- 3.5 mm or 4.0 mm crochet hook
- Yarn needle
- Scissors
- Stitch marker
- Measuring tape
- Hot glue or fabric glue, optional
- Small clips or pins, optional for assembly
Abbreviations
- ch = chain
- sl st = slip stitch
- sc = single crochet
- dc = double crochet
- st = stitch
- sts = stitches
- rep = repeat
Pattern Notes
- This bag is worked in joined rounds from the base upward.
- The base begins around a foundation chain to create a small pouch shape.
- The bag body uses double crochet stitches.
- Two drawstrings are made separately and woven around the upper part of the bag.
- Small crochet flowers are attached to the drawstring knots.
- Finished size is approximately 8 cm wide and 8.5 cm tall, depending on yarn and tension.
- You can make the bag taller by adding more body rounds.
- Use firm tension so the bag holds its shape.
Step-by-Step Instructions
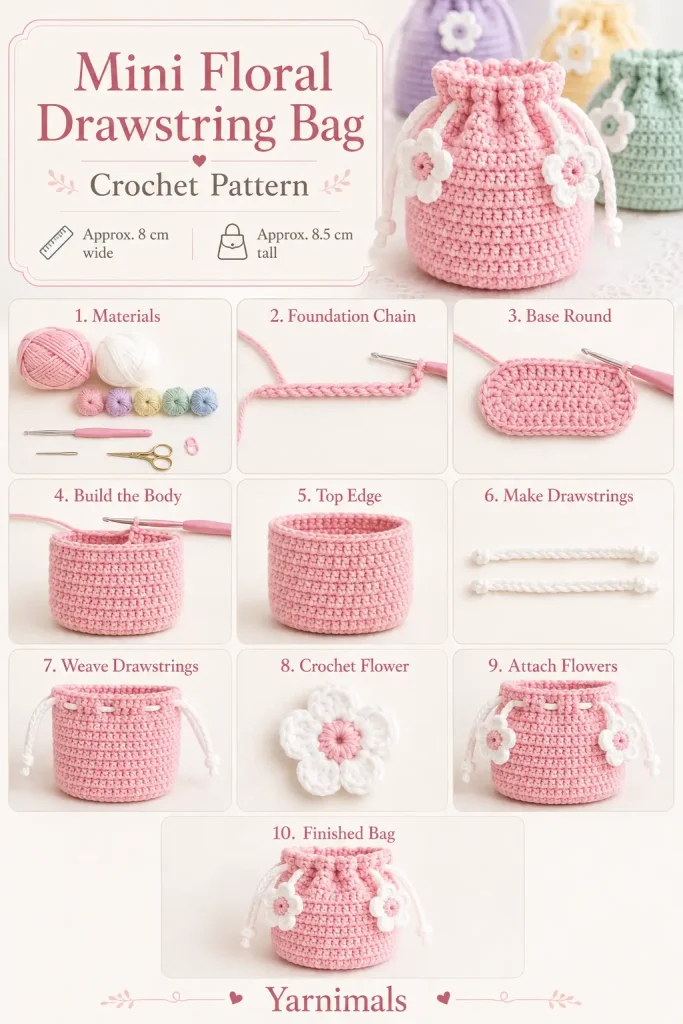
Bag Body
Foundation Chain
With your chosen bag color, make a slip knot.
Ch 21.
Round 1: Base Round
Dc in the 3rd ch from the hook.
Dc in each ch across until you reach the last ch.
Work 3 dc in the last ch to turn around the end.
Now work along the opposite side of the foundation chain.
Dc in each ch across the other side.
Work 2 dc in the final chain space where the round began.
Join with sl st to the first dc.
You should have 40 dc around.
This creates a narrow oval base for the mini pouch.
Round 2
Ch 2.
Dc in each st around.
Join with sl st to the first dc.
40 dc
Round 3
Ch 2.
Dc in each st around.
Join with sl st to the first dc.
40 dc
Rounds 4–9
Repeat Round 3.
Each round should have 40 dc.
Your pouch body will begin to grow upward into a small bag shape.
Round 10
Ch 2.
Dc in each st around.
Join with sl st to the first dc.
40 dc
Ch 1 and fasten off.
Weave in the yarn tail neatly on the inside of the bag.
Optional Neater Top Edge
If you want a firmer top edge, join yarn at the back of the bag.
Ch 1.
Sc in each st around.
Join with sl st to first sc.
Fasten off and weave in ends.
This step is optional, but it gives the top of the bag a cleaner finish.
Drawstrings
Make 2 drawstrings.
Drawstring 1
With white yarn or your chosen drawstring color, ch 70.
Fasten off.
Pull gently to straighten the chain.
Drawstring 2
Repeat the same steps.
Ch 70.
Fasten off.
You now have 2 separate crochet chains for the drawstring closure.
Weave the Drawstrings
Lay the bag flat.
Starting near one side of the bag, weave the first drawstring through the spaces around the upper section of the bag, approximately between Rounds 9 and 10.
Go in and out evenly around the full bag.
Bring both ends of the first drawstring out on the same side.
Now take the second drawstring.
Start on the opposite side of the bag.
Weave it through the same upper row spaces, going around the full bag.
Bring both ends out on the opposite side.
When both drawstrings are in place, pull both sides gently. The top of the bag should gather closed.
Tie a knot at each drawstring end area to secure the side.
Crochet Flower
Make 2 flowers.
Each flower has a small colored center and 5 white petals.
Flower Center
With the center color, make a magic ring.
Round 1: Ch 1, work 5 sc into the ring.
Pull the ring tight.
Join white yarn while completing the final stitch.
Sl st to the first sc to close the round.
You should have 5 sc.
Flower Petals
With white yarn:
Ch 2.
Work 3 dc into the same st.
Ch 2.
Sl st into the next st.
This makes the first petal.
Repeat the following for the remaining 4 petals:
Ch 2, work 3 dc into the same st, ch 2, sl st into the next st.
After the fifth petal, sl st to close.
Ch 1 and fasten off.
Leave a tail for sewing if you do not want to use glue.
Shape the petals gently with your fingers so the flower looks round and even.
Make the Second Flower
Repeat the same flower instructions.
Make sure both flowers are the same size.
Attach the Flowers to the Drawstrings
Pull one side of the drawstrings so the bag gathers slightly.
Tie the drawstring ends into a firm knot.
Place one crochet flower over the knot.
Sew the flower securely onto the knot using the flower yarn tail.
If preferred, add a small amount of hot glue or fabric glue to the back of the flower before pressing it onto the knot.
Repeat on the other side with the second flower.
Make sure both flowers sit neatly on the outside of the bag.
Finishing
Weave in all loose ends.
Check the drawstrings by pulling both sides open and closed.
Trim any extra yarn tails from the knots.
Shape the bag with your hands so the base sits flat and the body looks even.
Adjust the flowers so they face forward nicely.
Your mini floral drawstring bag is now ready to use.
Tips & Variations
Use pastel yarn colors for a cute soft look like the sample: pink, peach, purple, yellow, mint, and baby blue all work beautifully.
Use white flowers for a classic floral look, or match the flowers to the bag color for a softer tone-on-tone style.
For a stronger bag, use cotton yarn. For a softer pouch, use acrylic yarn.
To make the bag taller, add 2–4 extra rounds before the drawstring section.
To make the bag wider, start with a longer foundation chain, but keep the base stitches balanced on both sides.
If the drawstring feels too thin, make a second chain and twist both chains together.
If you do not want to use glue, sew the flowers on securely with a yarn needle.
For gift packaging, fill the bag with small candies, jewelry, stitch markers, lip balm, or mini handmade items.
FAQ
Is this mini drawstring bag beginner-friendly?
Yes. The bag body uses simple chains and double crochet stitches, and the flowers use basic crochet stitches. It is a good beginner-friendly crochet accessory project.
What can I put inside this mini bag?
It fits small items like earbuds, coins, lip balm, rings, stitch markers, tiny gifts, or small accessories.
Can I make the bag larger?
Yes. Start with a longer foundation chain for more width and add more rounds for height. You can also make the drawstrings longer if needed.
Do I have to attach flowers?
No. The flowers are decorative. You can leave the drawstrings plain, add beads, attach bows, or use small pom-poms instead.
Conclusion
This mini floral drawstring bag is a cute, quick, and practical crochet project with a sweet handmade finish. The simple pouch body, easy drawstring closure, and little crochet flowers make it perfect for gifts, markets, party favors, or everyday small storage.
Make one in soft pastel colors like the sample, or create a whole set in your favorite shades for a cheerful handmade collection.




Please email link thank you