Monochrome Puff Flower Granny Square Tote
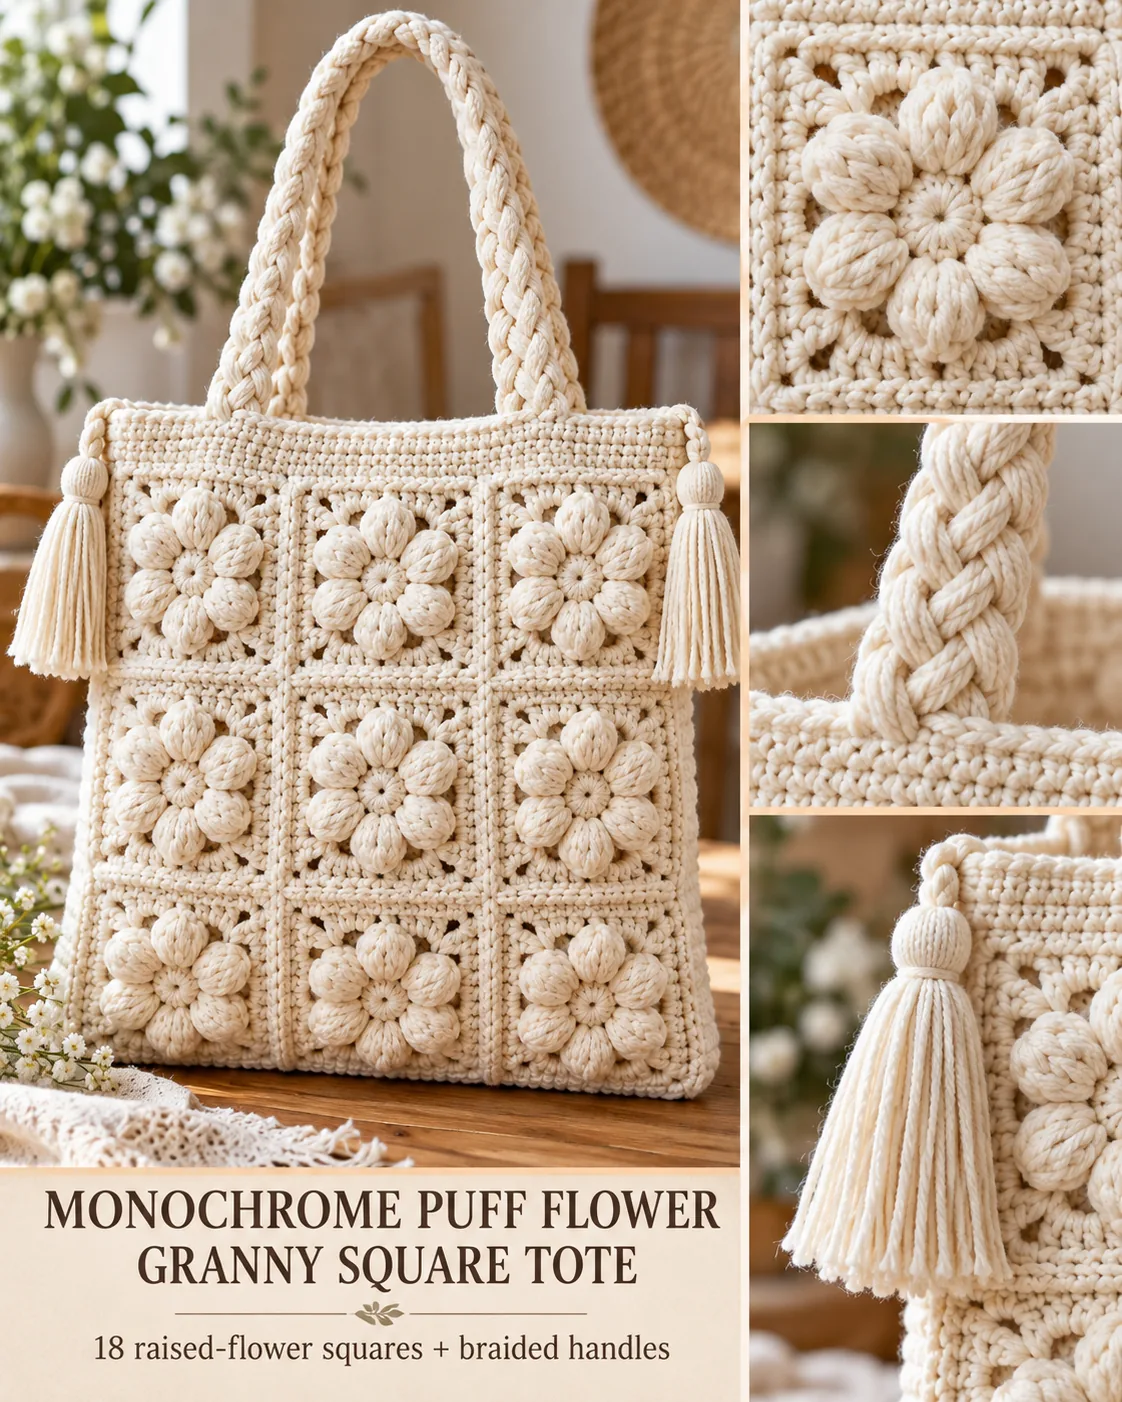
Softly sculpted flowers, a clean monochrome palette, and braided handles turn a familiar granny-square idea into a polished everyday tote. This Yarnimals version is built as one coordinated project from 18 matching raised-flower squares, so the front and back have the same rhythm, scale, and texture.
The finished bag is intentionally simple in shape: two flat 3-by-3 panels joined around three sides, topped with a firm three-round rim. That structure keeps the floral texture as the star while giving the tote enough stability for light daily use, yarn storage, or a relaxed market-bag look.
Finished Size and Project Specification
Each completed square measures about 4 in (10 cm) after light blocking. Nine squares form each 12 in (30 cm) panel. After joining and adding the top rim, the tote measures approximately 12 in (30 cm) wide by 12 in (30 cm) tall, not including the handles.
The project uses one warm ivory color throughout. Each square has one raised six-petal puff flower centered inside a compact granny-style frame. There are 18 squares total: 9 for the front and 9 for the back. The bag has two braided shoulder straps, four corner tassels, no lining, and no closure.
Materials
- Approximately 850–950 yd (780–870 m) worsted-weight #4 cotton or cotton-blend yarn in warm ivory
- 5 mm (H-8) crochet hook
- Yarn needle
- Sharp scissors
- Locking stitch markers
- Measuring tape
- Optional blocking mat and rustproof pins
Yarn and Gauge
A smooth, firm cotton gives the puff petals clear definition and helps the tote hold its shape. Avoid yarns that are extremely fuzzy because the raised flower detail can disappear. Aim for a blocked square of 4 in (10 cm). Exact stitch gauge matters less than consistent square size, but all 18 motifs should match before assembly.
Skill Level
Intermediate. You should be comfortable working in rounds, making puff stitches, working into chain spaces, joining motifs, seaming, and weaving in ends neatly.
US Crochet Abbreviations
- ch – chain
- sc – single crochet
- hdc – half double crochet
- dc – double crochet
- sl st – slip stitch
- sp – space
- st(s) – stitch(es)
- yo – yarn over
Special Stitch: 5-Loop Puff
Yo, insert hook in the indicated space, yo and pull up a loop to the height of a dc. Repeat this insertion-and-pull-up sequence four more times in the same space. Yo and pull through all loops on the hook, then ch 1 to secure. Keep every puff relaxed and even so all six petals match.
Construction Overview
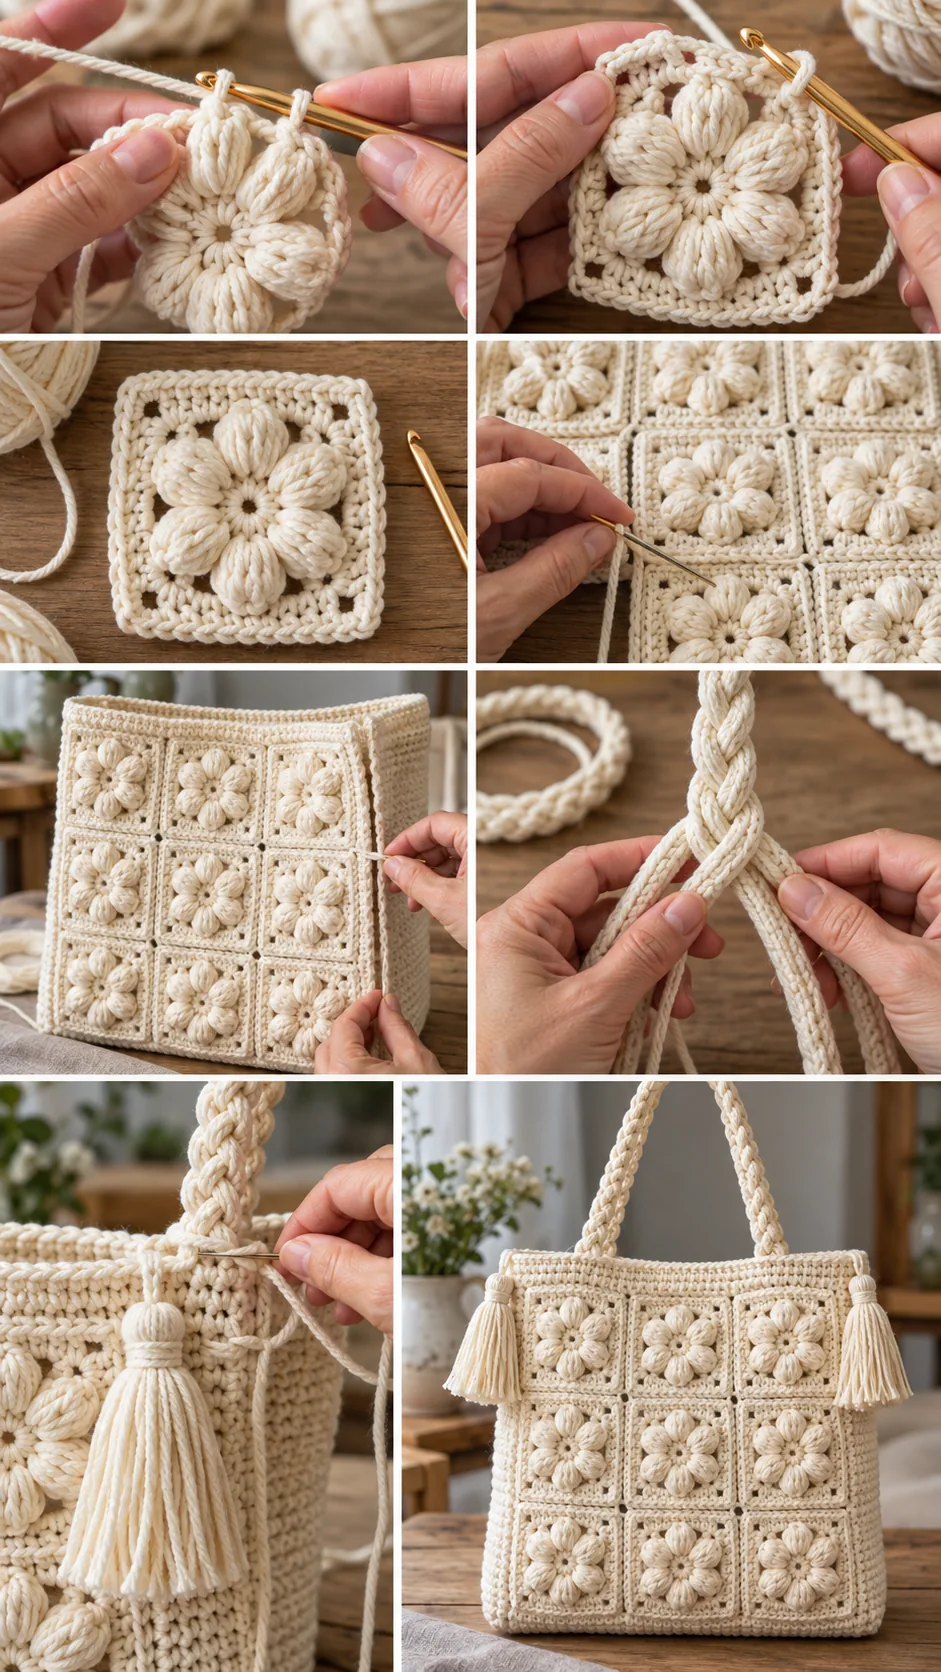
Make 18 identical floral squares. Arrange 9 squares in a 3-by-3 grid for the front and 9 in a second 3-by-3 grid for the back. Join each panel first, then place the panels with wrong sides together and seam the left side, bottom edge, and right side. Work three rounds around the open top for stability. Make two braided handles from crocheted cords, sew them securely to the rim, then add one tassel at each upper corner.
Visual Checkpoints Before Assembly
Every motif should show one centered flower with exactly six raised petals. Corners should be square rather than rounded, and all 18 motifs should lie close to the same 4 in measurement. Before joining, lay out both 3-by-3 panels and rotate motifs until the stitch direction looks balanced.
Detailed Pattern
Raised Flower Center — Make 18
Round 1: Ch 4 and join with a sl st to form a ring. Ch 1. Work 12 sc into the ring. Join with a sl st to the first sc. Do not turn.
Round 2: *Ch 3, skip 1 sc, sl st in next sc.* Repeat from * around to create six evenly spaced ch-3 loops. You should have exactly 6 loops.
Round 3: In each ch-3 loop work 1 sc, one 5-loop puff, 1 sc. Repeat in all six loops. Join with a sl st. You should now have 6 raised puff petals.
Square the Flower
Round 4: With the petals facing you, work behind them into the Round 2 structure. Join yarn in any gap between two petals. Ch 3 (counts as dc), 2 dc in same gap, ch 2, 3 dc in same gap to form the first corner. In next gap work 3 dc. In next gap work (3 dc, ch 2, 3 dc) for the next corner. Continue in this rhythm around so four corners are created and the remaining two gaps each receive 3 dc. Join to top of beginning ch-3.
Round 5: Sl st into the first corner ch-2 space. Ch 1. Work (2 sc, ch 2, 2 sc) in the corner. Sc in every dc across the side, placing 1 sc in each gap between 3-dc groups. Repeat the corner sequence in every ch-2 corner. Join with sl st.
Round 6: Ch 1. Sc in each st across. In each corner ch-2 space work (1 sc, ch 2, 1 sc). Join and fasten off.
Block the square to 4 in (10 cm), encouraging crisp corners without flattening the puff petals. Repeat until you have 18 matching squares.
Join the Front Panel
Arrange 9 squares in a 3-by-3 grid. Keep all flowers facing the same direction. Using a long yarn tail and a yarn needle, whipstitch neighboring squares through the outer loops only. Join the three squares in each row first, then join the three rows. Keep the seam snug but flexible so it does not pucker.
Check the finished panel. It should measure close to 12 in (30 cm) square. If one seam pulls inward, loosen and resew that section before continuing.
Join the Back Panel
Repeat the same 3-by-3 layout and seaming method with the remaining 9 squares. Match the front panel in overall dimensions and seam tension.
Assemble the Tote Body
Place the front and back panels with wrong sides together and flowers facing outward. Pin or clip the left edge, bottom edge, and right edge. Leave the top completely open.
With yarn and the 5 mm hook, join at the upper left corner and work sc evenly down the left side, across the entire bottom, and up the right side, crocheting through both layers. Aim for a firm seam without stretching the edges. Fasten off at the upper right corner.
Turn the bag upright and smooth the lower corners with your fingers. The tote should remain a flat, softly structured shape rather than a deep gusseted bag.
Top Rim
Rim Round 1: Join yarn at a side seam. Ch 1 and sc evenly around the entire open top, placing one extra sc at each side seam if needed to prevent pulling. Join with sl st.
Rim Round 2: Ch 1, sc in each st around. Join.
Rim Round 3: Ch 1, sc in each st around. Join and fasten off. The rim should feel noticeably firmer than the motif fabric.
Braided Handles — Make 2
For each handle, make three identical cords. Ch 76. Beginning in the second chain from the hook, sl st loosely in each chain across. Fasten off, leaving an 8 in tail. Make two more cords the same way.
Secure the three cords together at one end with a temporary knot or stitch marker. Braid them evenly without twisting. The finished braid should measure about 19–20 in (48–51 cm) before attachment. Secure the opposite end.
Repeat for the second handle. Compare both braids side by side and adjust the tension until their lengths match.
Attach the Handles
Lay the tote flat. On the front rim, mark handle attachment points about 3 in (7.5 cm) in from each side seam. Repeat on the back rim. Each handle attaches to one panel only, creating two parallel shoulder straps.
Using the long cord tails and a yarn needle, sew each braid end firmly through several rim stitches over a 1 in (2.5 cm) attachment area. Stitch back and forth multiple times. The braid should emerge vertically from the rim without folding the edge inward. Weave tails deeply into the dense rim.
Corner Tassels — Make 4
Cut 24 strands of yarn, each about 9 in (23 cm), for each tassel. Fold the bundle in half around a 12 in tying strand. Tie firmly at the fold. Wrap a separate strand around the bundle about 3/4 in (2 cm) below the top, knot securely, then trim the ends to an even 4 in (10 cm) tassel.
Attach one tassel to each upper outer corner of the tote, immediately beside the side seam. Keep all four tassels the same finished length.
Finishing
Weave in every remaining end through several direction changes. Steam or lightly damp-block the body if necessary, protecting the puff petals from being crushed. Shape the rim and handles by hand while drying. Do not aggressively stretch the tote because cotton can grow under weight.
Troubleshooting
Petals look uneven: Pull every puff loop to the same height before closing the stitch. A slightly relaxed puff looks fuller and more consistent than a tight one.
Squares differ in size: Block all motifs before joining. If one square is dramatically larger, remake it rather than forcing it into the grid.
Panel puckers after joining: The seam is too tight. Reopen the affected section and resew with a little more ease.
Top rim flares: You have too many stitches around the opening. On the next round, work a few evenly spaced sc2tog decreases.
Handles stretch: Cotton cords relax with use. Braid firmly, keep the cords short enough to compensate for a little stretch, and sew each end across several rim stitches.
Pattern at a Glance
- One color: warm ivory
- #4 cotton or cotton-blend yarn
- 5 mm hook
- 18 total raised-flower squares
- 6 puff petals per square
- 9 squares per 3-by-3 panel
- Approx. 12 × 12 in (30 × 30 cm) body
- 3-round single-crochet top rim
- 2 braided shoulder straps
- 4 corner tassels
This monochrome tote works because every detail repeats with intention: the same flower, the same square, the same cream tone, and the same crisp finishing from front to back. Take time with the motif sizing and joining, and the final bag will look polished before the handles and tassels are even added.