Moonlight Owl Amigurumi Crochet Pattern for an Easy DIY Plush Toy
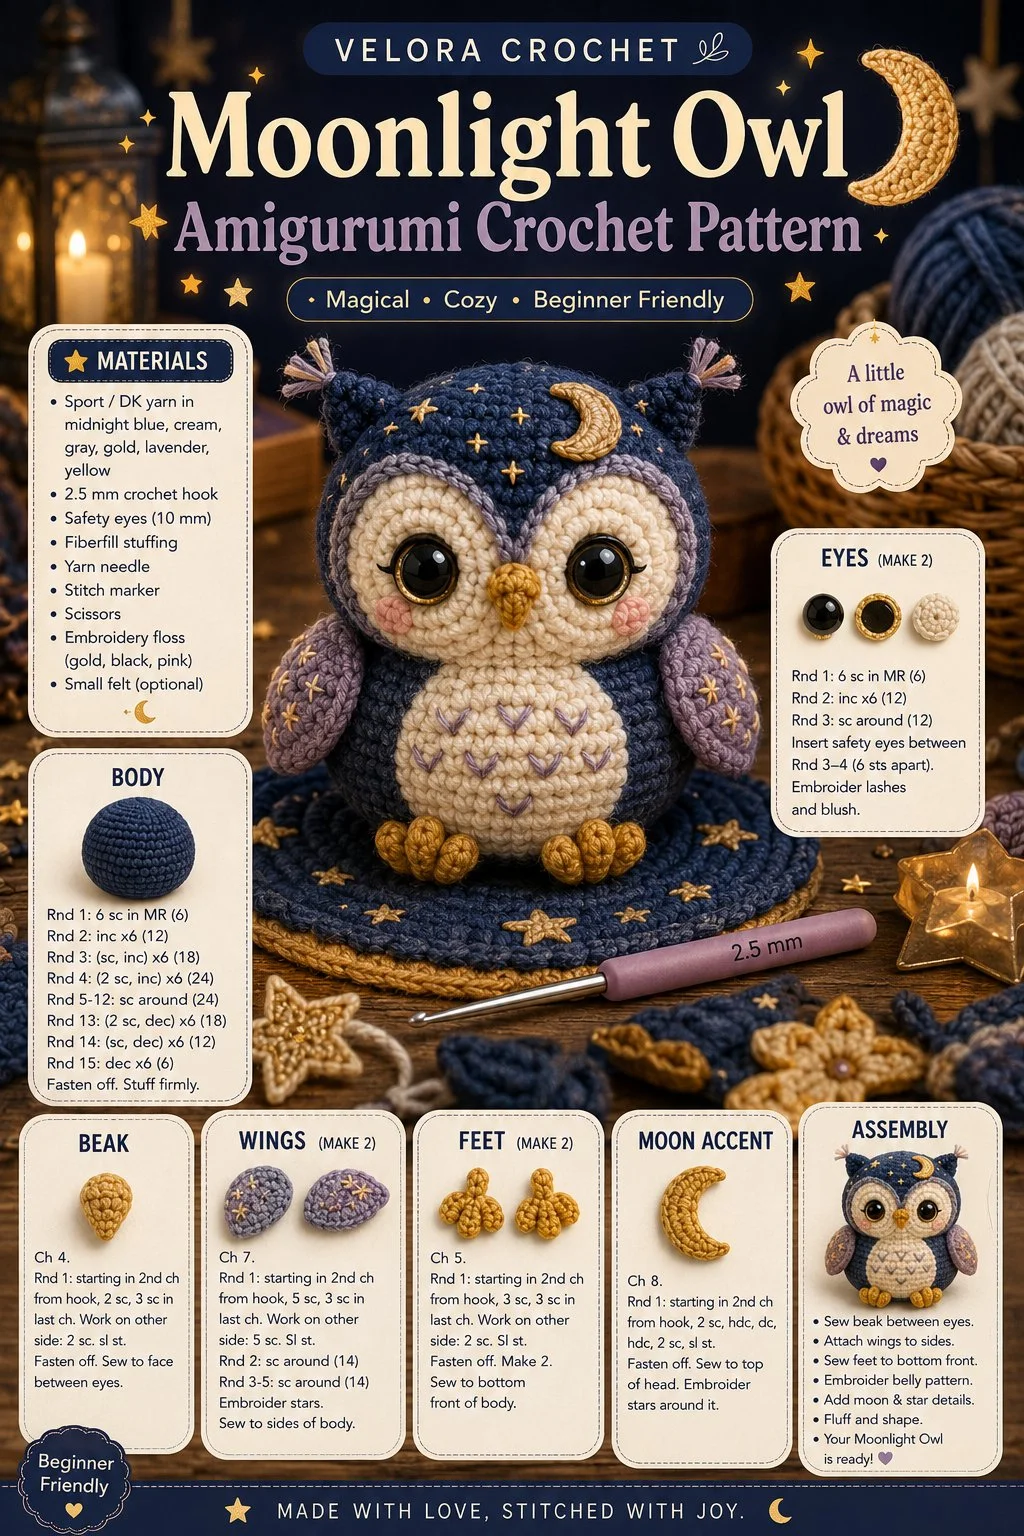
Creating a cozy and magical crochet piece can bring a touch of whimsy to any space, and this Moonlight Owl design is a delightful choice. Perfect as a gift or a charming decoration for your home, this handmade crochet project is sure to capture hearts with its round body, large eyes, tiny beak, wings, and an endearing crescent moon accent. Follow along as we guide you through this beginner-friendly pattern.
Materials
- Worsted weight yarn (in your choice of colors for body, eyes, beak, and moon accent)
- Crochet hook (size G/4.0 mm)
- Polyfill stuffing
- Yarn needle
- Stitch marker
- Scissors
Abbreviations
- MR: magic ring
- ch: chain
- sc: single crochet
- hdc: half double crochet
- dc: double crochet
- inc: increase
- dec: decrease
- sl st: slip stitch
- st: stitch
Instructions
Head and Body
- Round 1: Create a MR and sc 6 into the ring. (6)
- Round 2: Inc in each st around. (12)
- Round 3: (sc in next st, inc) repeat around. (18)
- Round 4: (sc in next 2 sts, inc) repeat around. (24)
- Rounds 5-10: Sc in each st around. (24)
- Round 11: (sc in next 2 sts, dec) repeat around. (18)
- Round 12: (sc in next st, dec) repeat around. (12)
- Round 13: Dec around. (6)
- Fasten off and leave a long tail for sewing.
Eyes (Make 2)
- Round 1: Create a MR and sc 6 into the ring. (6)
- Round 2: Inc in each st around. (12)
- **Fasten off, leaving a long tail for sewing.
Beak
- Row 1: Ch 3, sc in 2nd ch from hook and in next ch. (2)
- Row 2: Ch 1, turn, inc in each st. (4)
- Fasten off, leaving a long tail for sewing.
Wings (Make 2)
- Row 1: Ch 10, sc in the 2nd ch from hook and in each ch across. (9)
- Row 2: Ch 1, turn, sc in next 4 sts, leave remaining unworked. (4)
- Fasten off, leaving a long tail for sewing.
Feet (Make 2)
- **Ch 4, sc in 2nd ch from hook and in next ch, 3 sc in last ch. Turn to work on the other side, sc in next 2 chs. (6)
- Fasten off, leaving a long tail for sewing.
Moon Accent
- **Ch 6, sc in 2nd ch from hook, hdc in next ch, dc in next ch, hdc in next ch, sc in last ch. (5)
- Fasten off, leaving a long tail for sewing.
Face Details
- Use safety eyes for added charm. Position them on the head before attaching the eyebrows with needle and yarn.
- For a cute smile, you can embroider a little line below the beak.
Assembly
- Attach the eyes to the head, using the long tails to sew them into place.
- Sew on the beak between the eyes.
- Sew the wings on either side of the body.
- Attach the tiny feet at the bottom of the body.
- Finally, sew the moon accent above or beside the eyes for that magical touch.
Tips for the Best Result
- When stuffing the owl, be careful not to overstuff to keep a pleasing shape.
- Use a stitch marker to keep track of your rounds, especially when working in the round.
- Take your time with the assembly; pinning parts in place can help achieve symmetry.
In conclusion, this Moonlight Owl crochet pattern is a wonderful project that invites creativity and whimsy. It can serve as a charming handmade gift or a cozy decoration for your night-themed collection. Consider experimenting with different color combinations to create your unique versions! Happy crocheting!