Ocean Pearl Jellyfish Amigurumi Crochet Pattern
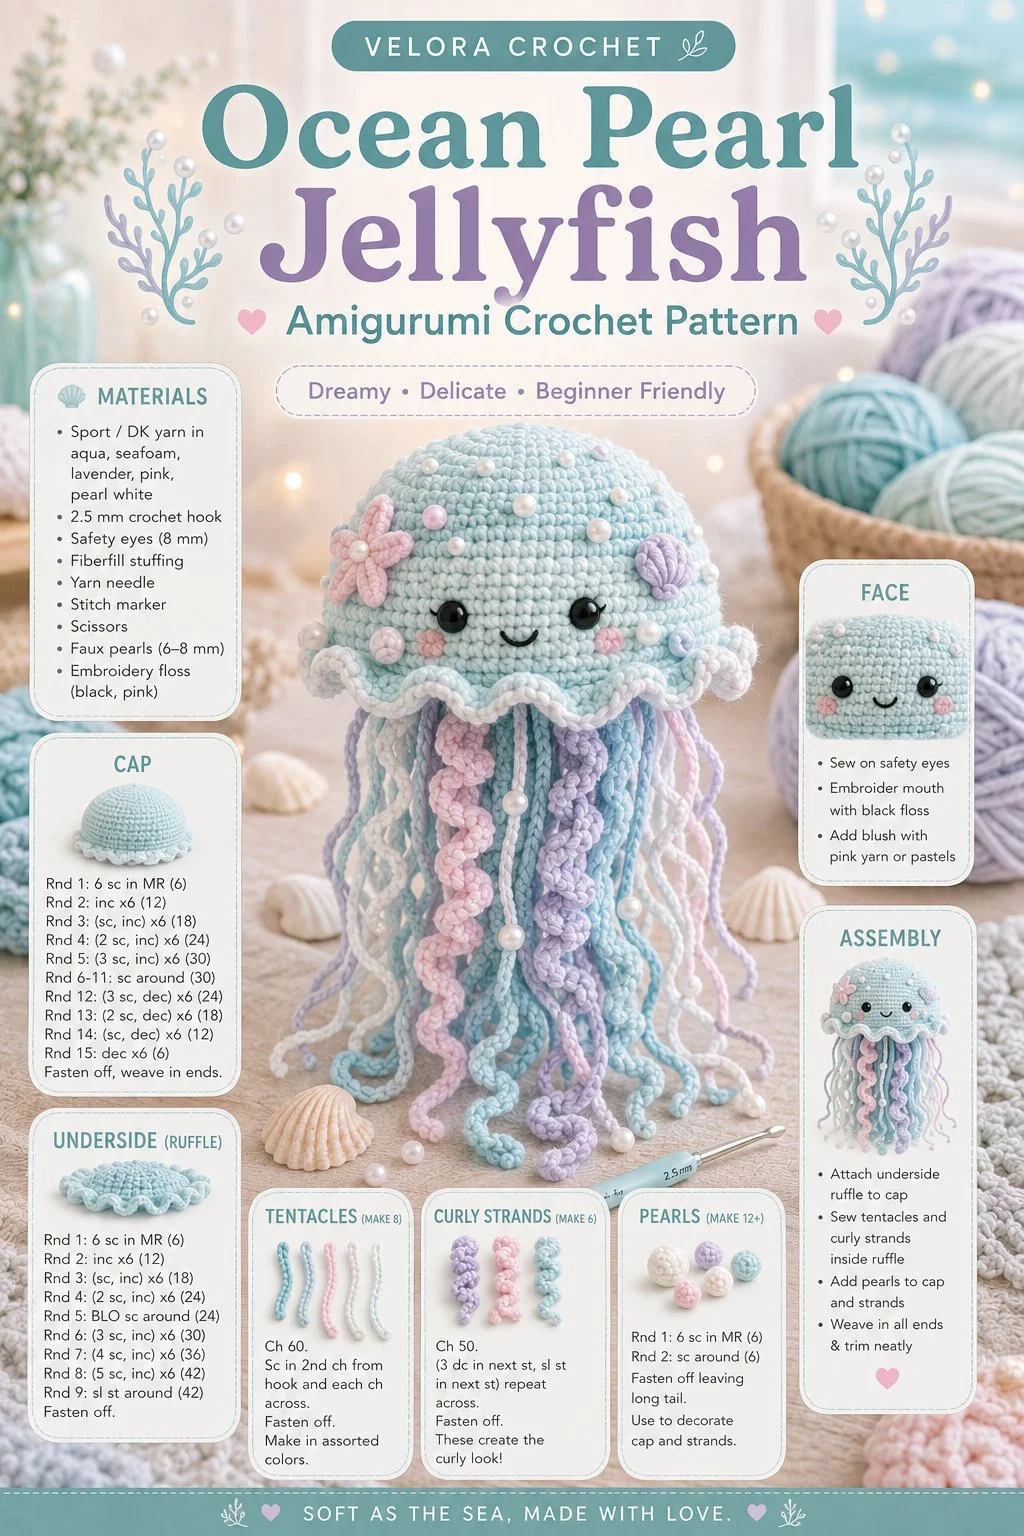
Create your own soft ocean pearl jellyfish with this delightful crochet pattern that’s perfect for adding a whimsical touch to nursery decor. This charming jellyfish features a domed head, a cute embroidered face, soft dangling tentacles, and playful curls, alongside small, pearl-like crochet bubbles. It’s an easy and enjoyable crochet project that brings a dreamy and pastel vibe, making it a great handmade gift or decoration.
Materials
- Worsted weight yarn in pastel colors (such as light blue, white, and soft pink)
- Crochet hook (size G/4.0 mm)
- Fiberfill stuffing
- Tapestry needle
- Scissors
- Safety eyes (optional)
- Embroidery thread for face details
Abbreviations
- MR: magic ring
- ch: chain
- sc: single crochet
- hdc: half double crochet
- dc: double crochet
- inc: increase
- dec: decrease
- sl st: slip stitch
Jellyfish Cap
- Start with a magic ring (MR), ch 1, and work 6 sc into the ring.
- Round 1: inc in each sc (12 sc).
- Round 2: (sc, inc) around (18 sc).
- Round 3: (2 sc, inc) around (24 sc).
- Rounds 4-6: sc in each st around (24 sc).
- Round 7: (2 sc, dec) around (18 sc).
- Round 8: (sc, dec) around (12 sc).
- Stuff the cap lightly and finish with dec until the opening closes. Fasten off and weave in the ends.
Underside
- Using the same color, ch 1 and work 6 sc in the MR.
- Round 1: inc in each sc (12 sc).
- Round 2: (sc, inc) around (18 sc).
- Round 3: (2 sc, inc) around (24 sc).
- Rounds 4-5: sc in each st around (24 sc).
- Fasten off, leaving a long tail for sewing.
Tentacles
Make 4 tentacles:
- Ch 25.
- Start from the second ch from the hook and sc to the end.
- For a curly effect, you can gently knit the tentacle to create waves or use a smaller hook for the edges.
- Fasten off and leave a long tail.
Curly Strands
Make 6 curly strands:
- Ch 15.
- Work 1 sc in 2nd ch from hook, hdc in next, dc in next, and continue with increased height for 2 more stitches.
- At the end, fasten off and gently curl the strand around a pencil or dowel to set the shape.
Face Details
Using embroidery thread or safety eyes, create a cute face on the jellyfish cap. You might sew simple button eyes, or use a smile-shaped stitch to add character.
Pearl Bubbles
Make 3 small bubbles:
- Work 3 sc in MR.
- Round 1: inc around (6 sc).
- Round 2: (sc, inc) around (9 sc).
- Fasten off, stuff lightly, and leave a long tail for sewing.
Assembly
- Attach the underside of the jellyfish cap to the main cap with the long tail left from the undersides. Ensure the cap is securely attached.
- Position the tentacles evenly around the bottom of the jellyfish’s cap and sew them in place.
- Securely attach the curly strands on top of the jellyfish head to give it a playful character.
- Finally, embroider the face, or attach safety eyes if using them, and sew the pearl bubbles in strategic places around the tentacles for added charm.
Tips for the Best Result
- Ensure each body part is stuffed adequately but not overstuffed, especially the cap, for a softer look.
- Use stitch markers to keep track of your rounds, especially in the cap where the increases can be easy to lose track of.
- If you wish to add more personality to your jellyfish, don’t hesitate to experiment with different colors or embellishments.
Conclusion
This soft ocean pearl jellyfish makes for a lovely handmade addition to any nursery or as a thoughtful gift for a loved one. The soothing pastel colors and whimsical details bring a touch of the sea to your home. Feel free to experiment with color variations or create a whole school of jellyfish for an enchanting display! Happy crocheting!