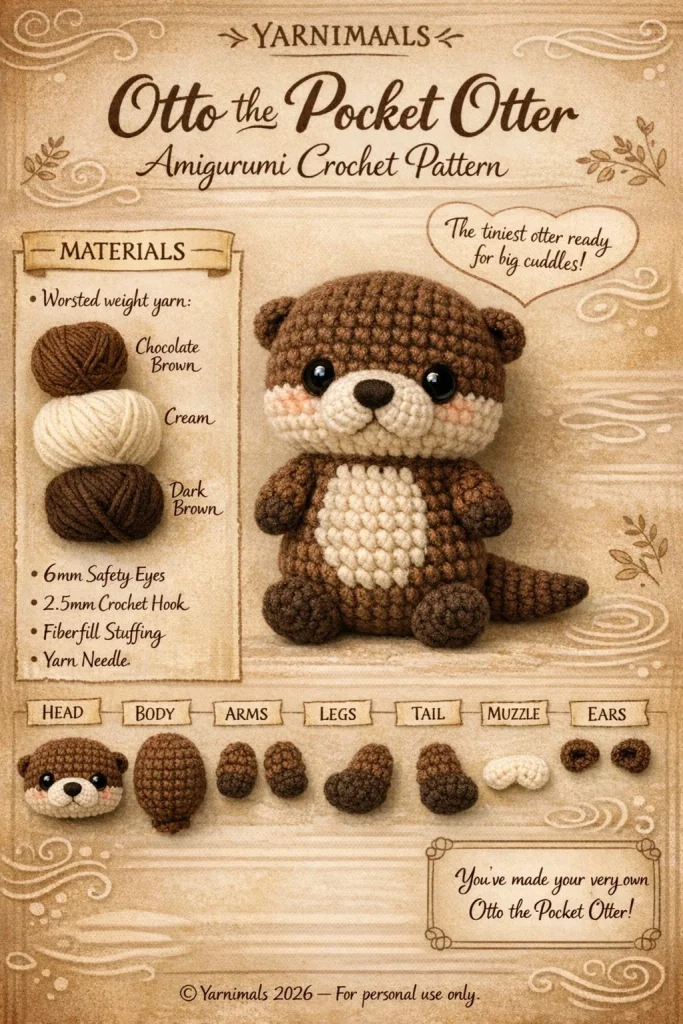
Crocheting a pocket-sized amigurumi otter brings to life a delightful, soft toy that’s perfect for hugging. This charming little creature features a beautiful rusty brown and creamy off-white color scheme, making it a standout addition to any amigurumi collection. Its rounded shape, complete with large safety eyes and a tapered tail, captures the essence of the playful otter.
Materials
- Plush chenille-style yarn in rust brown
- Plush chenille-style yarn in off-white
- Size G (4.0 mm) crochet hook
- Yarn needle
- Stitch marker
- Black safety eyes (12mm)
- Stuffing
Abbreviations
- ch: chain
- sc: single crochet
- inc: increase
- dec: decrease
- st: stitch
- sl st: slip stitch
Pattern Instructions
Head
- With rust brown yarn, create a magic ring.
- Round 1: 6 sc in magic ring (6)
- Round 2: inc in each st around (12)
- Round 3: (sc in next st, inc) repeat around (18)
- Round 4: (sc in next 2 sts, inc) repeat around (24)
- Rounds 5-8: sc in each st around (24)
- Round 9: (sc in next 2 sts, dec) repeat around (18)
- Round 10: (sc in next st, dec) repeat around (12)
- Begin stuffing the head firmly.
- Round 11: dec around (6)
- Fasten off and weave in ends.
Body
- With rust brown yarn, create a magic ring.
- Round 1: 6 sc in magic ring (6)
- Round 2: inc in each st around (12)
- Round 3: (sc in next st, inc) repeat around (18)
- Round 4: (sc in next 2 sts, inc) repeat around (24)
- Rounds 5-9: sc in each st around (24)
- Round 10: (sc in next 2 sts, dec) repeat around (18)
- Rounds 11-12: sc in each st around (18)
- Begin stuffing the body.
- Round 13: (sc in next st, dec) repeat around (12)
- Round 14: dec around (6)
- Fasten off and leave a long tail for assembly.
Arms
- With rust brown yarn, create a magic ring.
- Round 1: 6 sc in magic ring (6)
- Round 2: inc in each st around (12)
- Rounds 3-4: sc in each st around (12)
- Fasten off, leaving a long tail for sewing. Make 2.
Legs
- With rust brown yarn, create a magic ring.
- Round 1: 6 sc in magic ring (6)
- Round 2: inc in each st around (12)
- Rounds 3-4: sc in each st around (12)
- Fasten off, leaving a long tail for sewing. Make 2.
Ears / Details
- With off-white yarn, create a magic ring.
- Round 1: 6 sc in magic ring (6)
- Round 2: inc in each st around (12)
- Round 3: (sc in next st, inc) repeat around (18)
- Fasten off. Make 2.
Accessories (if any)
- You can add a small heart or star as a charm on a collar using off-white yarn.
Assembly & Finishing
- Attach the head to the body using the long tail left from the body.
- Secure the large black safety eyes to the head, positioning them evenly.
- Stitch the arms to the sides of the body and the legs at the bottom.
- Sew the ears onto the top of the head.
- Use off-white yarn to create a small snout, stitching it centered on the face.
- Ensure all pieces are securely attached and weave in any remaining ends.
Tips for Best Results
- Use a stitch marker to keep track of your rounds, especially in the head and body.
- Choose a comfortable lighted area to help you see your stitches clearly.
- Ensure the stuffing is even to prevent bumpy areas on your otter.
- For a neater finish, consider using half double crochet for the snout.
- Don’t rush; take your time to enjoy the process and perfect each section.
Conclusion
Creating this adorable pocket-sized otter amigurumi is a rewarding project that allows you to hone your crochet skills. Whether you’re a beginner or looking to expand your amigurumi collection, this pattern is a delightful choice. Happy crocheting!



