Pastel Striped Chameleon Amigurumi Crochet Pattern with Step-by-Step Tutorial
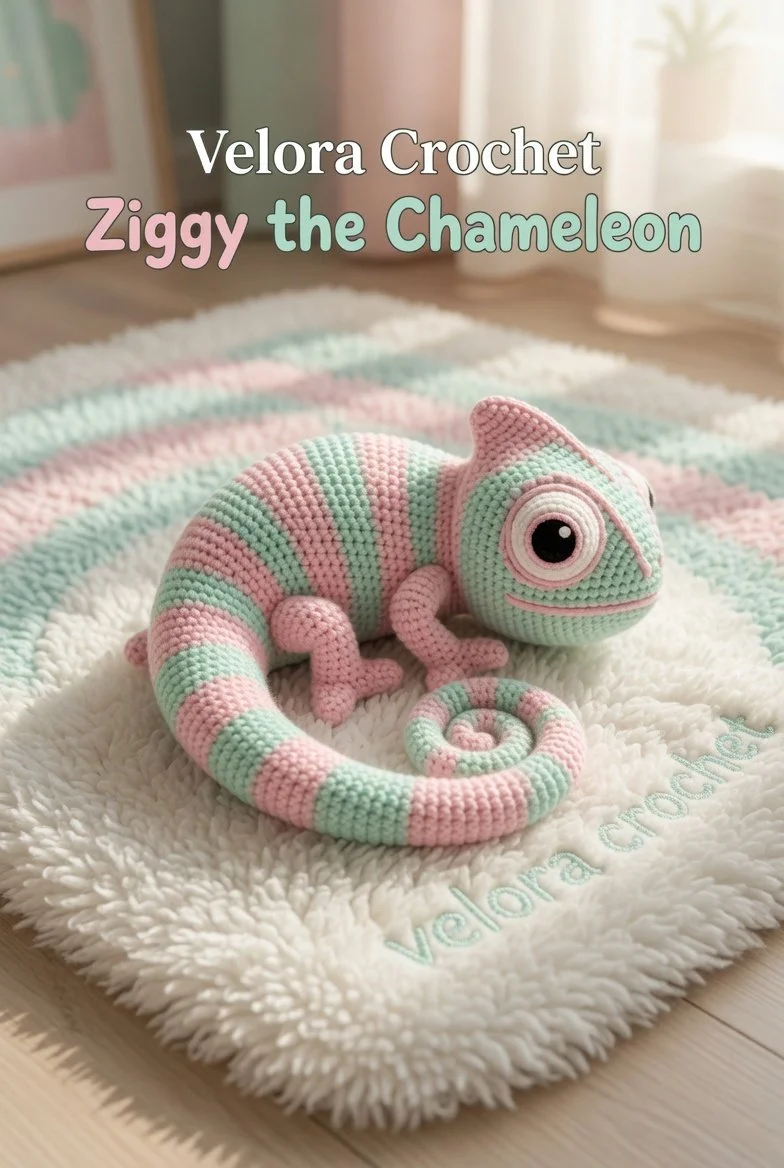
Create a soft pastel chameleon crochet toy, complete with alternating pink and mint green stripes. This charming little project has an oval chunky body, a large rounded head, layered circular eyes, and distinctive triangular crest pieces. With short legs featuring tiny toes and a coiled segmented tail, your handmade creation is sure to bring joy both to you and anyone who receives it. Let’s dive into this beginner-friendly crochet project that will spark creativity and brighten any space.
Materials
- Yarn: Pastel pink and mint green yarn (worsted weight)
- Crochet hook: Size G (4.0 mm)
- Stuffing: Fiberfill or similar
- Yarn needle
- Stitch markers (optional)
- Safety eyes (optional)
Abbreviations
- MR: magic ring
- ch: chain
- sc: single crochet
- hdc: half double crochet
- dc: double crochet
- inc: increase
- dec: decrease
- sl st: slip stitch
Instructions
Head
- Start with a magic ring (MR).
- Round 1: 6 sc in MR (6).
- Round 2: inc in each stitch around (12).
- Round 3: sc in next stitch, inc around (18).
- Round 4: sc in next 2 stitches, inc around (24).
- Rounds 5-7: sc in each stitch around (24).
- Round 8: sc in next 2 stitches, dec around (18).
- Round 9: sc in next stitch, dec around (12).
- Stuff the head lightly, then round 10: dec around to finish (6). Fasten off, leaving a long tail for sewing.
Body
- Starting with a MR.
- Round 1: 6 sc in MR (6).
- Round 2: inc in each stitch around (12).
- Round 3: sc in next stitch, inc around (18).
- Round 4: sc in next 2 stitches, inc around (24).
- Rounds 5-12: sc in each stitch around (24).
- Round 13: sc in next 2 stitches, dec around (18).
- Rounds 14-15: sc in each stitch around (18).
- Round 16: sc in next stitch, dec around (12). Stuff.
- Final round: dec around (6). Fasten off, leaving a long tail for sewing.
Eyes
- For each eye, make a MR.
- Round 1: 6 sc in MR (6).
- Round 2: inc in each stitch around (12).
- Round 3: sc in each stitch around (12). Fasten off, leaving a long tail for sewing.
Legs
- Make four legs, starting with a MR.
- Round 1: 6 sc in MR (6).
- Rounds 2-4: sc in each stitch around (6). Fasten off with a long tail for sewing.
Feet
- Make four feet, starting with a MR.
- Round 1: 6 sc in MR (6).
- Round 2: inc in each stitch around (12).
- Round 3: sc in each stitch around (12). Fasten off, leaving a long tail for sewing.
Tail
- Start with a MR.
- Round 1: 6 sc in MR (6).
- Rounds 2-5: sc, inc around (12).
- Rounds 6-10: sc around (12).
- Round 11: dec around (6). Stuff lightly, fasten off with a long tail.
Crest
- Make four triangular pieces. Start with a ch 5.
- Row 1: sc in second ch from hook, hdc in next ch, dc in last ch (3).
- Fasten off.
Back Ridge
- Chain 8.
- Row 1: sc in second ch from hook and into each chain across (7). Fasten off.
Face Details
- Use black yarn to embroider a smile and add eyebrows above the eyes.
Assembly and Finishing
- Begin by sewing the head to the body.
- Attach the eyes to the head, positioning them symmetrically.
- Sew the legs to the bottom of the body, ensuring they are evenly spaced.
- Attach the feet to the legs, securing them tightly.
- Sew the tail to the back, coiling it slightly for effect.
- Attach the crest pieces along the top of the head and back ridge for that distinctive look.
{image_template}
As you put everything together, check that all parts are sewn securely and symmetrically to create a balanced look. Double-check the shape of your chameleon—don’t hesitate to adjust the stuffing to get the perfect squishy feel!
Tips for the Best Result
- When stuffing the head and body, avoid overstuffing to maintain a cute shape.
- Use stitch markers to keep track of your rounds, especially in larger sections like the body.
- Try different color combinations to personalize your chameleon even further.
Creating this delightful pastel chameleon can be a rewarding experience, whether you keep it for yourself or gift it to a friend. The combination of colors and textures makes it a lovely addition to any handmade collection, and I hope you enjoy making your own version. Happy crocheting!