Introduction
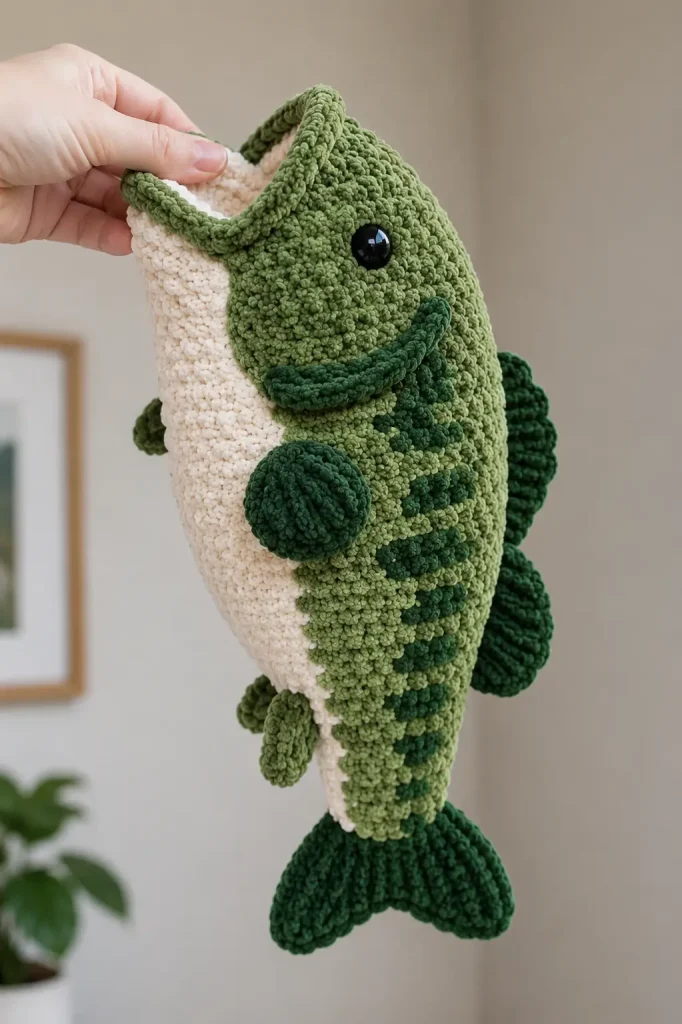
If you’re looking for a unique crochet project that stands out from the usual bears and bunnies, this plush bass crochet pattern is a fun and rewarding choice. Inspired by the iconic largemouth bass, this amigurumi fish combines realistic details with a soft, cuddly design that’s perfect for display or gifting.
The textured body, wide-open mouth, and layered fins give this handmade fish plenty of character. Whether you’re creating a gift for a fishing enthusiast or adding a new piece to your amigurumi collection, this beginner-friendly to intermediate crochet project is sure to become a favorite.
Description
This realistic bass amigurumi features a beautifully shaped body with a creamy white belly, rich green coloring, and textured dark green fins that mimic the appearance of a real largemouth bass. The slightly flattened shape, detailed gills, and signature open mouth create an authentic look while still maintaining the soft charm of a plush crochet toy.
Measuring approximately 7 inches (18 cm) long, this fish makes a wonderful handmade gift, nursery decoration, office desk companion, or collectible piece for anyone who loves fishing and nature-inspired crafts. Its soft texture and detailed shaping make it both visually appealing and fun to hold.
Materials
Yarn
- Medium green yarn for the body (approximately 60 yards)
- Dark green yarn for fins and tail (approximately 20 yards)
- Cream or off-white yarn for the belly and mouth opening (approximately 20 yards)
- Pink yarn for the mouth interior accent (approximately 5 yards)
Tools & Notions
- 4 mm crochet hook
- 8 mm black safety eyes
- Tapestry needle
- Polyester fiberfill stuffing
- Scissors
- Stitch markers
Additional Information
- Difficulty: Easy to Intermediate
- Finished Size: Approximately 7 inches (18 cm) long
- Jumbo Version: Use bulky yarn with a 6 mm hook and 15 mm safety eyes for a larger plush version
Step-by-Step Instructions
Body
Begin with Cream / Off-White yarn.
Round 1: 6 sc into a Magic Ring. Pull ring closed. (6)
Round 2: Inc all around. (12)
Round 3: (Sc 7, inc) × 2. (18)
Round 4: (Sc 5, inc) × 3. (21)
Round 5: (Sc 6, inc) × 3. (24)
Round 6: (Sc 3, inc) × 6. (30)
Round 7: Sl st 1, sc 29. (30)
Place a stitch marker in the slip stitch of Round 7. This marks the bottom of the fish and serves as a reference point for eye and fin placement.
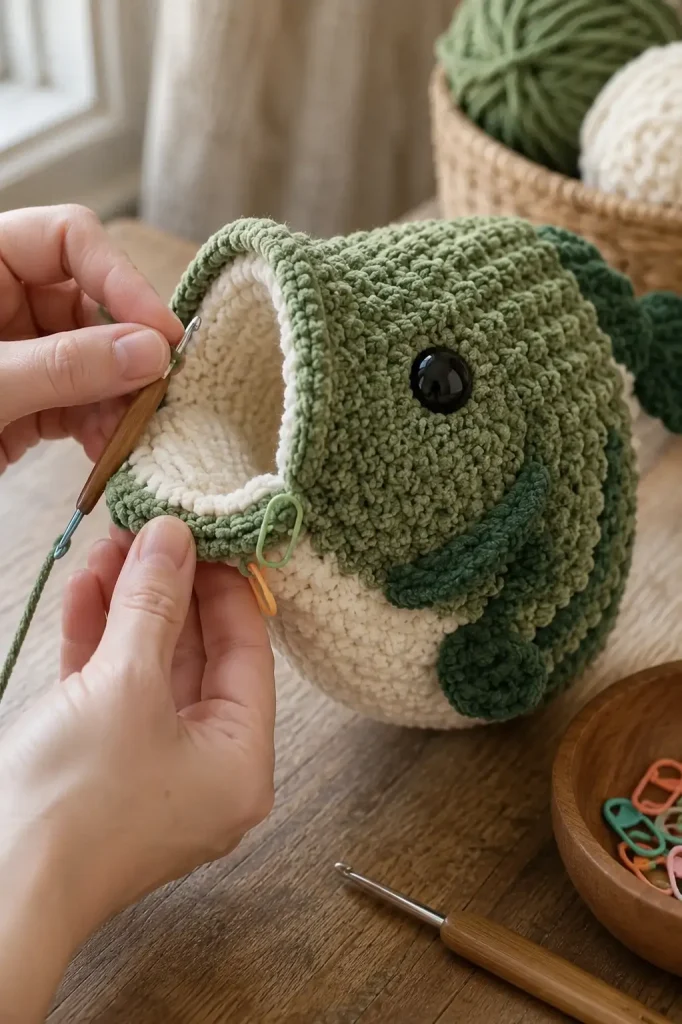
Switch to Medium Green yarn.
Round 8: (Sc 14, inc) × 2. (32)
Round 9: Sc all around. (32)
Round 10: (Sc 15, inc) × 2. (34)
Round 11–13: Sc all around. (34) × 3 rounds
Round 14: Inc in first st, sc 33. (35)
Round 15: Sc all around. (35)
Round 16: Inc in first st, sc 34. (36)
Insert the 8 mm safety eyes now. Position them 3 rounds back from the front ridge of Round 10 and approximately 10–11 stitches apart.
Round 17–22: Sc all around. (36) × 6 rounds
Round 23: (Sc 10, dec) × 3. (33)
Round 24: Sc all around. (33)
Round 25: (Sc 9, dec) × 3. (30)
Round 26: Sc all around. (30)
Round 27: (Sc 8, dec) × 3. (27)
Round 28: Sc all around. (27)
Round 29: (Sc 7, dec) × 3. (24)
Round 30 (BLO): Sc all around. (24)
Round 31 (BLO): (Sc 6, dec) × 3. (21)
Gently push the cream-colored front section inward to create the bass’s characteristic open mouth.
Begin stuffing lightly, keeping the mouth cavity indented.
Round 32: Sc all around. (21)
Round 33: (Sc 5, dec) × 3. (18)
Round 34: Sc all around. (18)
Round 35: (Sc 4, dec) × 3. (15)
Round 36: Sc all around. (15)
Round 37: (Sc 3, dec) × 3. (12)
Round 38: (Sc 2, dec) × 3. (9)
Finish stuffing the body evenly. Do not stuff the tail section.
Round 39: (Sc 2, inc) × 3. (12)
Round 40: (Sc 3, inc) × 3. (15)
Round 41: (Sc 4, inc) × 3. (18)
Round 42: (Sc 5, inc) × 3. (21)
Round 43: (Sc 6, inc) × 3. (24)
Round 44: Sc all around. (24)
Switch to Dark Green yarn.
Round 45: Ch 1, (2 dc in next st) × 2, hdc 2, sl st 3, hdc 2, (2 dc in next st) × 2, sl st 1.
Sc up the side of the opening until reaching the top edge of the tail.
Tail Close: Sc 8 sts straight across the top, then sc the last 2 sts at a slight angle toward the front of the fish. (10 sts total)
Fasten off and weave in the end.
Mouth Interior Accent
Using Pink yarn:
Row 1: Ch 7. Sc in 2nd ch from hook, sc across. (6)
Row 2: Ch 1 and turn. Inc, sc 4, inc. (8)
Row 3–4: Ch 1 and turn. Sc all across. (8) × 2 rows
Row 5: Ch 1 and turn. Dec, sc 4, dec. (6)
Fasten off, leaving a long tail. Sew inside the mouth opening.
Pectoral Fins (Make 2)
Using Dark Green yarn:
Round 1: MR, 4 sc into ring. (4)
Round 2: (Sc 1, inc) × 2. (6)
Round 3: (Sc 2, inc) × 2. (8)
Round 4: Ch 1, sc 4 across one side only. (4)
Do not stuff.
Close: Sc 2 sts at a slight angle away from the front of the fin, then sc 8 sts straight down. (10 sts)
Fasten off, leaving a tail for sewing.
Attach each fin 5–6 rounds behind the eyes.
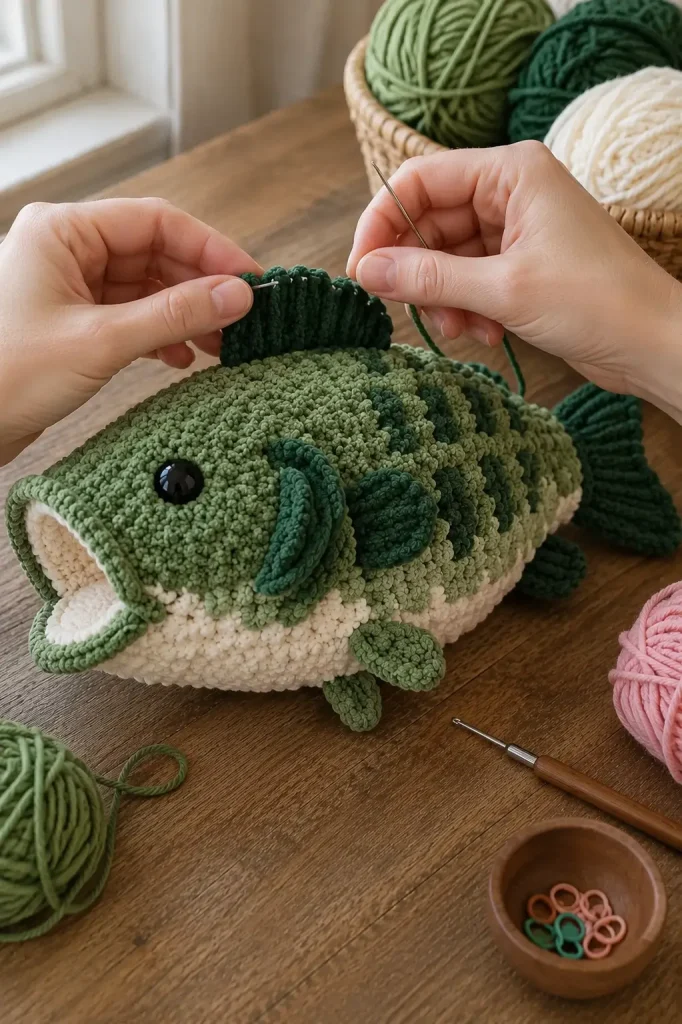
Dorsal Fin
Using Dark Green yarn:
Row 1: Ch 3. Starting in 2nd ch from hook: sc 1, inc in next st. (3)
Row 2: Ch 1 and turn. Sc all. (3)
Row 3: Ch 1 and turn. Sc 2, inc. (4)
Row 4: Ch 1 and turn. Inc, sc 3. (5)
Row 5: Ch 1 and turn. Sc 4, inc. (6)
Row 6: Ch 1 and turn. Sc all. (6)
Row 7: Ch 1 and turn. Dec, sc 2, dec. (4)
Row 8: Ch 1 and turn. Dec, dec. (2)
Fasten off and leave a tail for sewing.
Anal Fin
Using Dark Green yarn:
Row 1: Ch 3. Starting in 2nd ch from hook: sc 1, inc. (3)
Row 2–3: Ch 1 and turn. Sc all. (3) × 2 rows
Row 4: Do not ch 1. Turn. Sc 2. (2)
Fasten off and leave a tail for sewing.
Pelvic Fins
Using Medium Green yarn:
Attach directly to the body.
R1: Sl st to join yarn to body. Ch 3, turn, sl st back down both chain stitches to the body. Sl st into the same base stitch to anchor.
Fasten off and repeat on the opposite side.
Gills
Using Medium Green yarn:
Row 1: Ch 3, turn. Starting in 2nd ch: 2 sc in next st, sc 1. (3)
Row 2: Ch 1 and turn. Sc 2, inc. (4)
Row 3–4: Ch 1 and turn. Sc all. (4) × 2 rows
Row 5: Do not ch 1. Turn. Sc 3. (3)
Row 6: Ch 1 and turn. Sc 3. (3)
Row 7: Do not ch 1. Turn. Sc 2. (2)
Fasten off and repeat on the opposite side in mirror placement.
Assembly
- Confirm safety eyes are securely attached.
- Sew the pink mouth piece inside the mouth opening.
- Attach the pectoral fins on both sides.
- Sew the dorsal fin along the top center of the fish.
- Attach the anal fin underneath the body.
- Add the pelvic fins directly to the body.
- Weave in all remaining yarn ends securely.
Tips & Variations
- For a more natural appearance, use multiple shades of green throughout the body and fins.
- Chenille yarn creates an extra-soft plush crochet toy with a cuddly texture.
- Cotton yarn offers sharper stitch definition and a more realistic finish.
- If you prefer a larger fish, increase your yarn weight and hook size while maintaining the same stitch pattern.
- Stuff the body gradually rather than all at once to maintain the fish’s flattened profile.
- Avoid overstuffing around the mouth area so the open-mouth shape remains visible.
- Try earthy greens, olive tones, or even blue-green shades for different freshwater fish-inspired variations.
Frequently Asked Questions
Is this bass amigurumi pattern beginner-friendly?
Yes. While the shaping and fin placement require some attention, the pattern primarily uses basic crochet stitches, making it suitable for adventurous beginners.
What yarn works best for a realistic bass look?
Medium-weight acrylic or cotton yarn provides excellent stitch definition. Plush chenille yarn creates a softer, more cuddly finished fish.
Can I make this crochet fish safe for young children?
Absolutely. Instead of safety eyes, embroider the eyes using black yarn to create a child-friendly version.
Conclusion
This plush bass crochet pattern is a wonderful combination of realism and charm. From its distinctive open mouth to its detailed fins and textured body, every feature helps bring this freshwater favorite to life. Whether you’re making it as a gift for an angler, decorating a fishing-themed room, or simply enjoying a relaxing crochet session, this amigurumi bass is a project you’ll be proud to display.
Save this easy crochet pattern for later, share it with fellow crochet enthusiasts, and enjoy creating your own handmade largemouth bass.




why does this pattern not match the picture? No white belly, no lip enhancement. Not showing pink in mouth. DISAPPOINTED as it is almost completed and is not as shown. AI picture enhancement UCKS !