Introduction
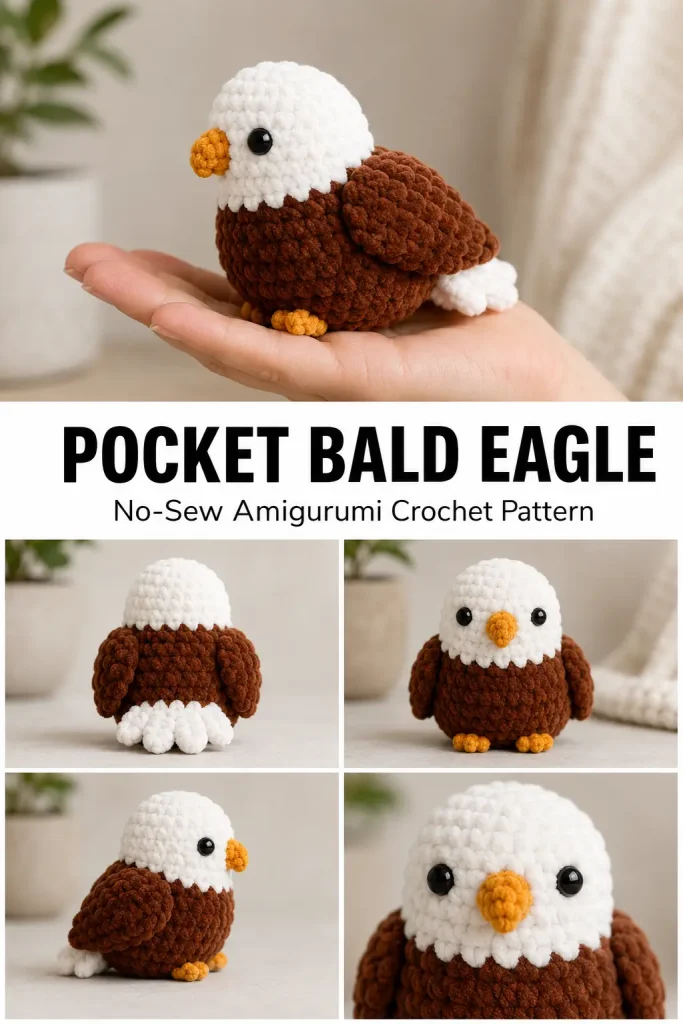
A tiny handmade eagle has such a sweet, proud charm. This pocket bald eagle amigurumi is soft, round, and wonderfully simple, with a snowy white head, warm brown body, tiny orange beak, little feet, and fluffy feather details that make it instantly recognizable.
This is the kind of easy crochet pattern that feels satisfying from start to finish. Because the design is no-sew, the wings, tail feathers, neck feathers, beak, and feet are worked directly onto the main body instead of being made as separate pieces. That makes it a lovely beginner crochet project for crocheters who enjoy quick plush toys with very little assembly.
The finished eagle is small enough to fit in your hand, making it perfect as a keychain, ornament, desk decoration, patriotic handmade gift, craft fair item, or cute bird amigurumi for your collection. The original design is about 3.5 inches or 9 cm tall when made with super bulky chenille yarn and a 5 mm hook.
Description
This pocket bald eagle amigurumi has a rounded plush body worked in two colors: white for the head and neck area, and brown for the lower body. A tiny orange beak is added to the front of the face, with glossy black safety eyes placed on each side. The white neck feathers are worked into the front loops left during the body color change, creating a soft feathered edge between the head and body.
The wings are made directly onto the sides using brown yarn, while the white tail feathers are worked onto the back of the body. Small orange feet complete the look and help give the eagle a playful baby-bird style. The finished plush crochet toy has a cozy, squishy texture when made with chenille yarn, but it can also be made smaller with cotton or acrylic yarn for a keychain-sized version.
This amigurumi bald eagle is a thoughtful handmade project for summer markets, Independence Day decor, bird lovers, animal crochet collections, backpack charms, ornaments, and small gifts.
Materials
- Super bulky weight 6 chenille velvet yarn in white
- Super bulky weight 6 chenille velvet yarn in brown
- Small amount of orange yarn for the beak and feet
- 8 mm plastic safety eyes, 2 pieces
- 5 mm crochet hook
- Polyester fiberfill stuffing
- Scissors
- Yarn needle
- Stitch marker
Skill Level
Familiar beginner to intermediate.
This pattern is beginner-friendly, but it does require comfort with color changes, attaching yarn directly to finished crochet rounds, and working into back loops and front loops.
Abbreviations
- FO: fasten off
- ch: chain
- sl st: slip stitch
- sc: single crochet
- inc: increase, 2 sc in the same stitch
- dec: decrease, sc 2 stitches together
- dc: double crochet
- BLO: back loops only
- st: stitch
- sts: stitches
- R: round
Pattern Notes
Work the main head and body in continuous rounds.
The head begins in white yarn, then changes to brown near the end of Round 7.
Rounds 7 and 8 include back-loop-only sections. These leave front loops available for adding the white neck feathers later.
Pause after Round 12 to add the beak and safety eyes before finishing the final decreases.
The wings, tail feathers, neck feathers, beak, and feet are attached directly to the body, making this a no-sew amigurumi pattern.
For a child-safe version, embroider the eyes instead of using plastic safety eyes.
Step-by-Step Instructions
Head
Start with white yarn.
R1: Ch 2. Work 8 sc into the 2nd ch from hook. (8)
R2: Inc around. (16)
R3: (Sc, inc) x 8. (24)
R4-R5: Sc around. (24)
R6: Sc 22, inc 2. (26)
R7: Sc 23, inc.
Switch to brown yarn.
Still in R7, work in BLO: inc, sc. (28)
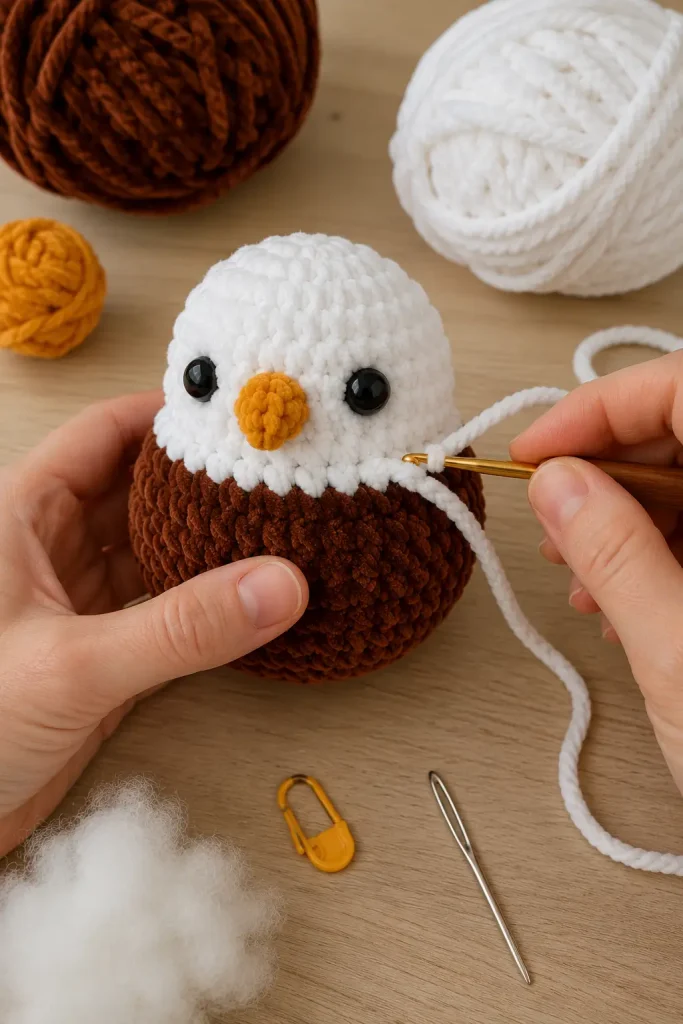
The white section forms the rounded head of the eagle. The brown yarn begins the body area, while the unused front loops will later create the fluffy white neck feather detail.
Body
Continue with brown yarn.
R8: In BLO: sc 24, inc. Then, inc, sc 2. (30)
R9: Sc 25, inc 2, sc 3. (32)
R10-R11: Sc around. (32)
R12: (Sc, dec) x 2. Sc 10. (Dec, sc) x 3. Dec 2, sc, dec. (24)
Pause here before fastening off. The beak and eyes are added before the body is fully closed.
Arms
This eagle pattern does not include arms. The side wings create the bird’s arm-like shape.
Wings
Make 2 using brown yarn.
Each wing is worked directly onto the side of the body and takes up 4 stitches of space between R8 and R9.
Hold the body upside down.
Insert your hook under the leftmost stitch where the wing should begin and pull brown yarn through.
Ch 2, then dc in the same stitch as the chain.
Work 3 dc into each of the next 3 stitches.
Ch 1 and turn.
Skip 1 stitch, sc in the next stitch, sc in the next stitch, then sl st.
FO and weave in the ends.
Repeat the same steps for the second wing on the opposite side.
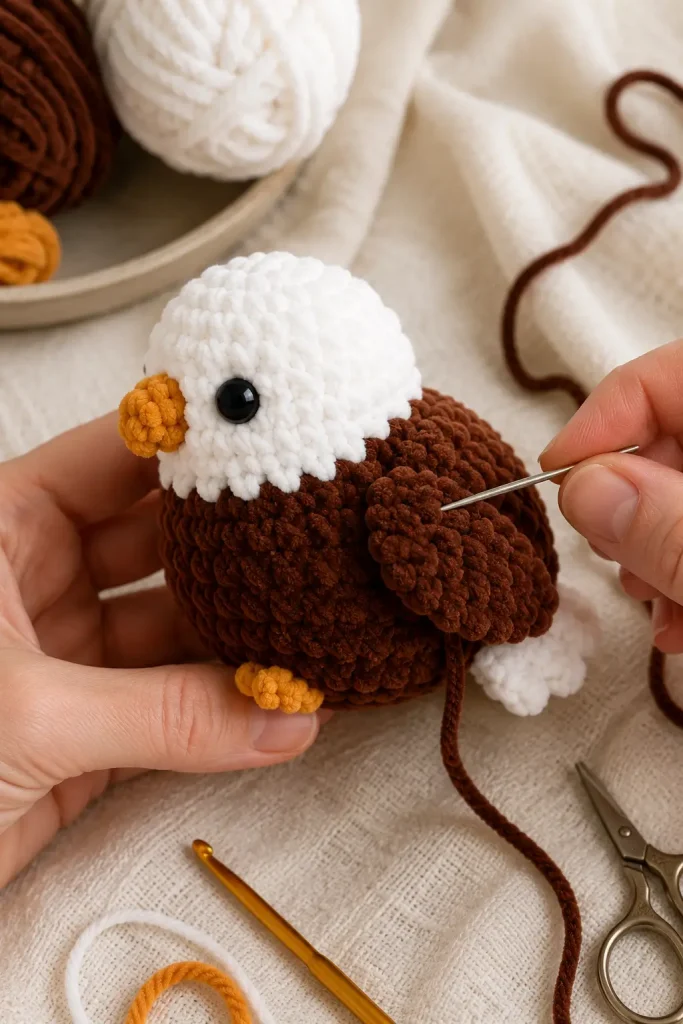
The wings should sit on the brown body section, just below the white neck feathers.
Legs
This pattern does not include full separate legs. The small orange feet are worked directly onto the lower body.
Feet
Make 2 using orange yarn.
Each foot takes up 2 stitches of space on the body between R12 and R13.
Insert your hook under 2 stitches where the first foot should go and pull orange yarn through.
Ch 1, then work 1 dc under the same 2 stitches.
FO and weave in the ends.
Repeat for the second foot.
The feet should sit near the lower front of the eagle so they peek out under the round brown body.
Ears
This bald eagle pattern does not include ears.
Tail
Use white yarn.
The tail is worked directly onto the back of the body between R11 and R12. It takes up 3 stitches of space.
Hold the body upside down.
Insert your hook under the leftmost stitch where the tail should begin and pull white yarn through.
In the same stitch, work: ch 2, dc, ch 2, sl st.
Repeat that same feather sequence into each of the next 2 stitches.
You should have 3 small white tail feathers.
FO and weave in the ends.
Face
Use orange yarn for the beak.
Fold the body in half to find the center front of the white head. The back of the bird is the pointier side where the tail will sit.
Hold the body upside down.
Insert your hook under 2 center stitches between R4 and R5.
Pull orange yarn through.
Ch 1, then work 1 dc under the same 2 center stitches.
FO with a long tail.
Pull both the starting and ending yarn tails inside the head and tie securely.
Pinch the beak gently to shape it into a point.
Insert the safety eyes about 2 stitches away from each side of the beak.
Once the beak and eyes are placed, stuff the head and body.
Continue stuffing as you work the final rounds.
R13: (Sc, dec) x 8. (16)
R14: Dec around. (8)
FO with a long tail and sew the remaining hole closed.
Neck Feathers
Use white yarn.
Find the first unworked front loop created in R7 of the body.
Insert your hook under that front loop and pull white yarn through.
Work (sl st, dc) around into the available front loops.
FO and weave in the ends.
This creates the soft white feathered edge that separates the eagle’s head from the brown body.
Assembly
This is a no-sew amigurumi pattern, so there are no separate pieces to attach after the main details are finished.
Check that the beak is centered and shaped neatly.
Make sure both eyes are securely attached.
Shape the white neck feathers so they sit evenly around the body.
Gently adjust both wings so they curve naturally against the sides.
Shape the 3 tail feathers at the back.
Check that both orange feet are placed evenly.
Weave in all remaining yarn ends securely.
Massage the stuffing gently so the eagle looks round, soft, and balanced.
Tips & Variations
Use chenille velvet yarn for the softest plush crochet toy. It gives the bald eagle a squishy, cuddly texture and helps the project work up quickly.
For a smaller keychain version, use worsted-weight cotton or acrylic yarn with a smaller hook. The original article notes that thinner yarn with a smaller hook can create a smaller backpack-buddy style eagle.
If you are new to color changes, place a stitch marker at the start of each round and take your time around R7 and R8. Those rounds are important because they create the front loops used for the neck feathers.
For a more realistic bald eagle look, use bright white for the head, deep chestnut brown for the body, and golden orange for the beak and feet.
For a softer baby bird style, try cream for the head, caramel brown for the body, and pastel yellow for the beak and feet.
Do not overstuff the body. A firm but soft round shape works best for this pocket plush.
If the safety eyes are difficult to place through chenille yarn, gently separate the stitches with your fingers before inserting the eye post.
For young children, embroider the eyes with black yarn instead of using plastic safety eyes.
FAQ
Is this pocket bald eagle pattern beginner-friendly?
Yes, it is suitable for familiar beginners. The main body uses basic crochet stitches, but you should be comfortable with color changes, BLO rounds, and attaching yarn directly to the body.
Is this really a no-sew crochet pattern?
Yes. The wings, tail feathers, feet, beak, and neck feathers are worked directly onto the body, so there are no separate pieces to sew on.
What yarn works best for this amigurumi eagle?
Super bulky chenille velvet yarn works best for a soft plush finish. You can also use thinner cotton or acrylic yarn if you want a smaller keychain-sized eagle.
How big is the finished eagle?
The finished eagle is approximately 3.5 inches or 9 cm tall when made with super bulky chenille yarn and a 5 mm hook.
Can I make this eagle without safety eyes?
Yes. Embroidered eyes are a great option, especially if the toy is intended for babies or young children.
Conclusion
This pocket bald eagle amigurumi is a sweet and quick no-sew crochet project with plenty of personality. The white head, brown body, tiny orange beak, fluffy neck feathers, little wings, tail feathers, and small orange feet all come together to create a charming handmade bird.
It is a lovely easy crochet pattern for gifts, keychains, ornaments, patriotic decor, craft fair tables, or animal amigurumi collections. Save this beginner crochet project for your next cozy crochet session and enjoy making a tiny plush eagle that fits right in the palm of your hand.




Rounds 6 and 7 are confusing. Round six 26 stitches, then round seven sc 23 inc 25 stitches. again in round 7 inc sc 28 stitches. I have pasted this section from the pattern below. Can you explain?
R6: Sc 22, inc 2. (26)
R7: Sc 23, inc.
Switch to brown yarn.
Still in R7, work in BLO: inc, sc. (28)