
Introduction
A tiny capybara plush is one of those crochet projects that instantly feels calm, cozy, and lovable. With its rounded body, soft little ears, tiny feet, and gentle face, this pocket-sized amigurumi is perfect for anyone who loves cute animal crochet patterns with a simple handmade charm.
This easy crochet pattern is designed as a small no-sew style capybara, which means the ears and feet are worked directly into the main body instead of being sewn on separately. That makes it a wonderful beginner crochet project for relaxing evenings, last-minute gifts, craft fair makes, keychains, or small desk buddies.
The linked inspiration pattern describes the Pocket Capybara as a quick no-sew plush amigurumi designed for bulky plush yarn, measuring about 3.5 inches long and 2.5 inches tall. This version below is written as an original pocket-style capybara tutorial with soft caramel and dusty mauve colors, giving the design a slightly different handmade look while keeping the same cute, compact capybara feeling.
Description
This pocket capybara amigurumi has a simple horizontal body shape, a rounded snout, small upright ears, four tiny feet, and glossy black eyes. The plush body is worked from the muzzle toward the back, creating a sweet side-profile animal shape that looks adorable in the palm of your hand.
The main body uses a warm caramel-brown shade, while the snout, ears, and little feet use a dusty mauve-brown accent. This small color change makes the finished plush look unique without losing the natural capybara-inspired style. The chunky chenille yarn gives the toy a soft, fluffy texture, making it perfect as a plush crochet toy, keychain charm, bag accessory, nursery decoration, or handmade gift.
Because this pattern uses basic stitches and minimal finishing, it is a great project for confident beginners who want to practice shaping, color changes, bobble-style feet, and small amigurumi details.
Materials
- Super bulky chenille yarn in caramel brown for the main body
- Small amount of dusty mauve-brown chenille yarn for the snout, ears, and feet
- Small amount of black yarn or embroidery thread for nostrils
- 5 mm crochet hook
- 10 mm black safety eyes
- Polyester fiberfill stuffing
- Stitch marker
- Yarn needle
- Scissors
- Optional keychain ring or hanging loop
Finished Size
Using super bulky chenille yarn and a 5 mm hook, the finished capybara measures approximately 3.5 to 4 inches long.
Your final size may vary depending on yarn thickness, hook size, and personal tension.
Skill Level
Beginner to confident beginner.
You should know how to work in continuous rounds, increase, decrease, change colors, crochet small chains, and stuff amigurumi.
Abbreviations
- MR: magic ring
- ch: chain
- sc: single crochet
- inc: increase, 2 sc in the same stitch
- dec: decrease, single crochet 2 stitches together
- sl st: slip stitch
- st: stitch
- sts: stitches
- FO: fasten off
- Bobble foot: work 4 unfinished sc stitches into the same stitch, then yarn over and pull through all loops on the hook
Pattern Notes
Work in continuous rounds unless stated otherwise.
Use a stitch marker to mark the first stitch of every round.
The capybara is worked from the snout toward the back of the body.
The ears are made directly into the body using small chain stitches.
The feet are made directly into the body using bobble stitches.
Stuff lightly but evenly. The body should be soft and rounded, not stretched.
If this toy is for a young child, embroider the eyes instead of using safety eyes.
Step-by-Step Instructions
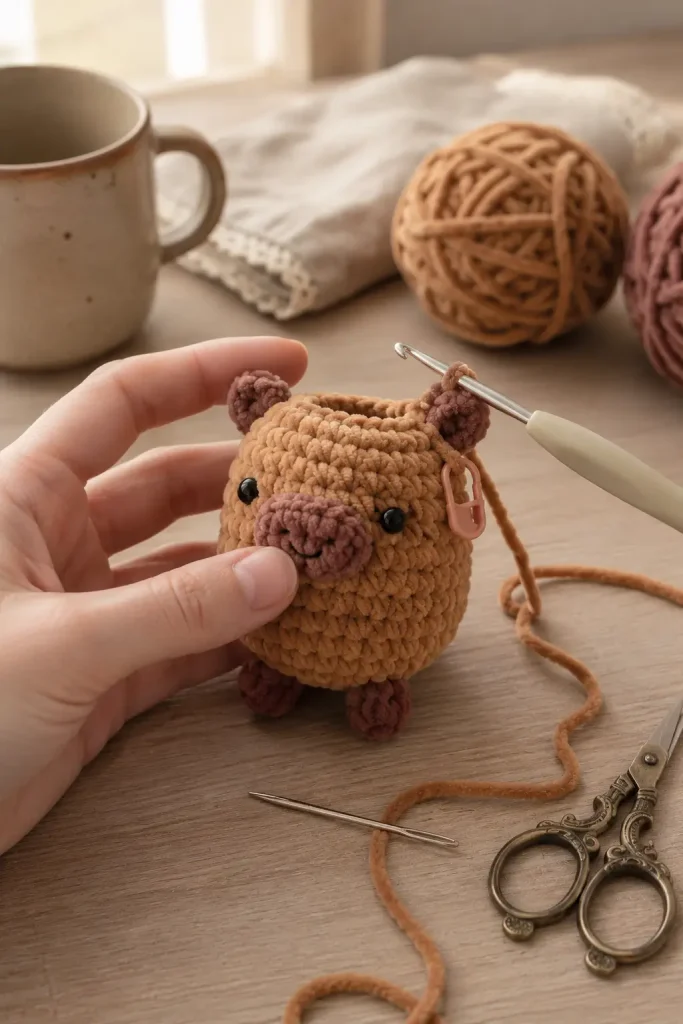
Head
The head and body are worked as one continuous piece.
Begin with dusty mauve-brown yarn for the snout.
R1: 6 sc in MR. (6)
R2: inc around. (12)
R3: (sc 1, inc) repeat around. (18)
Switch to caramel brown yarn.
R4: sc around. (18)
R5: (sc 2, inc) repeat around. (24)
R6: sc around. (24)
Insert safety eyes between R4 and R5, one on each side of the head area. Place them about 4–5 stitches back from the snout and slightly above the center line of the face.
The dusty mauve section forms the rounded muzzle. Make sure the color change sits neatly around the front of the face.
Body
Continue with caramel brown yarn.
R7: sc around. (24)
R8: sc around. (24)
R9: sc around. (24)
These rounds build the long, soft body shape. Keep your stitches even so the capybara stays smooth and rounded.
Arms
This capybara design does not include separate arms. The simple pocket plush shape uses only ears, feet, snout, and body shaping.
Legs
The feet are worked directly into the body using dusty mauve-brown yarn.
R10: sc 2, switch to dusty mauve-brown yarn and make 1 bobble foot in the next st, switch back to caramel brown, sc 3, switch to dusty mauve-brown and make 1 bobble foot in the next st, switch back to caramel brown, sc 5, switch to dusty mauve-brown and make 1 bobble foot in the next st, switch back to caramel brown, sc 3, switch to dusty mauve-brown and make 1 bobble foot in the next st, switch back to caramel brown, sc 7. (24)
The four bobble feet should sit along the lower sides of the body. If they shift slightly because of your tension, that is fine. You can gently shape them into place at the end.
R11: sc around. (24)
Begin stuffing the body lightly. Add small amounts at a time so the plush keeps a rounded shape.
R12: (sc 2, dec) repeat around. (18)
R13: sc around. (18)
Add more stuffing if needed.
R14: (sc 1, dec) repeat around. (12)
R15: dec around. (6)
FO, leaving a short tail. Use your yarn needle to weave through the front loops of the remaining stitches, pull closed, knot securely, and weave in the end.
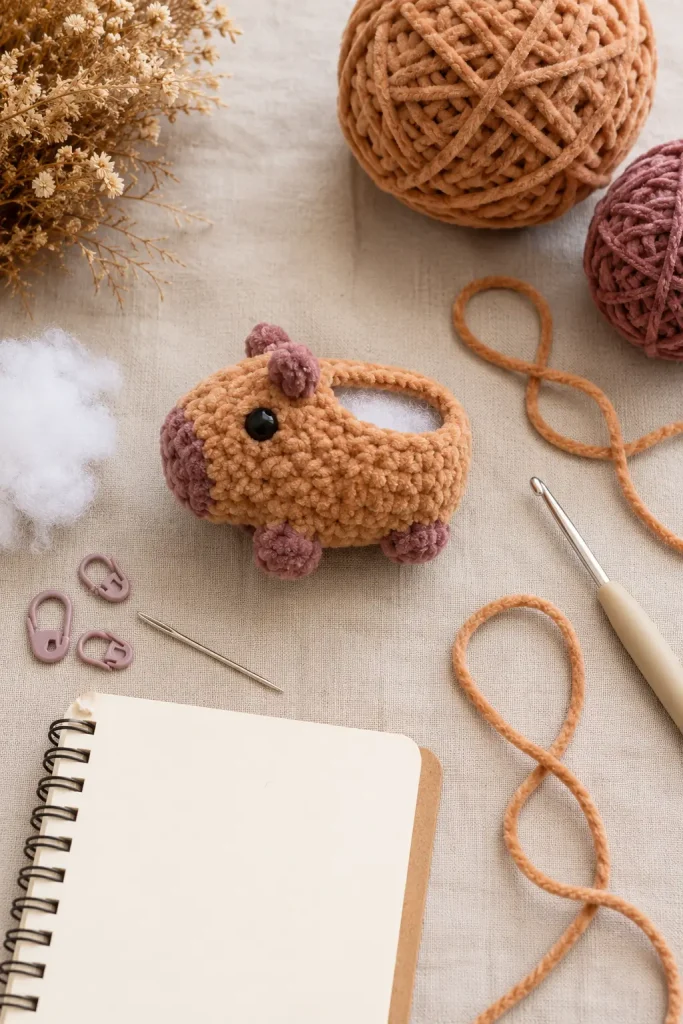
Ears
The ears are worked directly into the body during Round 7.
If you prefer to add them while working the body, replace Round 7 with this shaped round:
R7: sc 4, in the next st work: sc, ch 3, sc in 2nd ch from hook, sc in next ch, sl st back into the same base st; sc 14, in the next st work: sc, ch 3, sc in 2nd ch from hook, sc in next ch, sl st back into the same base st; sc 4. (24)
The chain sections create two small rounded ears. Use dusty mauve-brown yarn for the ears if you want stronger contrast, or keep them caramel brown for a softer blended look.
If you already worked Round 7 plain, you can still make the ears as tiny surface details:
Join dusty mauve-brown yarn where the first ear should sit.
Ch 3, sc in the 2nd ch from hook, sc in the next ch, sl st into the body.
FO and weave in the end.
Repeat on the opposite side.
Tail
Capybaras have very tiny tails, so this pocket-style design does not need a visible tail. Leaving the back smooth helps keep the plush simple, rounded, and keychain-friendly.
Face
Use black yarn or embroidery thread to add two tiny nostrils on the dusty mauve snout.
Place the nostrils near the center front of the muzzle.
Make each nostril with 1–2 small vertical stitches.
Optional: Add a very tiny straight mouth stitch under the nostrils for a sweeter expression.
Keep the face minimal. A simple expression gives the capybara its calm and gentle personality.
Assembly
Because this is a no-sew style pattern, most of the shaping is already built into the body.
Check that the ears are sitting evenly on top of the head.
Gently shape the snout with your fingers so it stays rounded.
Adjust the bobble feet so they point downward.
Add or shift stuffing before closing if the body looks uneven.
Close the back opening securely.
Weave in all loose yarn ends.
If making a keychain, sew a small hanging loop or keyring attachment at the top center of the body, slightly behind the ears. Stitch through the plush several times so the attachment is strong.
Tips & Variations
Use plush chenille yarn for the softest pocket capybara. It gives the toy a squishy texture and makes the project work up quickly.
For a smaller keychain version, use cotton or acrylic yarn with a smaller hook. The same stitch counts will create a firmer mini capybara.
Try a warm tan body with chocolate brown details for a natural capybara look.
For a pastel version, use soft beige with dusty pink feet and snout.
If you want a more realistic look, use a darker brown for the snout and feet instead of mauve.
Do not overstuff the body. A capybara should look softly oval, not round like a ball.
When making bobble feet, keep your tension loose enough that the feet puff outward.
Use pins or stitch markers to mark where the ears and feet should sit before working those rounds if you want extra symmetry.
For a baby-safe version, embroider the eyes and avoid keychain hardware.
FAQ
Is this pocket capybara crochet pattern beginner-friendly?
Yes. This is a beginner-friendly amigurumi pattern for crocheters who know how to work in continuous rounds, increase, decrease, and make simple color changes.
Is this really a no-sew pattern?
Yes. The body, head, ears, and feet can all be worked as one piece. The only finishing is closing the back, embroidering the face, and optionally adding a keychain loop.
What yarn works best for this plush crochet toy?
Super bulky chenille yarn works best if you want a soft and squishy plush. Cotton or acrylic yarn can also be used for a smaller, more structured capybara.
Can I make this capybara bigger?
Yes. Use thicker yarn and a larger hook, or hold two strands of yarn together. You may also want to use larger safety eyes so the face stays balanced.
Can I make it without safety eyes?
Yes. Embroidered eyes are a great option, especially for toys intended for babies or small children.
Conclusion
This pocket capybara amigurumi is a simple, sweet, and relaxing crochet project that works up quickly and feels adorable in the hand. With its soft oval body, tiny ears, rounded muzzle, little feet, and calm expression, it is a perfect plush crochet toy for gifts, keychains, craft fairs, desk decor, or handmade animal collections.
Save this easy crochet pattern for your next cozy yarn session, choose your favorite warm neutral colors, and enjoy making a tiny capybara friend full of handmade charm.



