Introduction
A raised leafy crochet stitch has such a rich, elegant look. It feels textured, cozy, and handmade in a way that instantly works for blankets, scarves, cushion covers, cardigans, and winter accessories.
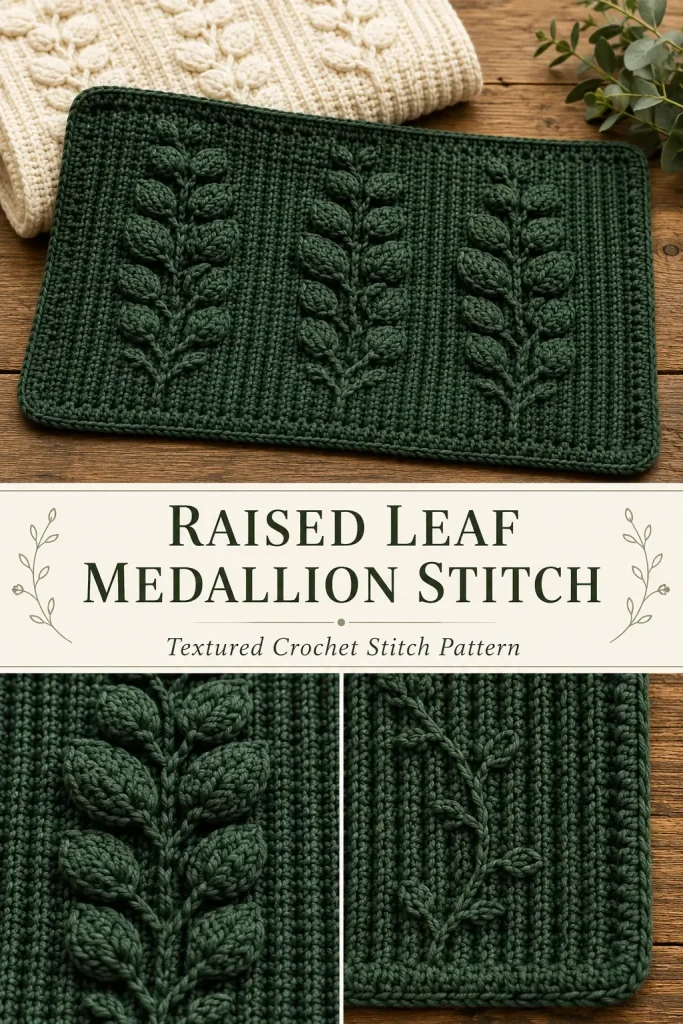
This Raised Leaf Medallion Crochet Stitch is an original stitch pattern designed to give a similar botanical, cable-like feeling without copying the premium pattern. Instead of using the exact construction from the original stitch, this version uses a simple ribbed background, raised puff-stitch leaves, and surface crochet vine lines to create a textured leaf medallion effect that is much easier to follow.
It is best for confident beginners or intermediate crocheters who want a decorative stitch that looks advanced but is built from manageable steps.
Description
This crochet stitch pattern creates vertical columns of raised leaf shapes on a soft ribbed background. The main fabric is worked in half double crochet and back-loop rows, while the leaf details are made with puff stitches placed in mirrored groups.
After the main panel is finished, surface slip stitch lines are added between the leaf columns to create a raised vine-like look. This gives the fabric the feeling of leafy cables without needing complicated post-stitch crossing.
The finished texture is thick, warm, and decorative. It works beautifully in forest green, cream, ivory, oatmeal, dusty blue, sage, or soft gray.
Materials
- Worsted weight yarn or DK weight yarn
- 5 mm crochet hook for worsted weight yarn
- 4 mm crochet hook for DK weight yarn
- Yarn needle
- Scissors
- Stitch markers, optional
Finished Swatch Size
Using worsted weight yarn and a 5 mm hook:
- Starting chain of 38 gives a swatch about 10–11 inches wide
- Work more repeats for scarves, blankets, or panels
Gauge
Gauge is not critical for a stitch pattern.
For wearable items, make a swatch first and adjust hook size until the fabric feels soft and flexible.
Abbreviations
- ch: chain
- sc: single crochet
- hdc: half double crochet
- dc: double crochet
- sl st: slip stitch
- BLO: back loop only
- st: stitch
- sts: stitches
- sk: skip
- puff: puff stitch
- RS: right side
- WS: wrong side
- FO: fasten off
Puff Stitch
Yarn over, insert hook into indicated stitch, yarn over and pull up a loop.
Repeat this 3 more times in the same stitch.
You should have 9 loops on your hook.
Yarn over and pull through all 9 loops.
Ch 1 to close the puff.
Keep the puff stitches soft and raised, not tight.
Stitch Multiple
Use a multiple of 12 + 2.
For the sample:
Ch 38.
This gives 36 pattern stitches plus 2 edge stitches.
Pattern Notes
The fabric is worked flat in rows.
Ch 1 at the beginning of each row does not count as a stitch.
The first and last stitch are edge stitches.
Puff stitches are worked on the right side only.
Wrong-side rows are simple half double crochet rows.
Surface crochet vine lines are added after the panel is finished.
This is an original stitch pattern inspired by leafy texture, not the premium pattern from the linked page.
Step-by-Step Instructions
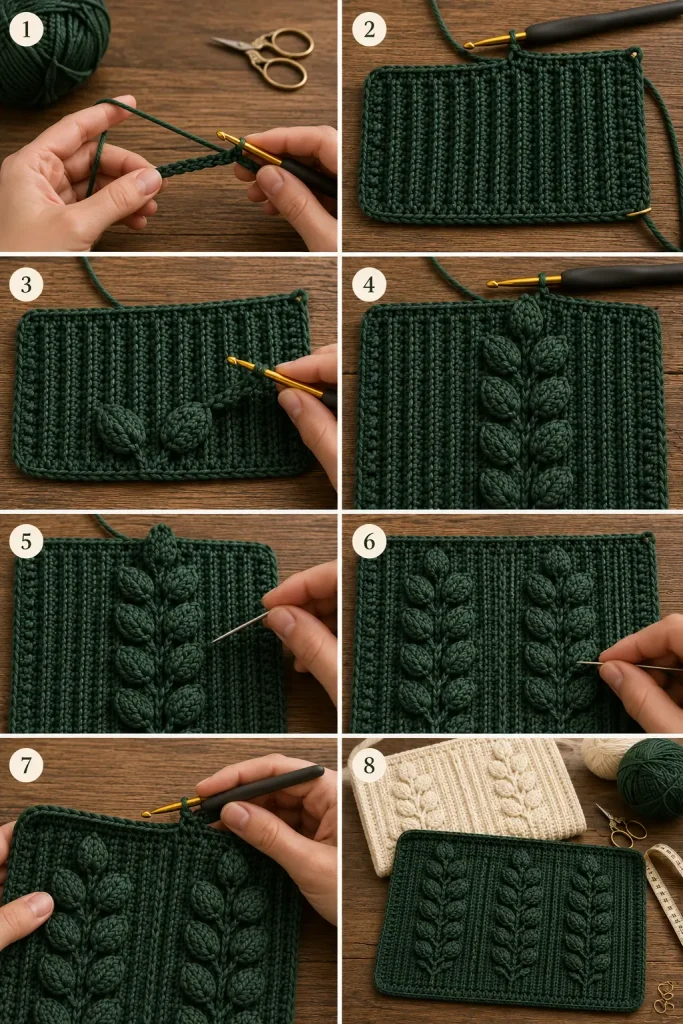
Foundation Row
Ch 38.
Row 1
Hdc in the 2nd ch from hook and in each ch across.
You should have 37 hdc.
Ch 1, turn.
Row 2
Hdc in BLO of each st across.
Ch 1, turn.
Row 3
Hdc in first st.
Repeat across:
Hdc in next 3 sts, puff in next st, hdc in next 4 sts, puff in next st, hdc in next 3 sts.
Hdc in last st.
Ch 1, turn.
This row begins the lower raised leaf points.
Row 4
Hdc in each st across.
Ch 1, turn.
Row 5
Hdc in first st.
Repeat across:
Hdc in next 4 sts, puff in next st, hdc in next 2 sts, puff in next st, hdc in next 4 sts.
Hdc in last st.
Ch 1, turn.
This brings the leaf shape closer toward the center.
Row 6
Hdc in each st across.
Ch 1, turn.
Row 7
Hdc in first st.
Repeat across:
Hdc in next 5 sts, puff in next st, hdc in next st, puff in next st, hdc in next 5 sts.
Hdc in last st.
Ch 1, turn.
This forms the center of the medallion.
Row 8
Hdc in each st across.
Ch 1, turn.
Row 9
Hdc in first st.
Repeat across:
Hdc in next 4 sts, puff in next st, hdc in next 2 sts, puff in next st, hdc in next 4 sts.
Hdc in last st.
Ch 1, turn.
Row 10
Hdc in each st across.
Ch 1, turn.
Row 11
Hdc in first st.
Repeat across:
Hdc in next 3 sts, puff in next st, hdc in next 4 sts, puff in next st, hdc in next 3 sts.
Hdc in last st.
Ch 1, turn.
This closes the raised leaf medallion shape.
Row 12
Hdc in each st across.
Ch 1, turn.
Row 13
Hdc in BLO of each st across.
Ch 1, turn.
Row 14
Hdc in BLO of each st across.
Ch 1, turn.
Repeat Section
Repeat Rows 3–14 for the pattern.
Continue until your swatch, scarf, blanket panel, or project reaches your desired length.
End after Row 13 or Row 14 for a clean ribbed finish.
Surface Crochet Vine Lines
This step creates the raised vertical cable-style lines between the leaf medallions.
Use the same yarn color for a subtle texture, or use a slightly darker shade for more contrast.
Place the finished panel with the right side facing up.
Join yarn at the bottom of one vertical line between two puff-stitch columns.
Insert hook through the fabric.
Pull up a loop.
Surface sl st upward in a straight vertical line, working between the puff stitches.
Keep the slip stitches loose so the fabric does not pucker.
Continue to the top of the panel.
FO and weave in ends.
Repeat between each medallion column.
For a more decorative look, add two surface slip stitch lines around each column, one on each side of the leaf shapes.
Optional Edge Border for a Swatch or Blanket
Join yarn in any corner.
Border Round 1
Ch 1.
Sc evenly around all four sides.
Work 3 sc in each corner.
Join with sl st to first sc.
Border Round 2
Ch 1.
Sc in each st around.
Work 3 sc in the center stitch of each corner.
Join with sl st.
FO and weave in ends.
Finishing
Weave in all ends securely.
Lay the fabric flat.
Gently stretch the stitch pattern with your hands.
Lightly steam-block if your yarn allows it.
Do not press directly on the puff stitches, because you want the leaves to stay raised.
Tips & Variations
Use forest green for a rich botanical stitch sample.
Use cream or ivory for an heirloom-style blanket panel.
Use oatmeal beige for a cozy farmhouse texture.
Use dusty blue or soft gray for a modern winter scarf.
For stronger raised leaves, use a slightly smaller hook for tighter puff stitches.
For a softer drape, use a slightly larger hook.
For blankets, work several panels and join them together.
For scarves, repeat the stitch pattern until the scarf reaches your preferred length.
For cushion covers, make two panels and seam them around a pillow insert.
Project Ideas Using This Stitch
- Textured crochet scarf
- Decorative throw blanket
- Crochet cushion cover
- Winter cowl
- Sweater front panel
- Table runner
- Bag panel
- Baby photo blanket, supervised use only
FAQ
Is this the exact Leafy Medallion stitch from the page?
No. The original page lists the stitch as part of a premium library. This is a new original version made with a raised leafy texture, different construction, and beginner-friendlier instructions.
Is this stitch beginner-friendly?
It is best for confident beginners or intermediate crocheters. The main fabric is simple, but the puff placement and surface crochet need careful counting.
Can I skip the surface crochet lines?
Yes. The puff leaves will still show without the surface crochet lines, but the vine lines make the texture look more polished and cable-like.
What yarn works best?
Smooth yarn with good stitch definition works best. Avoid very fuzzy yarn because it can hide the leaf texture.
Can I use this stitch for a blanket?
Yes. Use the stitch multiple to create the width you want, then repeat the row section until the blanket reaches your desired length.
Conclusion
The Raised Leaf Medallion Crochet Stitch is a beautiful way to create botanical texture without needing the original premium pattern. The ribbed background, raised puff leaves, and surface crochet vine lines work together to create a rich, cozy, handmade fabric.
Use it for scarves, blankets, cushions, garments, or home decor pieces in soft natural colors. It gives your crochet project a detailed leafy look while keeping the construction clear and realistic.




Hi! I have been trying to work this pattern for a few days and just can’t seem to get it right. I know I’m close but am just missing it. Do you happen to have a video tutorial available? I’d appreciate the bit of extra help it might be able to lend. The pattern is absolutely gorgeous by the way!!