Intro
This simple ribbed crochet hat is one of those satisfying projects that looks polished without requiring complicated shaping. The entire beanie begins as a flat rectangle, so there are no increases, decreases, or difficult rounds to keep track of.
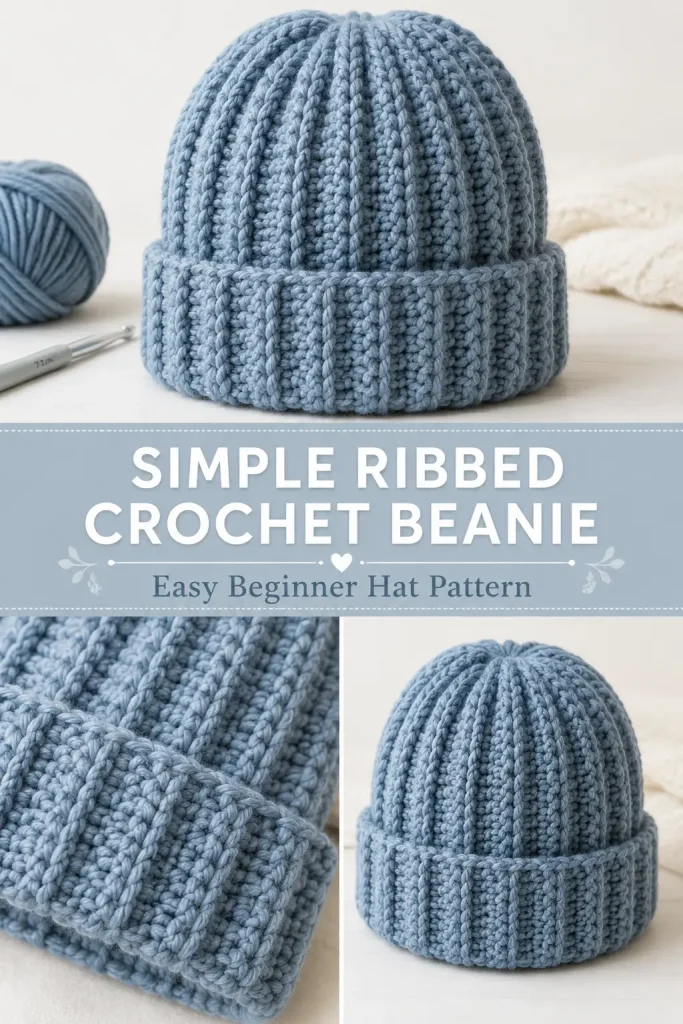
The deep vertical ribbing gives the finished hat a cozy, slightly stretchy texture, while the wide folded brim creates the chunky, voluminous look shown in the reference design. It is a great beginner crochet project and works especially well with thick, soft yarn.
Description
This chunky crochet beanie is made from a rectangular panel worked back and forth in half double crochet through the back loop only. That simple technique creates the pronounced vertical ribs visible across both the crown and folded cuff. Once the rectangle reaches the required head circumference, the short edges are joined to form a tube. One end is gathered tightly to create the crown, while the opposite edge remains open and is folded upward to create a approximately 7 cm brim. The reference style is soft, stretchy, slightly slouchy at the crown, and works beautifully in muted shades such as dusty blue, cream, oatmeal, gray, or sage.
Materials
- Bulky or chunky yarn, approximately 100 m per 100 g
- About 100 g for a shorter beanie without a folded brim
- Approximately 150–200 g for a hat with a deep folded brim
- 7 mm crochet hook
- Large-eye yarn needle
- Scissors
- Measuring tape
- Stitch marker, optional
Abbreviations
- ch – chain
- hdc – half double crochet
- BLO – back loop only
- sl st – slip stitch
- st – stitch
Pattern Notes
- US crochet terminology is used.
- The hat is crocheted sideways as one rectangular piece.
- Every ribbed row is worked in the back loop only.
- Ch 1 at the beginning of a row does not count as a stitch.
- The starting chain determines the height of the hat.
- The number of rows determines the circumference.
- The sample size below is suitable for an average adult, but measuring is more reliable than following a fixed row count.
- The ribbed fabric stretches, so the rectangle should be slightly smaller than the actual head circumference for a snug fit.
- Difficulty: beginner.
Finished Size
For an average adult hat with a folded brim:
- Hat height before folding: approximately 27 cm
- Folded brim depth: approximately 7 cm
- Finished height after folding: approximately 20 cm
- Rectangle width before seaming: approximately 46–50 cm, depending on desired stretch and yarn
The reference construction uses approximately 34 starting chains and 36 rows, but yarn and tension can change the measurements considerably.
Step-by-Step Instructions
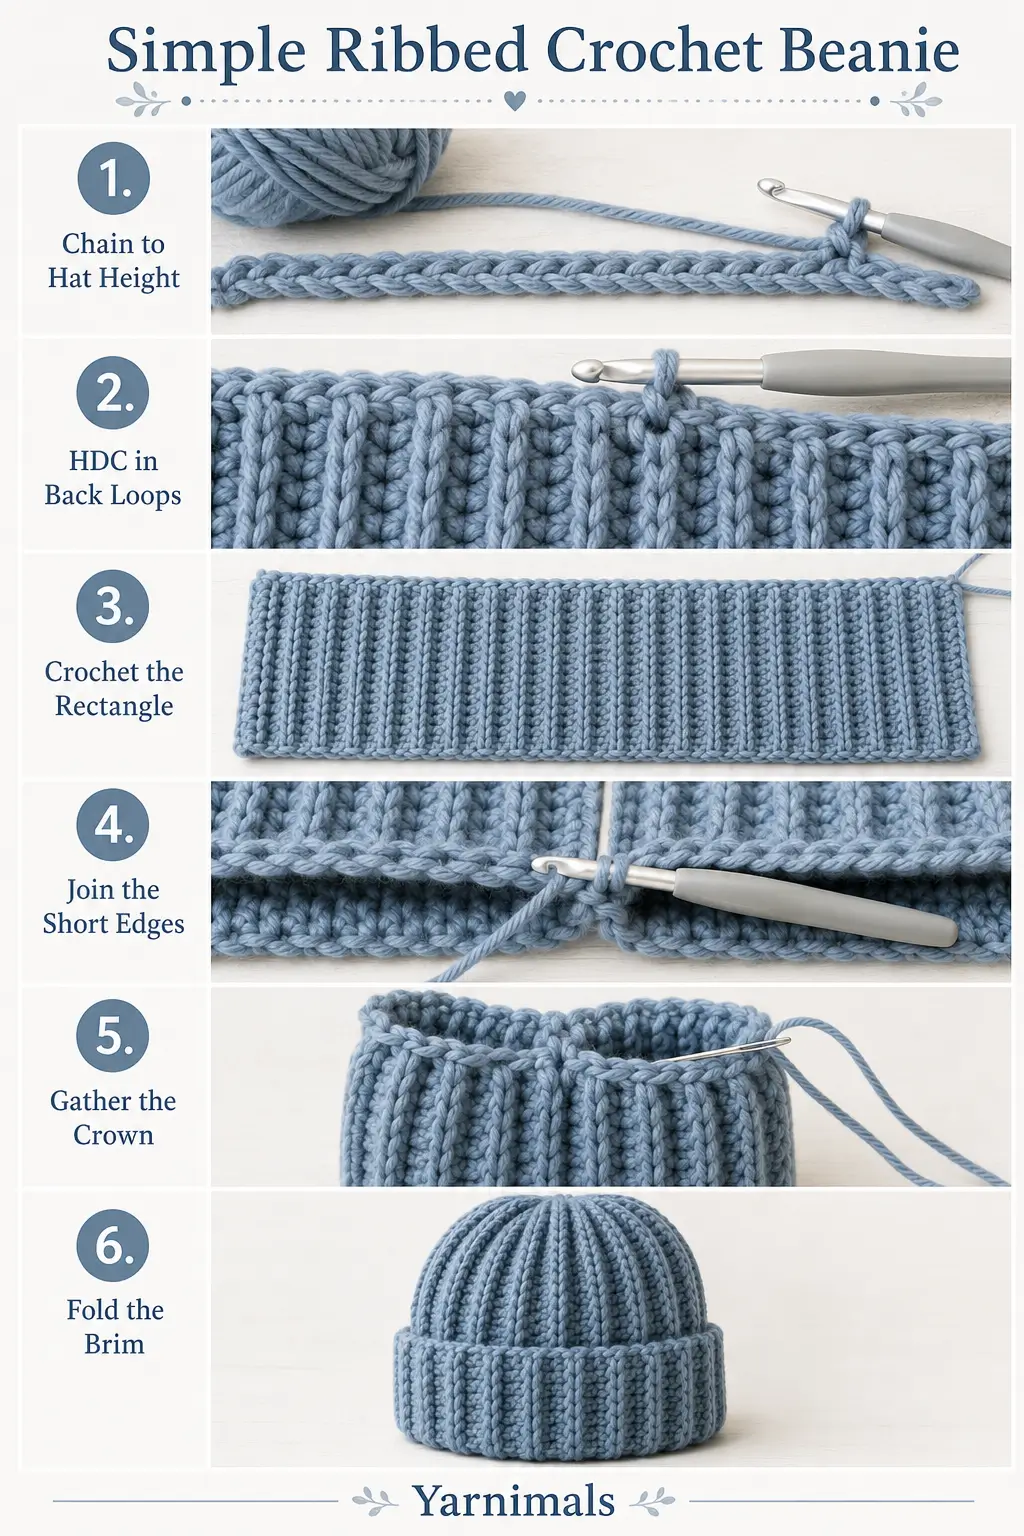
Step 1: Decide the Hat Height
First decide whether you want a folded brim.
For a simple beanie without a cuff, aim for approximately:
20 cm total height
For the chunky folded-brim style shown in the reference, add approximately 7 cm:
20 cm + 7 cm = 27 cm
Your starting chain should measure approximately 27 cm without being stretched.
Crochet the Hat Rectangle
Foundation Chain
Using the 7 mm crochet hook:
Ch 34, or chain until the foundation measures approximately 27 cm.
The exact number of chains is less important than achieving the correct height.
For the sample:
Ch 34
Row 1
Hdc in the second ch from the hook.
Hdc in each remaining chain across.
33 hdc
Ch 1 and turn.
Row 2
Hdc in the BLO of the first stitch.
Continue working 1 hdc BLO in every stitch across.
33 hdc
Ch 1 and turn.
You should already begin to see raised ribbing forming across the fabric.
Row 3
Hdc BLO in each stitch across.
33 hdc
Ch 1 and turn.
Remaining Rows
Repeat Row 3 until the rectangle is long enough to wrap comfortably around the head.
For an average adult using chunky yarn, approximately:
36 rows
may produce the correct circumference.
However, check the actual fit rather than relying only on the row number.
The fabric should wrap around the head with a small amount of negative ease. The two short edges should meet comfortably without needing to stretch the fabric excessively.
Checking the Fit
Before joining the hat, wrap the rectangle around the widest part of the head.
The ribbing should stretch gently.
For a head circumference around 54–57 cm, a rectangle measuring roughly 46–50 cm across may work well because the ribbed fabric stretches.
If the rectangle is too loose, remove a few rows.
If it is too tight, add more rows.
This makes the pattern easy to adapt for different sizes.
Joining the Hat
Once the rectangle is the correct width, do not fasten off.
Bring the first and last rows together so the rectangle forms a tube.
Make sure the ribbed columns are aligned.
Using the working yarn and crochet hook, join the two short edges together with slip stitches.
Insert the hook through the corresponding edge loops of both layers.
Work:
1 sl st through both edges at each row end
Continue all the way across.
Keep the slip stitches relaxed. A tight seam can prevent the hat from stretching properly.
Fasten off, leaving a long yarn tail for closing the crown.
The joined fabric should now look like a ribbed tube.
Closing the Crown
Turn the hat so the preferred side of the fabric will become the outside.
Thread the long yarn tail onto a large-eye yarn needle.
Working around one open end of the tube, pass the needle through the edge of each rib or row end.
Continue around the entire opening.
Once you return to the starting point, slowly pull the yarn.
The opening will gather together like a drawstring.
Pull firmly until the crown closes.
Pass the needle through several opposite sections of the gathered crown to secure it.
Make several strong stitches across the center so the opening cannot loosen.
Knot securely.
Weave the remaining yarn tail into the inside of the hat.
Forming the Folded Brim
Turn the hat right side out.
Fold the bottom edge upward approximately:
7 cm
Adjust the fold evenly around the entire hat.
The ribbing should continue vertically from the crown through the folded cuff, creating the thick, structured look of the reference beanie.
You do not need to sew the brim permanently in place unless you prefer a fixed cuff.
Finishing
Weave in all remaining yarn ends securely.
Gently stretch the hat vertically and horizontally with your hands to settle the ribbing.
Shape the gathered crown so the folds distribute evenly instead of collecting on one side.
Arrange the brim until it is the same depth all the way around.
Your chunky ribbed crochet beanie is finished.
Sizing Guide
The easiest way to resize this crochet hat is to adjust the foundation chain and number of rows separately.
Child
Make the starting chain approximately 20–23 cm for a folded-brim hat.
Continue the ribbed rows until the rectangle fits comfortably around the child’s head with slight negative ease.
Teen or Small Adult
Aim for approximately 24–26 cm in starting-chain length with a folded brim.
Work rows until the rectangle measures approximately 44–47 cm across, depending on stretch.
Average Adult
Aim for approximately 26–28 cm in starting-chain length.
Work approximately 46–50 cm of rows before joining.
Large Adult
Keep the desired hat height but add enough rows for the rectangle to comfortably stretch around the head.
Because yarn thickness and crochet tension vary, fitting the rectangle directly is more accurate than relying on a universal stitch count.
Tips & Variations
For the closest look to the reference hat, choose a thick yarn with good stitch definition. A wool-acrylic blend works especially well because it combines warmth, softness, and enough structure to make the ribs stand out.
Dusty blue creates a soft winter look, while cream or oatmeal gives the hat a classic neutral style. Charcoal, olive, burgundy, and muted rose would also work beautifully.
If your ribbing looks too loose, try dropping down half a hook size. If the fabric feels stiff and does not stretch comfortably, use a slightly larger hook.
For a shorter beanie, reduce the starting chain. For a deeper cuff, add extra length to the starting chain before beginning the first row.
You can also make the hat without a folded brim by starting with a chain that measures only the desired finished hat height.
Avoid making the rectangle exactly the same width as the head circumference. Back-loop ribbing stretches considerably, and a small amount of negative ease helps the hat stay comfortably in place.
FAQ
Why is my crochet hat too loose?
The rectangle may be too wide before joining. Ribbed half double crochet stretches, so the panel normally needs to be slightly smaller than the head circumference.
Can I make this hat with thinner yarn?
Yes, but the stitch and row counts will change. Instead of following the sample numbers, crochet the foundation chain to the required hat height and continue adding rows until the panel reaches the appropriate circumference.
Do I have to use half double crochet in the back loop?
For this particular look, yes. Working into the back loop only is what creates the strong vertical ribbing that gives this simple crochet hat its knitted appearance.
Conclusion
This easy ribbed crochet beanie proves that a beautiful winter hat does not need complicated shaping. A simple rectangle, stretchy back-loop ribbing, one seam, and a gathered crown are enough to create a warm chunky hat with a polished folded brim. Try it in a soft neutral shade or your favorite winter color, and save the pattern for quick handmade gifts and cozy seasonal projects.



