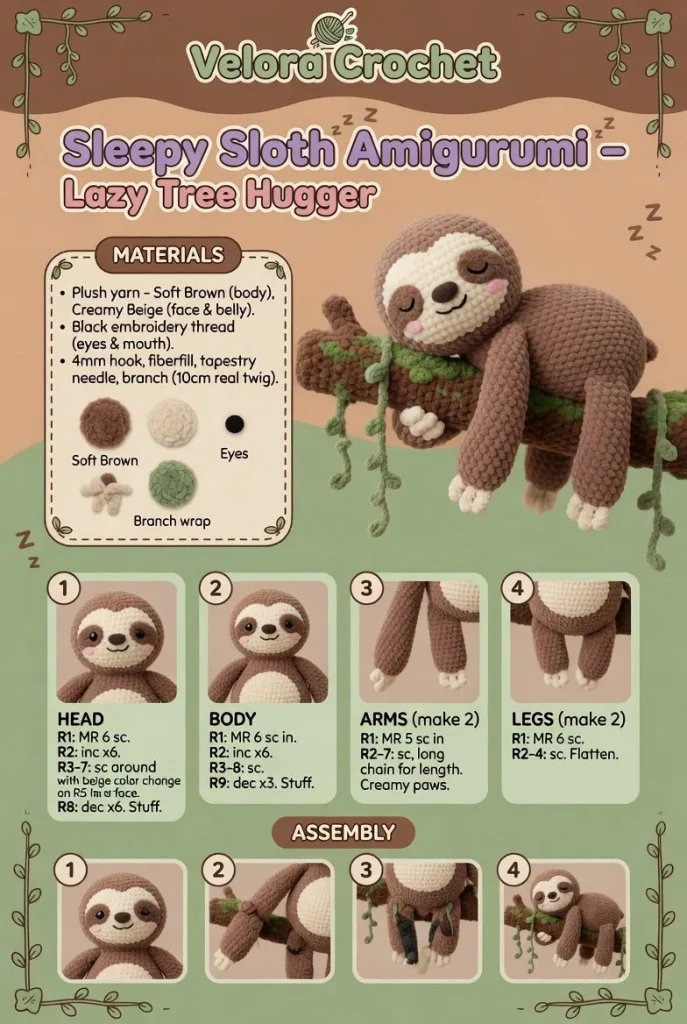
Get ready to bring a touch of whimsy into your space with this charming Sleepy Sloth Amigurumi pattern! Perfect for both seasoned crafters and those just starting their crochet journey, this pattern provides a step-by-step guide to create your very own lazy tree hugger.
Materials
- Worsted weight yarn in brown, cream, and dark brown
- 3.5 mm crochet hook
- Fiberfill stuffing
- Yarn needle
- Stitch marker
- Safety eyes (8mm)
- Scissors
Abbreviations
- ch = chain
- sc = single crochet
- inc = increase (2 sc in same stitch)
- dec = decrease (sc two stitches together)
- rnd = round
- st = stitch
Pattern Instructions
Head
- Rnd 1: Start with a magic ring, 6 sc in ring (6)
- Rnd 2: Inc in each st around (12)
- Rnd 3: (sc in next st, inc) around (18)
- Rnd 4: (sc in next 2 st, inc) around (24)
- Rnd 5-8: sc in each st around (24)
- Rnd 9: (sc in next 2 st, dec) around (18)
- Rnd 10: (sc in next st, dec) around (12)
- Rnd 11: dec around (6)
- Fasten off and leave a long tail for sewing.
Body
- Rnd 1: Magic ring, 6 sc in ring (6)
- Rnd 2: Inc in each st around (12)
- Rnd 3: (sc in next st, inc) around (18)
- Rnd 4: (sc in next 2 st, inc) around (24)
- Rnd 5-10: sc in each st around (24)
- Rnd 11: (sc in next 2 st, dec) around (18)
- Rnd 12: (sc in next st, dec) around (12)
- Rnd 13: dec around (6)
- Fasten off, leaving a long tail.
Arms
Make 2:
- Rnd 1: Magic ring, 6 sc in ring (6)
- Rnd 2: Inc in each st around (12)
- Rnd 3-5: sc in each st around (12)
- Rnd 6: (sc in next st, dec) around (8)
- Rnd 7: dec around (4)
- Fasten off, leaving a long tail.
Legs
Make 2:
- Rnd 1: Magic ring, 6 sc in ring (6)
- Rnd 2: Inc in each st around (12)
- Rnd 3-6: sc in each st around (12)
- Rnd 7: (sc in next st, dec) around (8)
- Rnd 8: dec around (4)
- Fasten off, leaving a long tail.
Ears / Details
Make 2:
- Rnd 1: Magic ring, 5 sc in ring (5)
- Rnd 2: (sc in next st, inc) around (7)
- Rnd 3: sc in each st around (7)
- Fasten off, leaving a long tail.
Accessories (if any)
For extra details, you can add a small crocheted leaf to enhance the sloth’s environment.
Assembly & Finishing
- Stuff the head, body, arms, and legs with fiberfill.
- Attach safety eyes to the head.
- Sew the head to the body.
- Attach arms to the sides of the body.
- Sew legs to the bottom of the body.
- Position and sew ears onto the head.
- Weave in all ends neatly.
Tips for Best Results
- Use a stitch marker to keep track of rounds.
- Ensure all pieces are securely stuffed for stability.
- Take your time while sewing, ensuring that each piece is attached firmly.
- Experiment with colors to personalize your sloth.
- Always check your tension; tighter stitches will help your amigurumi hold its shape better.
Conclusion
Your Sleepy Sloth Amigurumi is now complete! This delightful crochet pattern is not only a fun project but also a great way to practice beginner crochet techniques. Embrace your creativity and consider making a whole sloth family for added charm! Happy crocheting!



