Spa Mesh Crochet Soap Saver
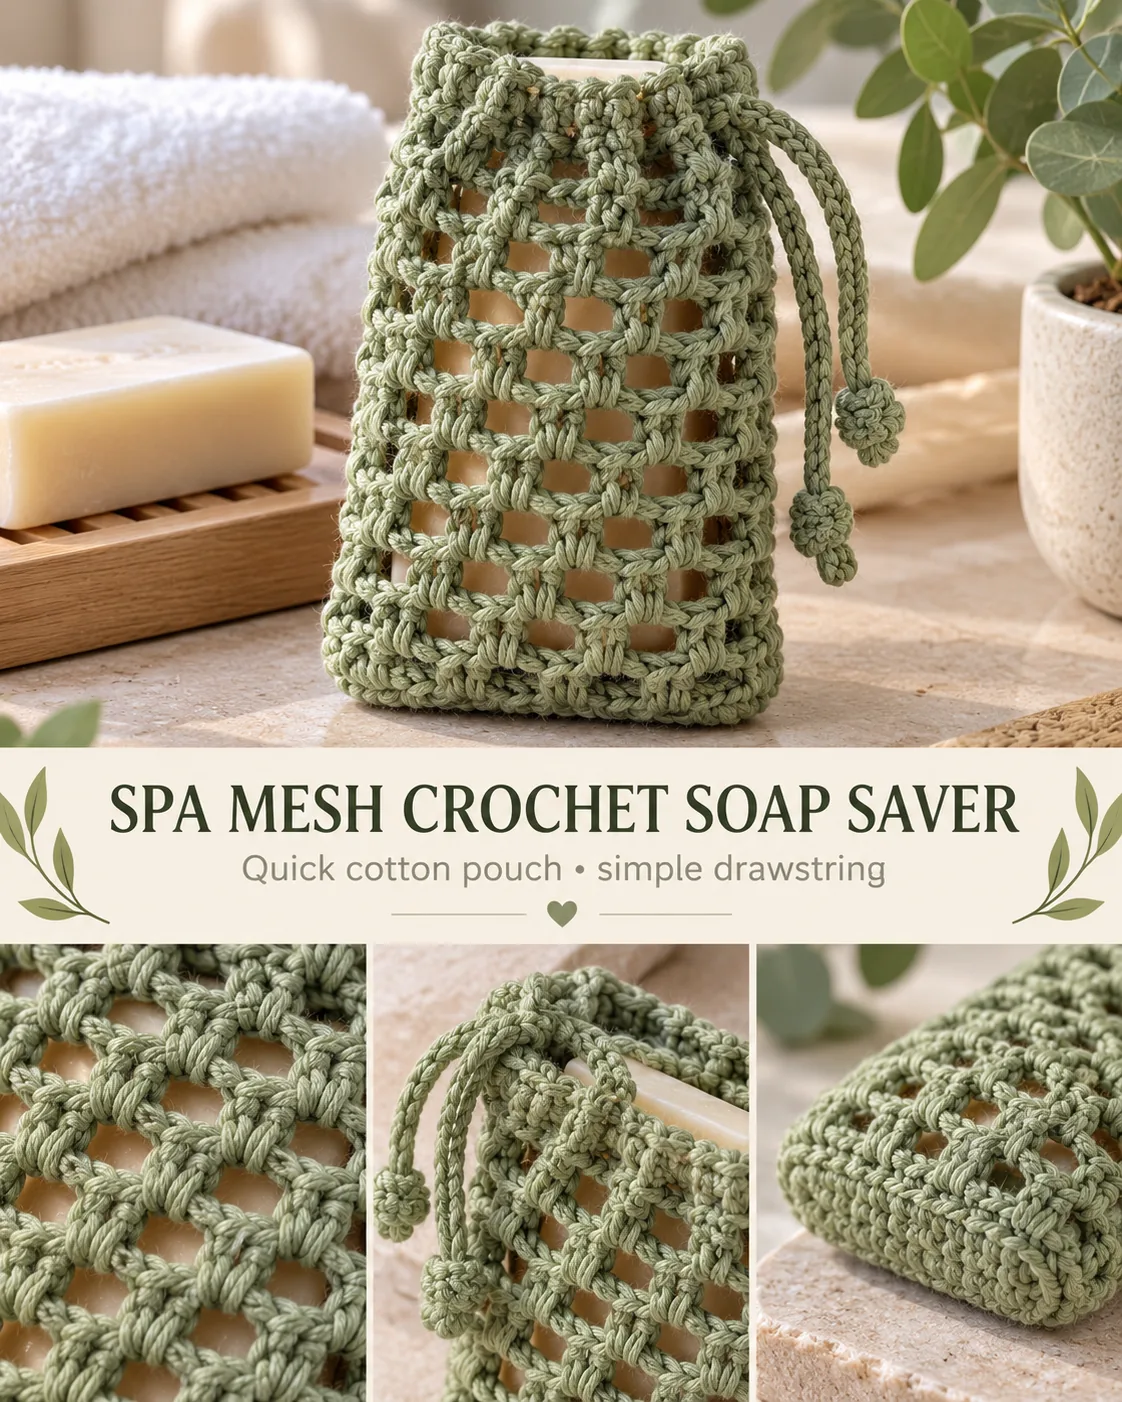
The Spa Mesh Crochet Soap Saver is a small one-piece cotton pouch made from a flat rectangle, one vertical fold, one side seam, one bottom seam, and one handmade drawstring. This corrected Yarnimals version keeps every row at a defined 25-position width so the mesh stays aligned and the finished pouch closes cleanly around a standard bar of soap.
The panel is worked from bottom to top. Row 1 and Row 15 are solid single crochet. Rows 2-14 form a straight grid of 13 double-crochet columns separated by 12 chain-1 spaces. The 7-inch-wide panel is then folded in half to create the 3.5-inch pouch width.
Finished Size and Project Specification
- Finished pouch: approximately 3.5 inches wide x 5.25 inches tall (9 x 13.5 cm)
- Flat panel before folding: approximately 7 inches wide x 5.25 inches tall
- Foundation width: 25 stitches
- Mesh rows: 13 total, Rows 2-14
- Each mesh row: 13 dc columns + 12 ch-1 spaces
- Yarn: #4 worsted-weight 100% cotton
- Color: soft sage green
- Hook: 4.0 mm G-6
- Construction: flat rectangle folded vertically; bottom and one side closed; top left open
- Drawstring: one slip-stitched cord threaded through all 12 openings of the uppermost mesh row
Materials
- 70-90 yards / 64-82 m of smooth #4 cotton yarn in sage green
- 4.0 mm crochet hook
- Tapestry needle
- Scissors
- 2 locking stitch markers
- A standard bar of soap for the final fit check
Gauge
Gauge is less critical than the finished panel measurement, but a useful target is approximately 14 sc = 4 inches across the solid rows and approximately 10 mesh rows = 4 inches in height after the fabric has relaxed.
Before seaming, the panel should measure close to 7 inches across and 5.25 inches high. If your panel is much narrower or wider, change hook size before continuing rather than relying on the mesh to stretch around the soap.
Abbreviations
- ch = chain
- sc = single crochet
- dc = double crochet
- sl st = slip stitch
- sp = space
- st(s) = stitch(es)
Mesh Structure
The mesh alternates one dc column with one ch-1 space. The dc columns must stack directly over the dc columns from the previous row. Do not work the new dc into the chain space. Keeping the columns aligned is what produces the straight square-grid appearance.
The turning ch 4 on each mesh row counts as one dc plus one ch-1 space. When the next row is worked, treat the top of the third chain as the top of that edge dc and the fourth chain as the adjacent ch-1 space.
Construction Overview
Crochet 15 rows total. Rows 1 and 15 are solid. Rows 2-14 are mesh. Fold the panel vertically through the center of its 25-stitch width so stitch 13 of the solid bottom row sits at the fold. The two short row-end edges align to become the side seam. The two halves of Row 1 align to become the bottom seam. Row 15 forms the open rim. Thread the drawstring through the 12 chain-1 spaces in Row 14.
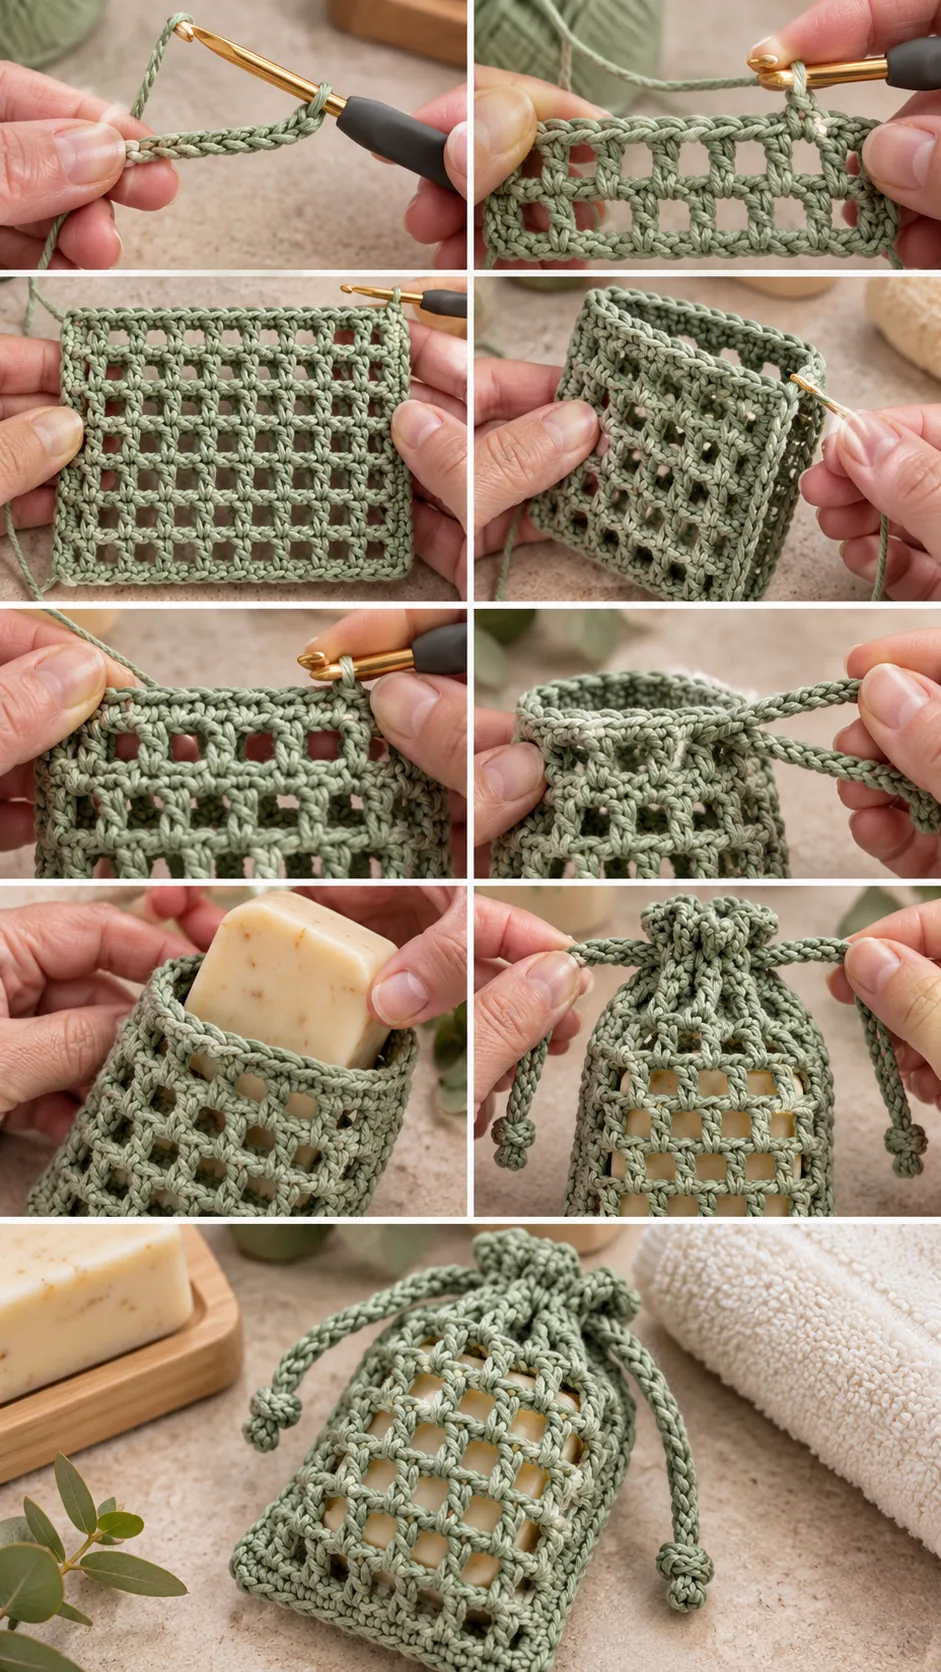
Detailed Pattern
Flat Mesh Panel
Ch 26.
Row 1: Sc in 2nd ch from hook and in each remaining ch across. Turn. 25 sc.
Row 2: Ch 4; the first 3 chains count as the first dc and the fourth chain counts as the first ch-1 space. Skip the next base stitch and dc in the next stitch. *Ch 1, skip the next stitch, dc in the next stitch* across. Turn. 13 dc columns including the turning chain, 12 ch-1 spaces.
Row 3: Ch 4. Skip the first ch-1 space and dc in the next dc. *Ch 1, dc in the next dc* across, working only into the tops of the dc columns and not into the chain spaces. Turn. 13 dc, 12 ch-1 spaces.
Rows 4-14: Repeat Row 3. After Row 14 you have worked 13 mesh rows total, each with 13 dc columns and 12 ch-1 spaces.
Row 15: Ch 1. Sc in the first dc. *Sc in the next ch-1 space, sc in the next dc* across. At the far edge, work the final sc into the top of the third chain of the Row 14 turning chain. Turn only if needed for finishing. 25 sc. Fasten off.
Panel Check
Lay the panel flat without stretching it.
- Row 1: 25 sc
- Rows 2-14: 13 mesh rows
- Every mesh row: 13 dc + 12 ch-1 spaces
- Row 15: 25 sc
- Total rows: 15
- Target size: approximately 7 x 5.25 inches
If the two long sides are not parallel, recount the mesh rows. Accidentally placing a dc into a chain space rather than into the dc below is the most common reason the grid drifts.
Fold the Panel Exactly in Half
Place the panel RS facing up with Row 15 at the top and Row 1 at the bottom. Fold the left and right sides toward each other so the panel becomes approximately 3.5 inches wide.
Along Row 1, the fold passes through stitch 13. The bottom stitches align in these pairs:
- stitch 1 with stitch 25
- stitch 2 with stitch 24
- stitch 3 with stitch 23
- continue in this way
- stitch 12 with stitch 14
- stitch 13 sits at the folded side and is not paired with a second stitch
Place one stitch marker near the bottom of the aligned row-end edges and one near the top. These aligned short edges become the only vertical side seam. The opposite side is the natural fold.
Close the Bottom Seam
Join sage yarn at the open-side corner of Row 1. Holding the two bottom halves together, insert the hook through both loops of stitch 1 and both loops of stitch 25 and make a slip stitch.
Continue pairing the Row 1 stitches exactly as listed above: 2 with 24, 3 with 23, and so on through 12 with 14. Work 12 relaxed slip stitches across the bottom. Stop when you reach the folded center at stitch 13. Fasten off.
The bottom now has one natural fold at one side and a 12-stitch seam running from the open side to that fold.
Close the Side Seam
Return to the two aligned vertical row-end edges. Join sage yarn at the bottom corner. Beginning with the Row 1 ends, slip stitch the two layers together once at each corresponding row end as you move upward.
Work through the row-end pair for Rows 1 through 15, keeping the seam relaxed and straight. 15 side-seam joining points. Fasten off at the top edge.
Turn the pouch RS out if you worked the seam with the WS facing outward. The pouch now has:
- one folded side
- one seamed side
- one closed bottom
- one fully open top
Make the Drawstring
Ch 56.
Sl st in 2nd ch from hook and in each remaining chain. 55 sl sts. Fasten off, leaving short tails for finishing.
Stretch the cord only enough to straighten it. Do not aggressively pull it longer. It should remain firm enough to slide through the mesh without curling into a tight spiral.
Thread the Drawstring
Row 14 is the uppermost mesh row immediately below the solid Row 15 rim. It contains exactly 12 ch-1 openings across the original flat panel. After folding, approximately six openings lie on the front face and six on the back face.
Beginning beside the side seam, weave one end of the cord through the first Row 14 ch-1 opening, then out through the next, continuing around the pouch through all 12 openings exactly once. Both cord ends should emerge beside the side seam.
Tie a compact overhand knot in each cord end. Do not add beads, toggles, or other removable pieces.
Fit Check
Slide a standard bar of soap into the open top. The pouch should fit around the soap without strongly stretching the mesh. Pull both drawstring ends together. The upper edge should gather evenly while the Row 15 solid rim stays above the soap.
If the soap will not slide in comfortably, do not force it through the openings. This version is sized for a standard bar approximately 2.5 x 3.5 x 1 inch.
Using and Caring for the Soap Saver
The soap can remain inside the pouch during use. After washing, rinse both soap and pouch thoroughly. Pull the drawstring closed and hang the pouch in a place where air can circulate freely around it.
Remove the soap before machine washing the pouch. Wash and dry according to the cotton yarn label. Reshape the pouch while damp and allow it to dry completely.
Visual Checkpoints
After Row 2: count 13 vertical dc positions and 12 open spaces.
After Row 7: the dc columns should still form straight vertical lines with no diagonal drift.
After Row 14: count all 12 upper mesh openings; these become the drawstring channel.
After folding: the panel should be approximately 3.5 inches wide, with one vertical fold and one aligned open side.
After seaming: the bottom and one side are closed; Row 15 remains a continuous open rim.
Troubleshooting
The mesh slants sideways
Make every dc into the dc directly below it. Do not work the dc into the adjacent ch-1 space.
The side seam twists the pouch
Your side-seam slip stitches are too tight or the row ends were paired out of order. Match Row 1 to Row 1, Row 2 to Row 2, and continue upward.
The bottom has a hole at the fold
The fold passes through Row 1 stitch 13. If a small gap remains beside it, use the yarn tail to make one discreet reinforcing stitch through the neighboring fabric without pulling the bottom out of shape.
The drawstring catches
Make sure it travels through the 12 actual ch-1 spaces in Row 14 rather than splitting yarn strands or passing through dc posts.
The top will not gather
Check that the cord visits every Row 14 opening once and that both ends exit from the same side of the pouch.
Pattern at a Glance
- Ch 26.
- Row 1: 25 sc.
- Rows 2-14: 13 dc/ch-1 mesh rows, 13 dc + 12 spaces each.
- Row 15: 25 sc.
- Fold through the center of the 25-stitch width.
- Bottom seam: 12 paired slip stitches.
- Side seam: 15 corresponding row-end joins.
- Drawstring: ch 56, then 55 slip stitches.
- Thread through all 12 openings of Row 14.
- Finished size: approximately 3.5 x 5.25 inches.
This construction keeps the soap saver fully reproducible: the flat panel has fixed row and mesh counts, the fold is anchored to the center stitch, the two seams follow defined matching points, and the drawstring uses a known 12-opening channel.