Strawberry Mouse Amigurumi Crochet Pattern
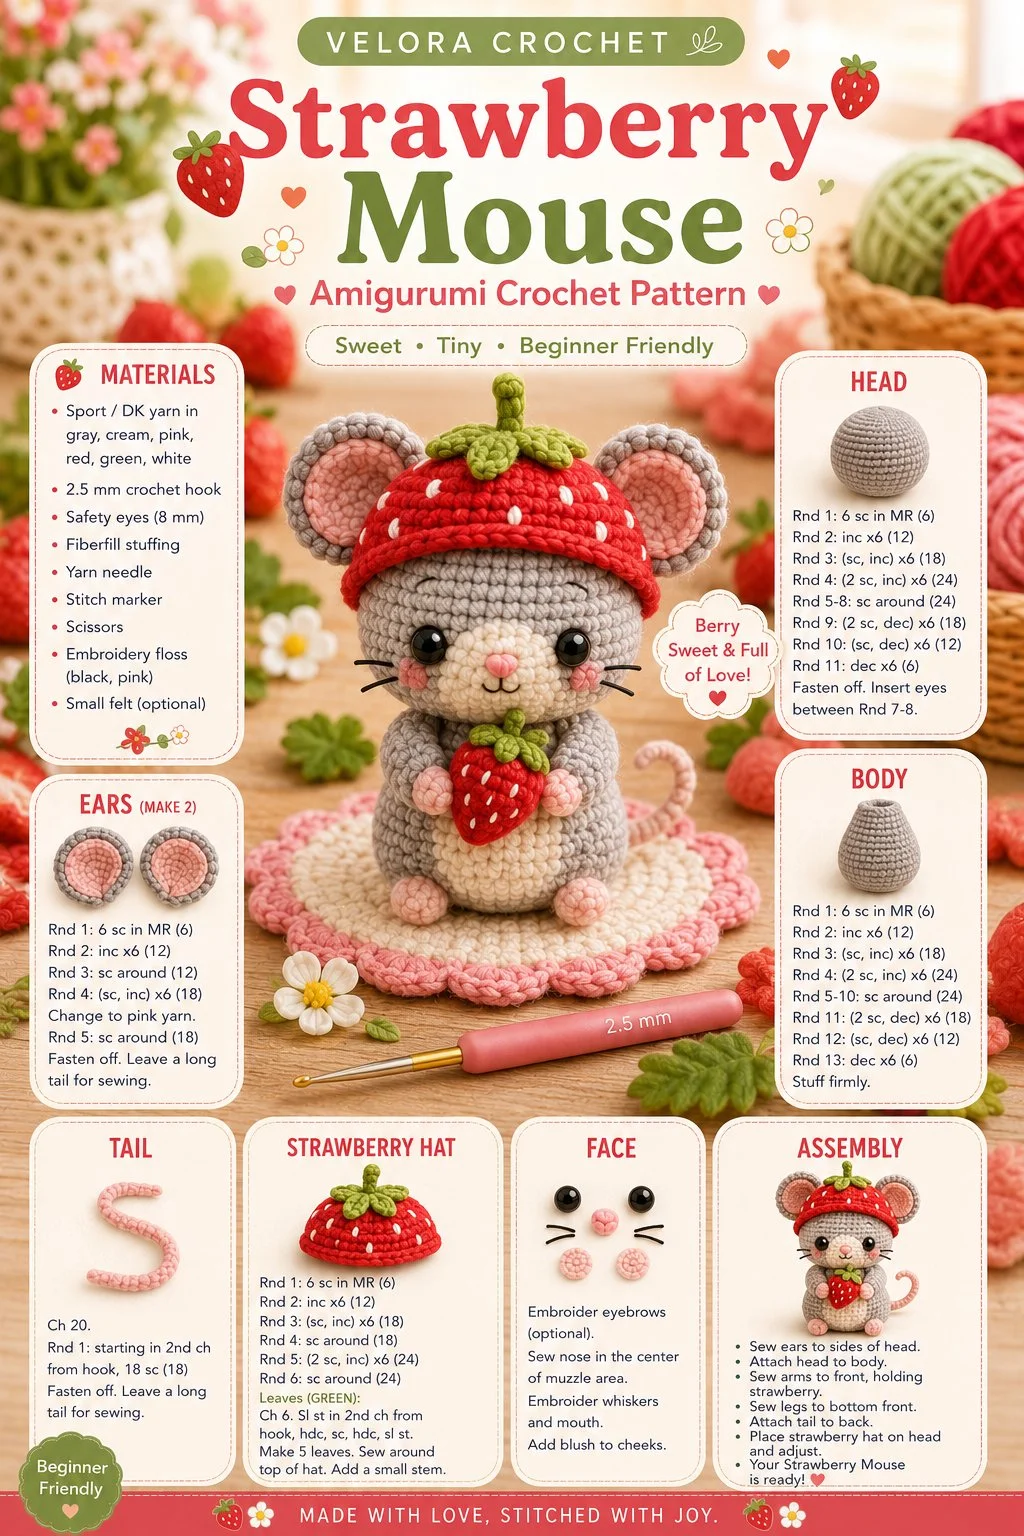
If you’re looking to craft an adorable little character, this tiny strawberry mouse crochet pattern is perfect for you! This sweet little mouse features a round body, oversized ears, a tiny nose, charming whiskers, small paws, a delicate thin tail, and a fun strawberry hat that adds a splash of color. It’s a beginner-friendly crochet project that’s not only cute but also quick to make, making it an ideal choice for gifts or personal décor.
Materials
- Medium-weight yarn (in pink, green, and red)
- Crochet hook (size G/6 or 4.0 mm)
- Yarn needle
- Scissors
- Stitch marker (optional)
- Fiber filling for stuffing
Abbreviations
- MR: magic ring
- ch: chain
- sc: single crochet
- inc: increase
- dec: decrease
- sl st: slip stitch
Instructions
Head
- Start with a MR and work 6 sc into the ring. (6)
- Round 1: Inc in each stitch around. (12)
- Round 2: (1 sc, inc) around. (18)
- Round 3: (2 sc, inc) around. (24)
- Rounds 4-6: Sc in each stitch around. (24)
- Round 7: (2 sc, dec) around. (18)
- Round 8: (1 sc, dec) around. (12)
- Stuff the head and finish with a dec in each stitch until closed.
Ears (make 2)
- Start with a MR and work 6 sc into the ring. (6)
- Round 1: Inc in each stitch around. (12)
- Round 2: Sc in each stitch around. (12)
- Finish with a sl st and leave a long tail for sewing.
Body
- Start with a MR and work 6 sc into the ring. (6)
- Round 1: Inc in each stitch around. (12)
- Round 2: (1 sc, inc) around. (18)
- Rounds 3-5: Sc in each stitch around. (18)
- Round 6: (1 sc, dec) around. (12)
- Stuff the body and finish with a dec in each stitch until closed.
Arms (make 2)
- Start with a MR and work 6 sc into the ring. (6)
- Round 1: Inc in each stitch around. (12)
- Round 2: Sc in each stitch around. (12)
- Leave a long tail for attaching.
Tail
- Ch 15 and sc in the second stitch from the hook. Sc in each stitch across.
- Fasten off, leaving a long tail for attaching.
Strawberry Hat
- Start with a MR and work 6 sc into the ring. (6)
- Round 1: Inc in each stitch around. (12)
- Round 2: (1 sc, inc) around. (18)
- Rounds 3-4: Sc in each stitch around. (18)
- Add green yarn to create the leaf detail by making small ch’s and sl st to secure around the hat.
Face Details
- Use black yarn to create two small eyes with the yarn needle.
- For the nose, make a small stitch in pink yarn between the eyes.
Assembly
- Attach the ears to the head using the long tails.
- Sew the head onto the body securely.
- Attach the arms on either side of the body.
- Sew the tail onto the back of the body.
- Place the strawberry hat on the head and secure it.
- Weave in any remaining ends.
Tips for the Best Result
- Take care not to overstuff the mouse; a little filling goes a long way for shaping.
- Using a stitch marker can be helpful to keep track of your rounds.
- When sewing on the face details, try to place the features symmetrically for a cute finish.
This tiny strawberry mouse is a delightful little project that captures both skill and whimsy! You can easily customize its colors for different seasonal themes or gift it to someone special. Consider making a few variations for a charming little collection—it’s a perfect handmade gift for friends or a lovely addition to your own crochet showcase!