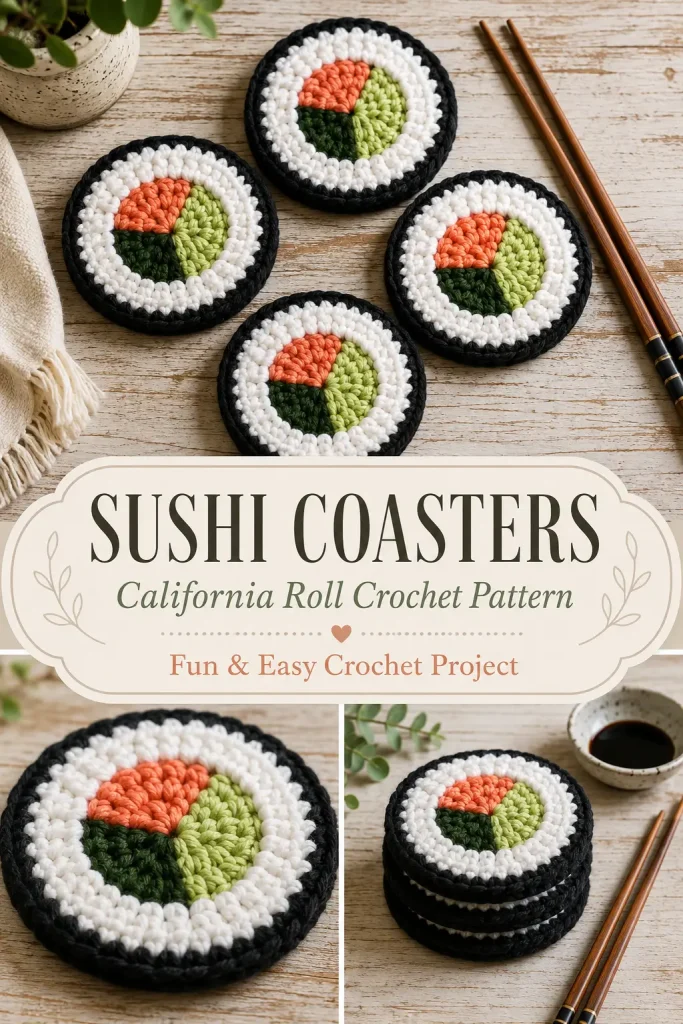
These sushi crochet coasters are such a fun handmade project for anyone who loves playful kitchen decor. Each coaster looks like a cute California roll slice, with a colorful filling center, a fluffy white rice ring, and a bold black outer seaweed border.
They are practical, quick to make, and perfect for coffee tables, kitchen gifts, handmade market sets, or sushi night decor. Make one coaster as a cute desk accessory, or create a full set of four for a giftable crochet coaster set.
Description
This crochet sushi coaster is worked as a flat round motif using color changes to create a California roll-inspired center. The middle has three filling sections in coral orange, light green, and dark green to represent the colorful sushi filling. A thick white ring around the center creates the rice layer, while a black outer border gives the coaster its classic sushi roll look. The finished coaster is round, sturdy, washable, and ideal for cups, mugs, small bowls, or decorative table settings.
Materials
- Worsted weight cotton yarn in black
- Worsted weight cotton yarn in white
- Worsted weight cotton yarn in coral orange
- Worsted weight cotton yarn in light green
- Worsted weight cotton yarn in dark green
- 4.0 mm crochet hook
- Yarn needle
- Scissors
- Stitch marker
- Blocking mat and pins, optional
Abbreviations
- MR = magic ring
- ch = chain
- sl st = slip stitch
- sc = single crochet
- hdc = half double crochet
- dc = double crochet
- inc = increase, 2 stitches in the same stitch
- st = stitch
- sts = stitches
- rep = repeat
Pattern Notes
- This pattern uses US crochet terms.
- The coaster is worked in joined rounds.
- Ch 2 at the beginning of double crochet rounds does not count as a stitch.
- Ch 1 at the beginning of single crochet rounds does not count as a stitch.
- The center uses three color sections to create the sushi filling.
- Change colors on the final yarn-over of the stitch before the new color begins.
- Cotton yarn is best because it is absorbent and holds shape well.
- Finished size is about 4.5 to 5 inches across, depending on yarn and tension.
Step-by-Step Instructions
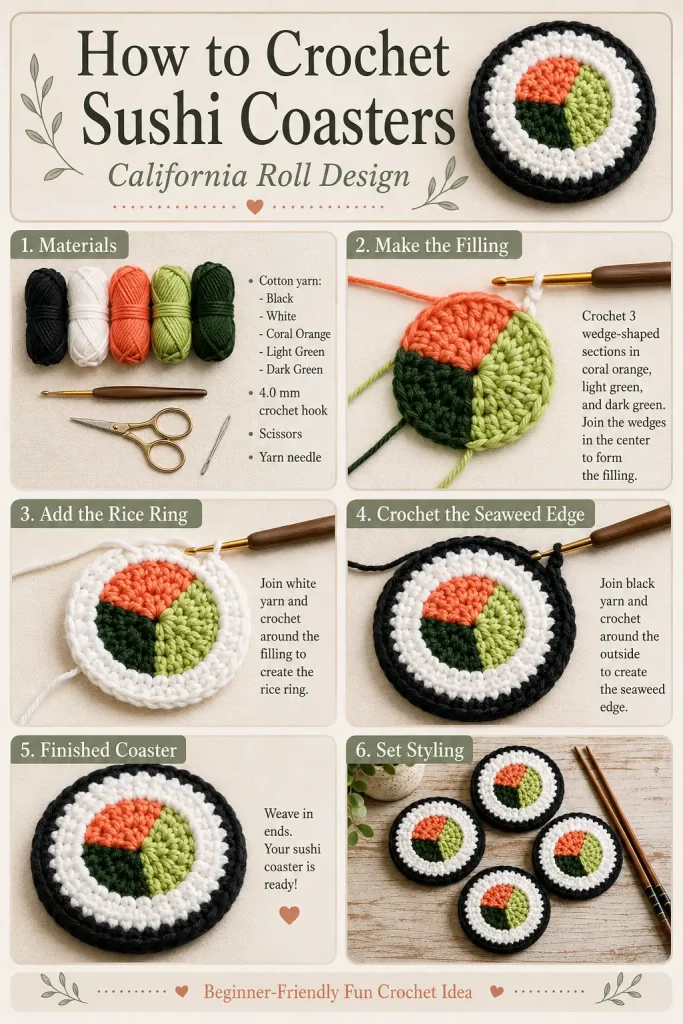
Color Sections for the Sushi Filling
The first 4 rounds are divided into 3 color sections:
- Coral orange = salmon or crab-style filling
- Light green = avocado
- Dark green = cucumber or seaweed filling
Each round increases evenly while keeping the three filling sections visible.
Round 1: Filling Center
With coral orange yarn, make a MR.
Ch 2.
Work 4 dc into the ring.
Change to light green.
Work 4 dc into the ring.
Change to dark green.
Work 4 dc into the ring.
Pull the magic ring closed.
Join with sl st to the first dc.
12 dc
Round 2
Ch 2.
With coral orange, work 2 dc in each of the first 4 sts.
Change to light green.
Work 2 dc in each of the next 4 sts.
Change to dark green.
Work 2 dc in each of the last 4 sts.
Join with sl st to the first dc.
24 dc
Each color section should now have 8 stitches.
Round 3
Ch 2.
With coral orange, work:
Dc in next st, inc in next st.
Repeat 4 times across the coral section.
Change to light green.
Dc in next st, inc in next st.
Repeat 4 times across the light green section.
Change to dark green.
Dc in next st, inc in next st.
Repeat 4 times across the dark green section.
Join with sl st to the first dc.
36 dc
Each color section should now have 12 stitches.
Round 4
Ch 2.
With coral orange, work:
Dc in next 2 sts, inc in next st.
Repeat 4 times across the coral section.
Change to light green.
Dc in next 2 sts, inc in next st.
Repeat 4 times across the light green section.
Change to dark green.
Dc in next 2 sts, inc in next st.
Repeat 4 times across the dark green section.
Join with sl st to the first dc.
48 dc
Fasten off the filling colors.
Weave in the color tails on the back of the coaster.
Round 5: White Rice Ring
Join white yarn in any stitch.
Ch 2.
Work 1 dc in each of the next 3 sts.
Work 2 dc in the next st.
Rep from dc in next 3 sts, inc in next st around.
Join with sl st to the first dc.
60 dc
Round 6: Puffy Rice Texture
Ch 1.
Sc in the first st.
Hdc in the next st.
Sc in the next st.
Hdc in the next st.
Rep from sc in next st, hdc in next st around.
Join with sl st to the first sc.
60 sts
This round adds a soft bumpy rice-like texture without making the coaster too bulky.
Round 7: White Stabilizing Round
Ch 1.
Sc in each st around.
Join with sl st to the first sc.
60 sc
Fasten off white.
Round 8: Black Seaweed Border
Join black yarn in any stitch.
Ch 1.
Sc in each st around.
Join with sl st to the first sc.
60 sc
Round 9: Thick Black Outer Edge
Ch 1.
Sc in each of the next 4 sts.
Work 2 sc in the next st.
Rep from sc in next 4 sts, inc in next st around.
Join with sl st to the first sc.
72 sc
Round 10: Clean Final Edge
Ch 1.
Sc in each st around.
Join with sl st to the first sc.
Fasten off and weave in the end.
This creates the thick black outer ring that makes the coaster look like a sushi roll slice.
Optional Backing Round
For a thicker coaster, make a second plain black circle.
With black yarn:
Round 1: MR, 12 dc.
Round 2: Inc around. 24 dc
Round 3: Dc in next st, inc in next st around. 36 dc
Round 4: Dc in next 2 sts, inc in next st around. 48 dc
Round 5: Dc in next 3 sts, inc in next st around. 60 dc
Round 6: Dc in next 4 sts, inc in next st around. 72 dc
Place the backing circle behind the sushi coaster.
Using black yarn, sc around both layers together.
This makes a firmer coaster and hides the color-change tails.
Finishing
Weave in all yarn ends securely.
Lay the coaster flat.
Gently shape the circle with your hands.
Lightly block if needed so the coaster sits flat.
Do not stretch too much, or the filling sections may lose their shape.
Make a Full Set
For a sushi coaster set, make 4 or 6 coasters.
You can keep all coasters the same, or vary the filling colors:
- Coral, light green, dark green
- Pink, avocado green, cucumber green
- Orange, cream, green
- Red, yellow, green
Keep the white rice ring and black seaweed border the same on every coaster for a matching set.
Tips & Variations
Use 100% cotton yarn for the most useful coaster.
Use a smaller hook if your coaster feels too floppy.
Use black for the outer border to get the strongest sushi roll look.
Make the white rice section slightly thicker by adding one more white sc round before the black border.
For a softer look, use off-white instead of bright white.
For a bold sushi set, make matching coasters in different filling colors.
If the center color changes look messy, make sure to change colors on the last yarn-over of the previous stitch.
If the coaster curls, block it flat or loosen your tension slightly on the outer rounds.
FAQ
Can beginners make these sushi coasters?
Yes, confident beginners can make them. The stitches are simple, but the center color changes need a little attention.
What yarn is best for crochet coasters?
Cotton yarn is best because it is absorbent, washable, and sturdy enough for everyday use.
Can I make the coaster bigger?
Yes. Add one extra white round before starting the black border, or use thicker yarn and a larger hook.
Do I need to add the backing?
No. The backing is optional. It makes the coaster thicker and cleaner on the back, but the single-layer version works well too.
Conclusion
These sushi crochet coasters are a fun and useful handmade project with a playful food-inspired design. The colorful center, white rice ring, and black seaweed border make each coaster look like a cute California roll slice.
Make a set for your coffee table, kitchen, sushi nights, or handmade gifts. They are quick, cheerful, and a unique way to bring crochet charm into everyday decor.



