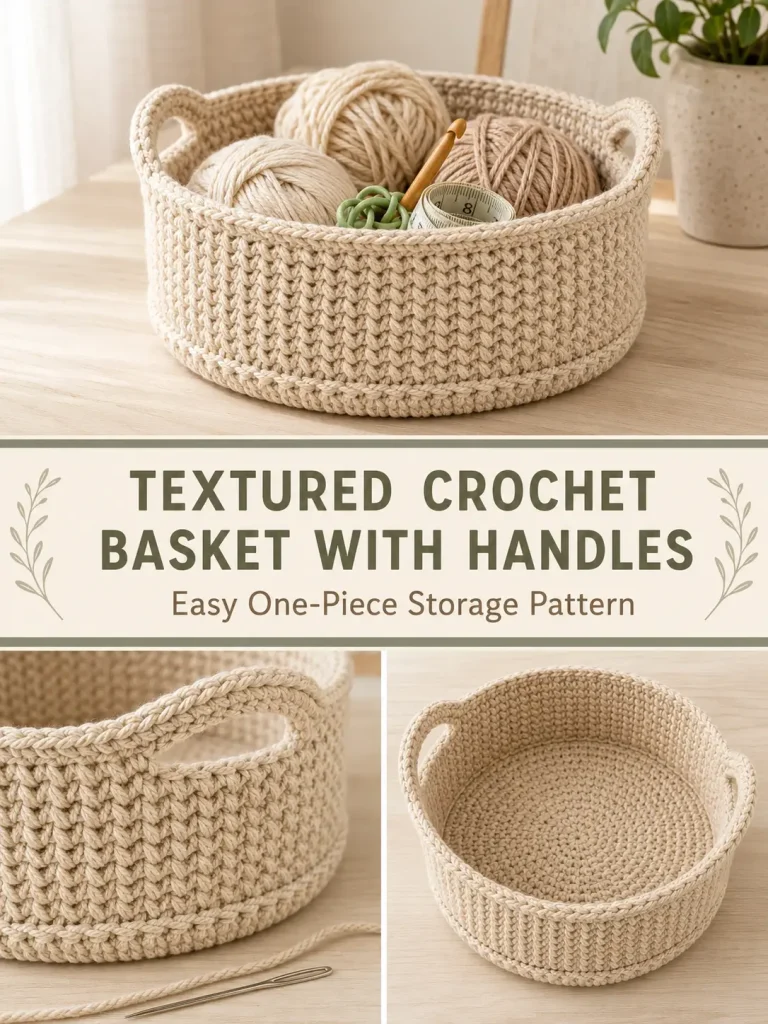
This sturdy little crochet basket is worked in one piece from the center of the base upward, then finished with two built-in handles.
The body uses split single crochet, sometimes called waistcoat stitch, which creates the compact V-shaped texture that works especially well with thick braided cotton cord.
For this version, the basket is designed to finish at roughly:
8 inches / 20 cm across × 4 inches / 10 cm high
The linked Ravelry design uses 5 mm braided cotton cord, an 8 mm hook, and the same general shallow round-basket idea, but the instructions below use an original base count, wall construction, texture repeat, handle placement, and finishing method rather than reproducing the paid pattern. (Ravelry)
Pattern at a Glance
Skill level: Confident beginner
Terminology: US crochet terms
Construction: Bottom-up, seamless, worked in continuous rounds
Finished diameter: Approximately 8 inches / 20 cm
Finished height: Approximately 4 inches / 10 cm
Suggested material: 5 mm braided cotton cord
Hook: 8 mm / L
Main body count: 48 stitches
Handles: 2 integrated handles
Main texture: Split single crochet
Materials
You will need:
- approximately 80–100 yards / 73–92 meters of 5 mm braided cotton cord
- 8 mm crochet hook
- large yarn needle
- scissors
- locking stitch marker
- measuring tape
A 100-meter spool gives you a safer amount to work with.
Best Material for This Basket
For a basket that actually holds its shape, use:
- braided cotton cord
- recycled cotton cord
- sturdy tube yarn
- similar firm 4–5 mm craft cord
Ordinary soft worsted yarn will not create the same structure.
The linked basket is also designed around 5 mm braided cotton cord, which is why this material is especially suitable for this style. (Ravelry)
Abbreviations
- ch = chain
- sc = single crochet
- ssc = split single crochet
- inc = 2 sc in same stitch
- BLO = back loop only
- sl st = slip stitch
- st = stitch
- sts = stitches
- rep = repeat
Special Stitch — Split Single Crochet
Split single crochet creates the firm woven-looking V texture.
Instead of inserting your hook under the two loops at the top of the stitch, insert the hook:
between the two vertical legs of the single crochet directly below.
Then:
- Insert hook between the vertical legs.
- Yarn over.
- Pull up a loop.
- Yarn over.
- Pull through both loops.
One ssc completed.
Important Tip for Split Single Crochet
Do not crochet tightly.
If you pull the previous round too tight, inserting the hook between the stitch legs becomes difficult.
Keep your working loop slightly taller than you would for ordinary single crochet.
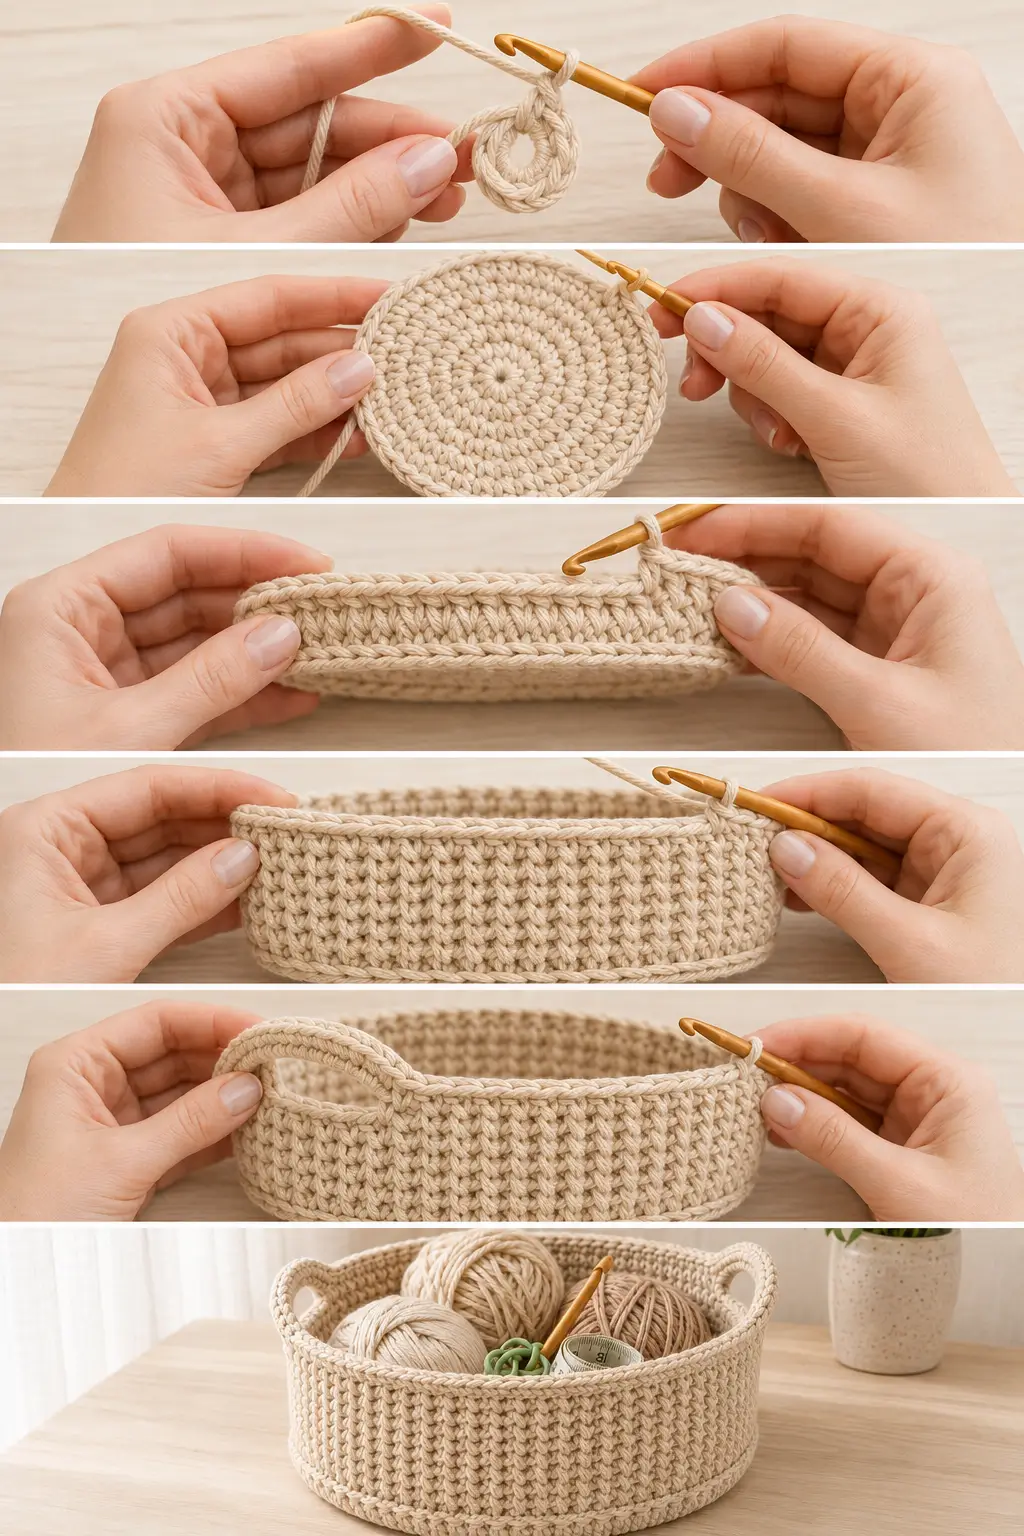
Construction Overview
The basket is made in five parts:
- Flat circular base
- Turning round
- Textured straight walls
- Two integrated handle openings
- Reinforced upper rim
Nothing is sewn together.
PART 1 — CROCHET THE BASE
Using your main cord, make a magic ring.
If the cord is too stiff for a magic ring, you may:
ch 2 and work Round 1 into the second chain from the hook.
Work in continuous rounds.
Place your stitch marker into the first stitch of every round.
Round 1
Work:
6 sc into the ring
6 sts
Round 2
Work:
2 sc in every stitch
12 sts
Round 3
Repeat:
sc in next st, inc in next st
around.
18 sts
Round 4
Repeat:
sc in next 2 sts, inc
around.
24 sts
Round 5
Repeat:
sc in next 3 sts, inc
around.
30 sts
Round 6
Repeat:
sc in next 4 sts, inc
around.
36 sts
Round 7
Repeat:
sc in next 5 sts, inc
around.
42 sts
Round 8
Repeat:
sc in next 6 sts, inc
around.
48 sts
Check the Base
Lay the circle on a flat surface.
It should measure approximately:
7½–8 inches across
depending on your cord and tension.
It should lie flat without strong ruffling or cupping.
What If the Base Ruffles?
Your stitches may be too loose for the cord.
Try:
- tightening slightly
- using a 7 mm hook
- gently shaping the base before continuing
Do not continue if the circle has large waves.
What If the Base Cups?
Your tension may be too tight.
Try:
- relaxing your stitches
- moving up to a 9 mm hook
A very slight curve is acceptable because the next round intentionally turns the wall upward.
PART 2 — CREATE THE BASKET CORNER
Round 9
Work:
sc BLO in every stitch around
48 sts
Do not increase.
This creates a visible ridge around the outside of the base and encourages the basket wall to turn upward.
PART 3 — TEXTURED BASKET WALL
From this point onward, use split single crochet.
Round 10
Work:
ssc in every stitch around
48 sts
Rounds 11–17
Repeat Round 10.
Work:
1 ssc in every stitch
Maintain:
48 sts per round
You now have:
8 rounds of split single crochet texture
from Rounds 10–17.
Check the Height
Before beginning the handles, the wall should measure approximately:
3–3½ inches
from the base ridge.
The exact height will vary with your cord.
If your basket is still too shallow, add:
1 additional ssc round
before starting the handles.
Keep 48 stitches.
What the Texture Should Look Like
The wall should have:
- dense V-shaped stitches
- almost knitted-looking texture
- firm upright sides
- no obvious holes
- clearly defined horizontal rows
- slightly rounded basket shape
The cord itself provides most of the structure.
PART 4 — PREPARE THE TOP EDGE
Round 18
Switch back to ordinary single crochet.
Work:
sc in every stitch around
48 sts
This creates a clean foundation for the handles.
PART 5 — HANDLE ROUND
The handles are positioned opposite each other.
Place the basket flat in front of you.
The first handle will sit across one half of the basket and the second directly opposite it.
Round 19
Work:
sc in next 8 sts
Now create Handle 1:
ch 10
Skip the next:
8 sts
Work:
sc in next 16 sts
Create Handle 2:
ch 10
Skip the next:
8 sts
Work:
sc in final 8 sts
You now have two matching handle arches.
Handle Placement Check
Before continuing, place the basket on a table.
The handles should sit:
- directly opposite one another
- centered on each side
- at approximately the same height
If one handle appears noticeably off-center, undo Round 19 and reposition it.
PART 6 — REINFORCE THE HANDLES
Round 20
Sc in each of the first:
8 sts
At Handle 1:
Work 6 sc evenly around the entire ch-10 handle arch.
Do not place one stitch into every chain.
Instead, distribute six firm stitches evenly around the whole chain.
Then:
sc in next 16 sts
At Handle 2:
Work:
6 sc evenly around the ch-10 arch
Then:
sc in final 8 sts
You now have:
44 sts around the reinforced rim
The slightly reduced stitch count helps pull the top edge inward rather than letting it flare.
Round 21 — Final Reinforcement
Work:
sc in every stitch around
44 sts
Keep the stitches firm but not painfully tight.
This round reinforces:
- the handles
- the upper rim
- the basket shape
Optional Extra-Sturdy Handle Round
If the basket will carry heavier objects, work one additional round.
Round 22 Optional
Work:
sl st loosely in every stitch around
Do not pull tightly.
This creates a strong cord-like finish along the top edge and handles.
Fasten off.
PART 7 — FINISHING
Cut the cord leaving a tail approximately:
8–10 inches
Pull the tail through the final loop.
Thread it onto a large yarn needle.
Because braided cord is thick, weave the tail through several neighboring stitches on the inside of the basket.
Change direction once.
Trim securely.
Do the same with your beginning tail.
Shape the Basket
Use your hands to gently shape:
- the circular base
- the side walls
- both handles
- the upper rim
Braided cotton cord usually responds well to hand shaping.
Finished Measurements
The basket should measure approximately:
Diameter
8 inches / 20 cm
Height
Approximately:
4 inches / 10 cm
excluding the very top of the handle arches.
Your exact measurements will depend on cord thickness and tension.
Why the Base Uses 48 Stitches
The base increases gradually:
6 → 12 → 18 → 24 → 30 → 36 → 42 → 48
This keeps the circle flat while creating enough circumference for a useful small storage basket.
Once 48 stitches are reached, there are no more increases.
That causes the sides to grow upward instead of outward.
Why We Use a BLO Turning Round
Working Round 9 through the back loops leaves a clear ridge around the bottom.
More importantly, it creates a natural fold between:
base and wall
without having to sew anything or add plastic inserts.
Why Split Single Crochet Works Well
Normal single crochet would also make a usable basket.
Split single crochet gives this version more visual interest.
The stitches look like compact little Vs stacked on top of one another.
With thick braided cord, that texture becomes especially pronounced.
If Split Single Crochet Is Too Difficult
You can replace all Rounds 10–17 with:
ordinary sc
Keep exactly:
48 stitches
The size and construction remain the same.
The basket will simply have a smoother texture.
What If My Basket Leans?
Check your stitch count.
Every wall round before the handles should contain:
48 stitches
Also make sure you are inserting into the correct center of each previous stitch when working ssc.
What If My Basket Walls Flare Out?
Possible causes include:
- accidentally increasing
- loose wall tension
- very soft cord
Make sure you have exactly:
48 stitches
in every wall round.
The final handle reinforcement rounds also help pull the rim inward slightly.
What If the Basket Narrows Too Much?
Your split single crochet may be much tighter than your base.
Try loosening your working loop.
If necessary, use a:
9 mm hook for the textured wall
while keeping the 8 mm hook for the base.
What If My Handles Are Too Small?
The standard handles use:
ch 10
For slightly larger handles, use:
ch 12
but still skip only:
8 stitches
On the following round, work:
6 sc evenly around each handle arch
so the basket rim does not gain unnecessary stitches.
What If I Want Smaller Handles?
Use:
ch 8
over the same skipped 8 stitches.
Then work:
6 sc evenly around each handle
on the reinforcement round.
Making the Basket Taller
For a taller basket, simply add additional split-single-crochet rounds before Round 18.
Each added round increases the height without changing:
- base diameter
- handle placement
- stitch count
For approximately a 6-inch-high basket, add several additional wall rounds until the measurement is right.
Making a Larger Basket
For a wider basket, continue increasing the base.
After 48 stitches:
Next Increase Round
Repeat:
sc in next 7 sts, inc
around.
54 sts
Then continue:
sc in next 8 sts, inc
for:
60 sts
However, the handle placement must then be recalculated.
For the simplest reliable version, use the original 48-stitch basket.
Two-Tone Version
This basket would look beautiful in:
Base + Lower Wall
Warm oatmeal
Upper Wall + Handles
Muted sage
Change color after approximately four textured wall rounds.
Keep all stitch counts identical.
Modern Neutral Version
Use:
natural unbleached cotton cord
for the entire basket.
This emphasizes the texture and gives the basket a clean Scandinavian-style appearance.
Nursery Version
Try:
- dusty rose
- muted sage
- soft blue
- warm cream
These colors work beautifully for:
- diapers
- small blankets
- baby accessories
Keep the handles securely crocheted and avoid adding loose decorative pieces.
Yarn Storage Basket
The basket is also a useful size for:
- several small yarn balls
- crochet hooks
- stitch markers
- measuring tape
- current small crochet project
For larger yarn-storage baskets, add more base rounds and increase the wall height.
Bathroom Storage
Use washable cotton cord and store:
- rolled washcloths
- hair accessories
- small towels
- toiletries
Avoid prolonged direct exposure to standing water.
Can I Use T-Shirt Yarn?
Yes.
T-shirt yarn can work, although its elasticity varies significantly.
Make the circular base first and measure it before continuing.
If the base is substantially larger than 8 inches at 48 stitches, use fewer increase rounds.
Can I Use Regular Yarn Held Together?
Yes, but you will probably need several strands held together to create comparable thickness.
The basket may also be softer than one made from braided cord.
For the most structured result, thick cotton cord is preferable.
Do I Need Plastic Canvas in the Base?
No.
The thick cord and dense crochet create enough structure for an ordinary storage basket.
If you want an unusually rigid basket, you can place a removable circular insert inside after finishing, but it is not required.
Do I Need to Line the Basket?
No.
The dense stitch pattern makes a lining unnecessary for ordinary storage.
You can add a fabric lining if you plan to store very small items.
Frequently Asked Questions
Is the basket crocheted in separate pieces?
No.
The entire basket is worked continuously from the center of the base upward.
How many stitches are in the base?
The final base round contains:
48 stitches
How many wall stitches are there?
Before the handles:
48 stitches per round
Are the handles sewn on?
No.
Both handles are crocheted directly into the top of the basket.
What stitch creates the textured body?
Split single crochet, also known as waistcoat stitch.
Can I use regular single crochet instead?
Yes.
Replace every split-single-crochet wall round with ordinary sc.
Keep the stitch counts unchanged.
Does the basket need blocking?
Usually not.
Thick cotton cord can generally be shaped by hand.
Is this beginner friendly?
Yes, provided you can already:
- crochet in continuous rounds
- single crochet
- increase
- work through back loops
- count stitches
The split single crochet may take a few stitches to become comfortable.
Why are there fewer stitches after the handles?
Round 20 deliberately works only:
6 sc around each ch-10 handle
instead of 10.
This reduces the top circumference slightly and gives the rim a more structured shape.
Final Thoughts
The nice thing about this basket is that almost all of the shaping happens automatically.
First, you increase a simple circle until it reaches 48 stitches.
Then you stop increasing.
The base becomes a wall.
A back-loop round makes the corner sharper.
Several rounds of split single crochet create that dense woven-looking texture.
Then two chain arches become the handles.
There are no separate side panels, no handles to sew on, and no complicated assembly.
Once the final rim is reinforced and the cord ends are woven in, you have a compact little crochet basket that looks much more polished than the construction suggests.




Thank you for this fun pattern. I’m very excited to try it out.
May I sell any of the baskets I make using your pattern. I do handmade craft shows. Although for now I’m just hoping to make them as gifts for my nieces.
Thank you again.
Thank you for the pattern..I plan to make a couple of them to organize my things..I appreciate the free pattern 😊