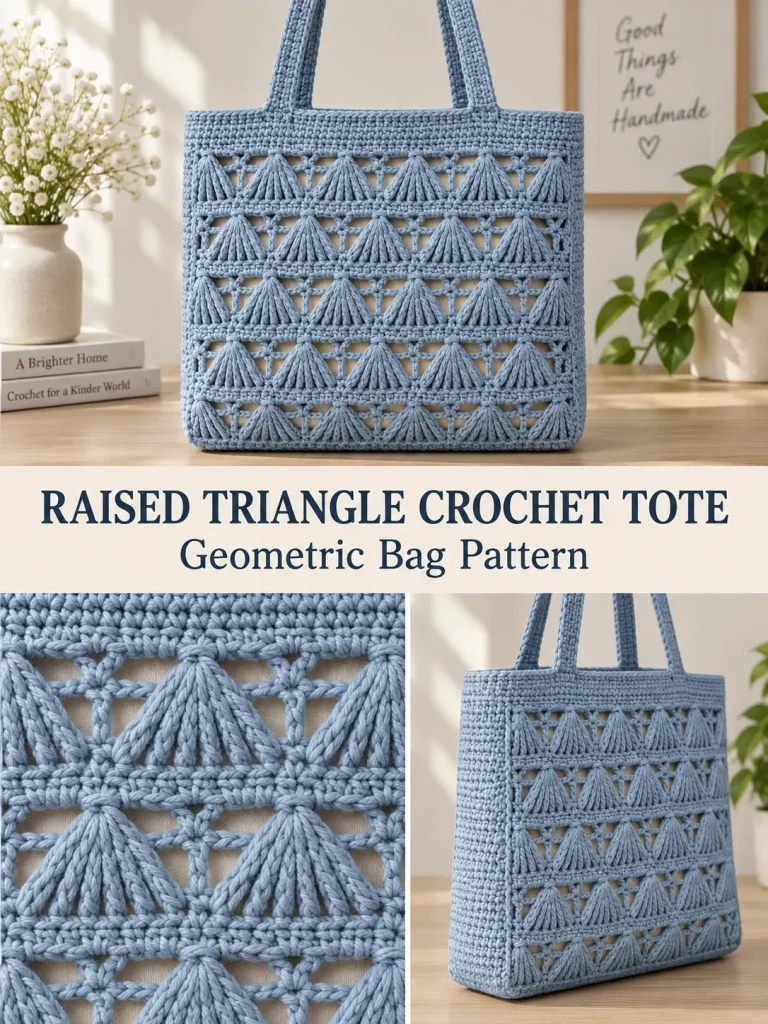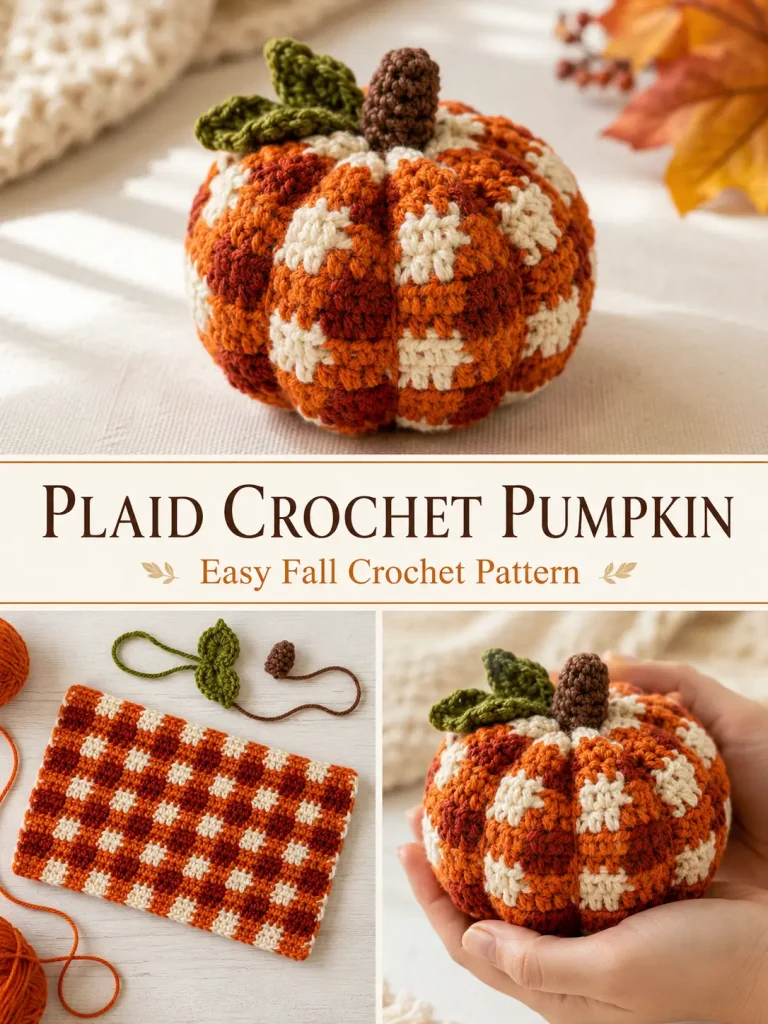
There are plenty of crochet pumpkins you can make in one color.
But the plaid is what makes this one impossible for me to ignore.
Instead of crocheting the pumpkin as a ball in continuous rounds, this version starts as something much easier:
a flat rectangle.
Crochet a simple three-color plaid fabric, sew the short sides together, gather the bottom, stuff it, gather the top, and pull a few strands around the outside to create those deep pumpkin ribs.
Then add a little brown stem and two olive leaves.
It looks much more complicated than the actual construction.
Plaid Crochet Pumpkin at a Glance
Skill level: Confident beginner
Terminology: US crochet terms
Construction: Flat rectangle → tube → stuffed pumpkin
Main stitch: Half double crochet
Finished size: Approximately 5–5½ inches wide and 4–4½ inches tall, depending on yarn and stuffing
Colors
- Pumpkin orange
- Deep rust
- Warm cream
- Walnut brown for stem
- Muted olive for leaves
This keeps the beautiful warm fall look from the inspiration without changing it into a completely different palette.
Materials
You will need:
- Worsted-weight / Category 4 yarn in pumpkin orange
- Worsted-weight yarn in deep rust
- Worsted-weight yarn in warm cream
- Small amount of walnut-brown yarn
- Small amount of muted-olive yarn
- 4 mm crochet hook
- Polyester fiberfill
- Yarn needle
- Scissors
- Stitch markers, optional
Use yarns of similar thickness.
A relatively firm fabric works best because it prevents the stuffing from showing through.
Abbreviations
- ch = chain
- sc = single crochet
- hdc = half double crochet
- sl st = slip stitch
- st = stitch
- sts = stitches
The turning ch 2 does not count as a stitch in this pattern.
The Plaid Construction
The plaid is made from blocks that are:
4 stitches wide × 2 rows tall
We alternate two color combinations:
Plaid Band A
Pumpkin orange + deep rust
Plaid Band B
Warm cream + pumpkin orange
Repeating those two bands creates the checkered effect.
Important Color-Change Method
For clean color transitions, change yarn on the final yarn-over of the preceding half double crochet.
Example:
Work the hdc until you have 3 loops on the hook.
Instead of finishing with the old color, yarn over with the new color and pull it through all 3 loops.
The next stitch is now ready in the new color.
Carrying the Yarn
While working a two-color row, lay the inactive yarn loosely across the top of the previous row and crochet over it.
Do not pull it tightly.
Tight carried yarn will make the rectangle pucker.
Because each two-row band uses only two colors, you can cut the unused third color and rejoin it later rather than dragging three strands through the entire fabric.
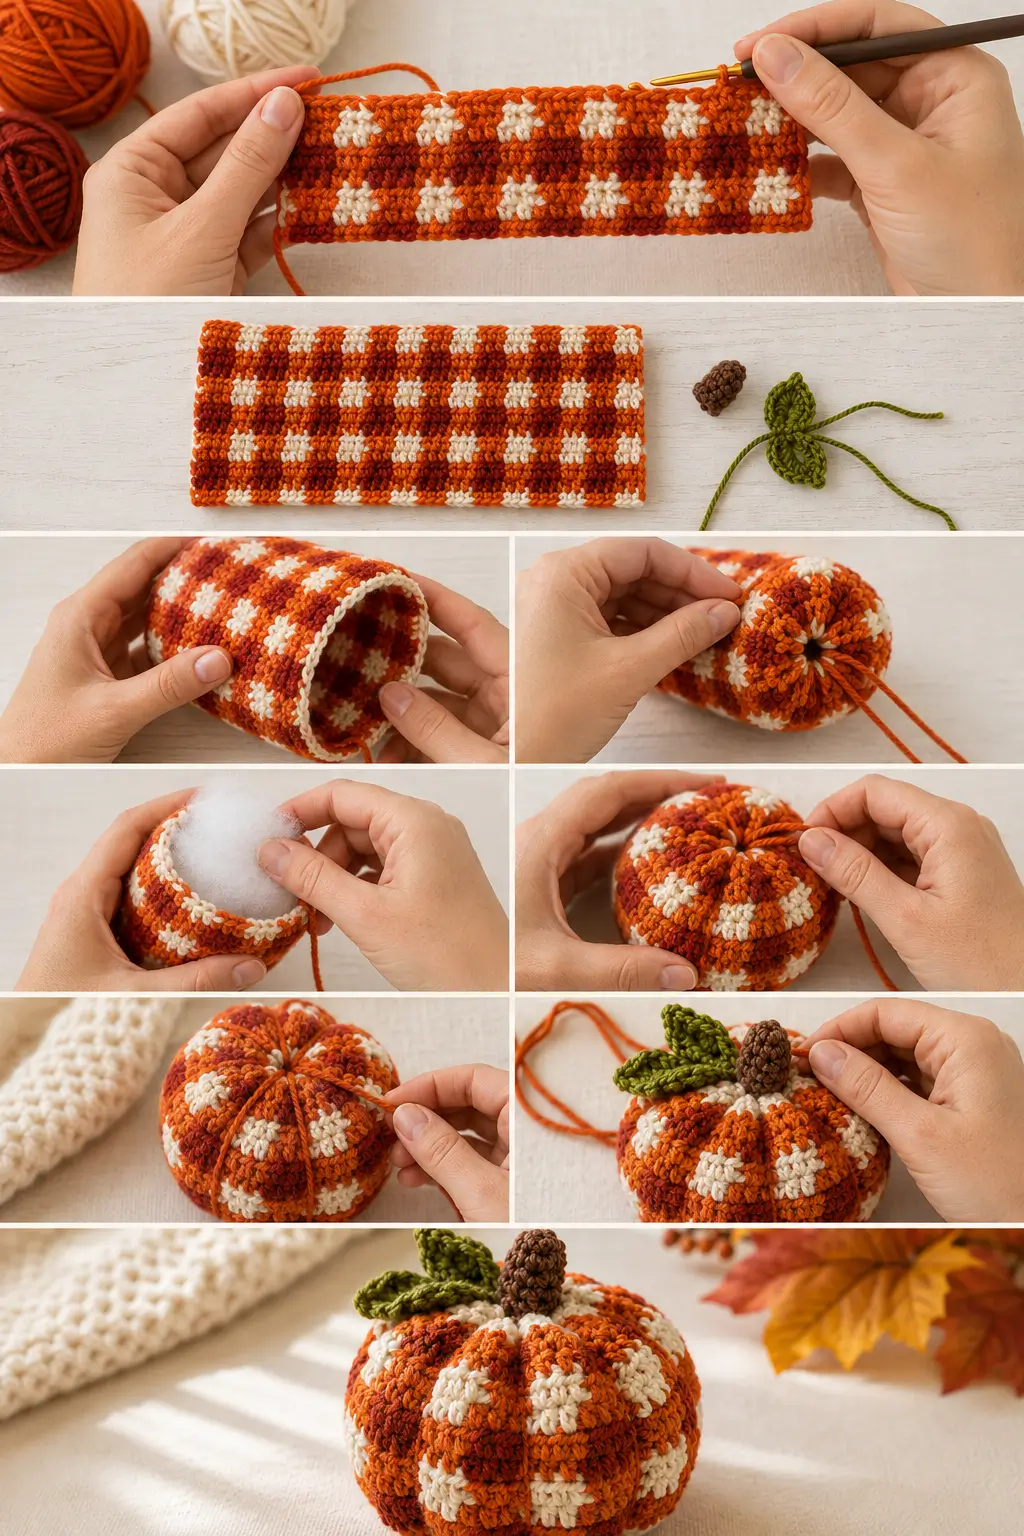
PART 1 — CROCHET THE PLAID RECTANGLE
With pumpkin orange:
Ch 50.
Row 1 — Orange + Rust
Starting in the third chain from the hook:
Hdc in next 4 chains with pumpkin orange.
Change to deep rust during the final hdc.
With rust:
Hdc in next 4 chains.
Change back to orange.
Repeat:
4 orange hdc, 4 rust hdc
across.
You should finish with:
48 hdc
Turn.
Row 2
Ch 2.
Continue the colors directly above themselves:
- 4 orange hdc over orange
- 4 rust hdc over rust
Repeat across.
48 hdc
At the end, fasten off rust.
Turn.
Row 3 — Cream + Orange
Ch 2.
Join warm cream.
Work:
4 cream hdc
then
4 pumpkin-orange hdc
Repeat:
4 cream, 4 orange
across.
48 hdc
Turn.
Row 4
Repeat Row 3:
4 cream hdc, 4 orange hdc
across.
Fasten off cream.
Turn.
Rows 5–20
Repeat:
Rows 1–4 four more times.
You will complete:
5 full plaid repeats
for a total of:
20 rows
Fasten off.
Check the Rectangle
Your finished rectangle should show a clean repeating plaid:
- pumpkin-orange blocks
- deep-rust blocks
- warm-cream blocks
Each block is approximately:
4 stitches wide × 2 rows high
The fabric should remain flat.
If the rectangle begins narrowing, count your stitches.
Every row must contain:
48 hdc
Why Half Double Crochet Works Well Here
Half double crochet gives the pumpkin a nice balance.
It is:
- faster than single crochet
- denser than double crochet
- sturdy enough for stuffing
- easy to use for colorwork
You want a relatively solid fabric rather than large open spaces.
The linked inspiration uses the same general reasoning: its designer specifically chose half double crochet so the stuffing would be less likely to show through the fabric.
PART 2 — TURN THE RECTANGLE INTO A TUBE
Fold the rectangle so the short sides meet.
Keep the right sides facing each other.
Thread a yarn needle with pumpkin-orange yarn.
Whip stitch the short edges together from top to bottom.
You can also use mattress stitch if you prefer.
Keep the seam firm but not tight.
Turn the tube right side out.
The plaid seam will later be less noticeable once the pumpkin is shaped.
PART 3 — CLOSE THE BOTTOM
Cut a long strand of pumpkin-orange yarn.
Thread it onto a yarn needle.
Working around one open edge of the tube, weave the needle in and out approximately every:
1–2 stitches
all the way around.
Pull firmly.
The opening should gather into the center.
Take several extra stitches across the gathered opening to secure it.
Knot firmly.
Do not cut the tail until you are confident the bottom is closed.
PART 4 — STUFF THE PUMPKIN
Begin adding polyester stuffing.
Add small amounts at a time.
Push the filling evenly into:
- the sides
- bottom
- center
You want a full round pumpkin, but do not pack it so tightly that the crochet stitches stretch open.
The finished form should still be soft enough to shape.
PART 5 — CLOSE THE TOP
Using another long strand of orange yarn, gather the second open edge exactly as you did the bottom.
Pull the opening mostly closed.
Before tightening completely, add any final small amount of stuffing needed.
Pull closed.
Secure with several stitches and a firm knot.
Leave a very long yarn tail attached.
We will use it for shaping.
PART 6 — CREATE THE PUMPKIN RIBS
Bring the yarn tail down the outside of the pumpkin.
Wrap it around the pumpkin from:
top center → bottom center → back to top
Pull firmly.
This creates one deep indentation.
Secure the yarn through the top center.
Now repeat around the pumpkin until you have approximately:
8 evenly spaced sections.
Do not pull so hard that the yarn cuts through the crochet fabric.
The goal is a softly ribbed pumpkin.
A Simple Way to Space the Ribs
First divide the pumpkin into:
2 halves
Then divide those into:
4 sections
Then divide again:
8 sections
This is easier than trying to judge eight equal sections from the start.
Check the Shape
Set the pumpkin on the table.
It should sit fairly flat.
Gently press:
- top downward
- sides outward
until you get a slightly squat pumpkin shape rather than a perfect ball.
PART 7 — CROCHET THE STEM
Using walnut brown, make a magic ring.
Stem Round 1
Work:
6 sc into the ring.
Do not join.
Place a marker.
6 sts
Rounds 2–6
Work:
1 sc in each stitch around.
Keep:
6 sc
Continue in a spiral.
Fasten off, leaving a long sewing tail.
Stuff the Stem
Add a tiny amount of fiberfill.
Do not overstuff.
The stem should be:
- short
- firm
- slightly rounded
not a large cylinder.
Attach the Stem
Place the stem over the gathered top opening.
Using the long brown tail, sew around the bottom of the stem.
Catch several sturdy pumpkin stitches with each pass.
Sew securely.
Weave in the end.
PART 8 — CROCHET THE FIRST LEAF
Use muted olive.
Ch 9.
Starting in the second chain from the hook:
- sl st in first chain
- sc in next
- hdc in next
- dc in next 2
- hdc in next
- sc in next
- sl st in final chain
Now work down the opposite side of the foundation chain:
- sl st
- sc
- hdc
- dc in next 2
- hdc
- sc
- sl st
Join at the base.
Fasten off, leaving a sewing tail.
You now have one pointed oval leaf.
Second Leaf
Repeat the same pattern.
You can make the second leaf slightly smaller by starting with:
Ch 8
if you want a more natural asymmetrical look.
Attach the Leaves
Position the two olive leaves beside the brown stem.
Angle them slightly away from one another.
Sew only through the lower portion of each leaf so the upper tips remain slightly dimensional.
Secure all ends.
Optional Curly Tendril
If you want a little extra detail:
With olive yarn:
Ch 18.
Starting in the second chain:
Work:
2 sc in each chain across.
The strip will naturally curl.
Fasten off.
Sew one end beside the stem.
Keep the tendril short enough that it does not overwhelm the pumpkin.
Finished Pumpkin
Your completed pumpkin should have:
- warm orange plaid body
- deep-rust check blocks
- cream check blocks
- approximately 8 shaped ribs
- short brown stem
- two olive leaves
- optional curly tendril
The plaid should follow the curves of the pumpkin after stuffing and shaping.
What If the Color Changes Look Messy?
Make sure each change happens on the final yarn-over of the previous stitch.
Also check the carried yarn.
If the unused strand is too loose, it may peek through.
If it is too tight, it will distort the block.
Keep it relaxed against the top of the previous row.
What If the Stuffing Shows Through?
Possible fixes:
- use a slightly smaller hook
- crochet with firmer tension
- use denser yarn
- avoid overstuffing
Do not stretch the fabric simply to make the pumpkin larger.
What If the Plaid Rectangle Curls?
A little curling can settle after assembly.
Strong curling usually means:
- your hook is too small
- tension is very tight
- carried yarn is pulling the fabric inward
Make a small test swatch before committing to the full rectangle if needed.
What If My Pumpkin Is Too Tall?
The height of the pumpkin comes mainly from the number of rectangle rows.
For a shorter pumpkin, reduce from:
20 rows
to:
16 rows
while keeping complete 4-row plaid repeats.
Want a Bigger Pumpkin?
You can scale the entire pattern.
A simple larger version could use:
64 stitches across
with the same 4-stitch plaid blocks.
Then work:
24 rows
instead of 20.
Use additional stuffing and a larger hook if appropriate.
Why Complete Plaid Repeats Matter
Always add or remove rows in groups of:
4
because the full pattern is:
- orange/rust
- orange/rust
- cream/orange
- cream/orange
Stopping halfway through the repeat can make the plaid look unbalanced.
Can I Use Different Fall Colors?
Absolutely.
But for this version I would keep the inspiration’s strong combination:
Main
Pumpkin orange
Dark
Deep rust
Light
Warm cream
It has much more visual impact on Facebook than a pumpkin made from only one orange yarn.
Alternative Color Ideas
Later, you could create separate non-duplicate versions such as:
Woodland
Olive + deep forest + oatmeal
Neutral
Caramel + mocha + cream
Dusty Fall
Clay + burgundy + oatmeal
Vintage
Mustard + walnut + cream
But I would publish orange + rust + cream first.
Can Beginners Make This?
If you already know:
- chain
- half double crochet
- color changes
- basic sewing
yes.
The hardest part is simply managing the plaid yarn colors.
The pumpkin shaping itself is very forgiving.
Is This Worked in the Round?
The pumpkin body is not crocheted in the round.
It is worked:
flat in rows
then:
seamed into a tube
then:
gathered and stuffed.
That makes the plaid much easier to control.
Why This Is Such a Good Fall Project
One-color crochet pumpkins are everywhere.
Plaid immediately makes this feel different.
It gives you:
- fall color
- texture
- pattern
- dimensional shaping
all in one small project.
And visually, it is excellent for social media because the viewer immediately sees:
“That pumpkin is CROCHET PLAID?”
That gives us a much stronger curiosity hook than another plain pumpkin.
Frequently Asked Questions
What stitch is used for the plaid body?
Half double crochet.
How many stitches are in each row?
48 hdc.
How many rows are in the sample?
20 rows.
How large are the plaid blocks?
Approximately:
4 stitches wide × 2 rows tall.
Is the pumpkin stuffed?
Yes.
The rectangle is sewn into a tube, gathered at one end, stuffed, then gathered closed at the other end.
How are the ridges made?
A long strand of yarn is wrapped tightly around the stuffed pumpkin to divide it into approximately 8 sections.
Is the stem crocheted separately?
Yes.
The short brown stem is worked in continuous single crochet rounds and sewn to the top.
Are the leaves separate?
Yes.
Two small flat olive leaves are crocheted and sewn beside the stem.
Final Thoughts
This project has exactly what I want from a fall crochet idea.
From a distance, you see a cute pumpkin.
Then you look closer and realize:
the entire pumpkin is plaid.
But behind that complicated-looking surface is a very straightforward project:
crochet a rectangle
sew it into a tube
stuff it
shape it
add a stem and leaves
That is a great combination for your audience:
strong finished visual + seasonal keyword + “looks harder than it is” + achievable construction.
The linked Crochet 365 Knit Too project confirms the core inspiration is a plaid rectangle worked in half double crochet, then seamed, stuffed and shaped; the original published sample measures about 4.5 inches wide by 4.25 inches high.