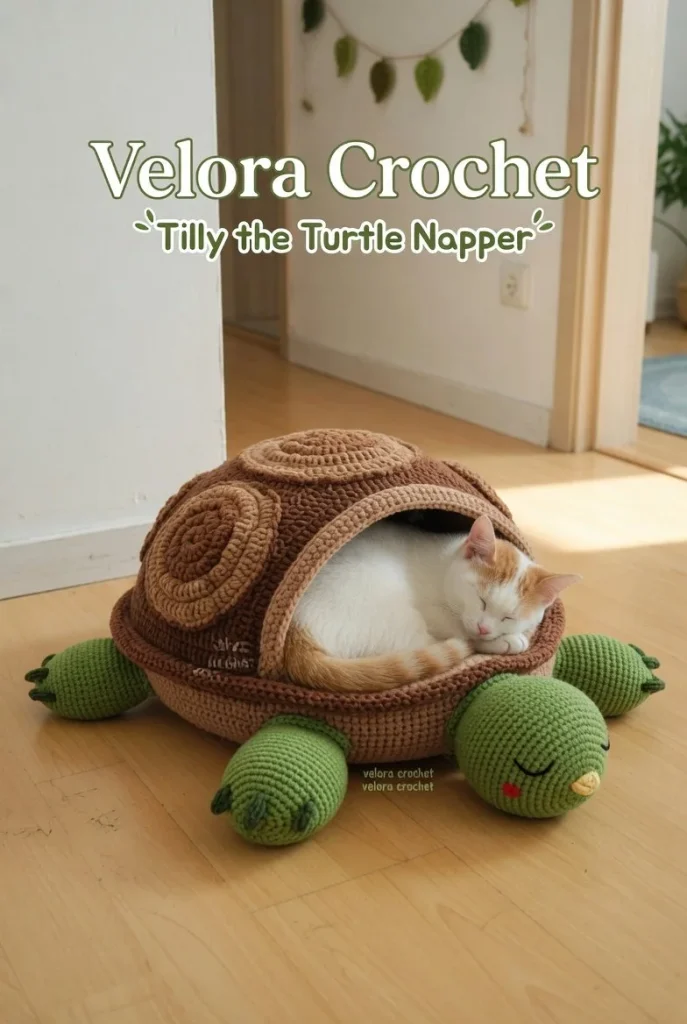
Creating a cozy spot for your furry friend is both a fun and rewarding project, especially when it involves crafting a plush turtle-shaped pet bed. This adorable handmade crochet design is perfect for your cat to snuggle into, featuring a soft, hollow brown shell with delightful bobble stitches, as well as an olive green turtle head and flippers. Not only will your pet appreciate the comfort, but this functional decor piece will also add a charming touch to your home decor. Let’s get started on your new DIY crochet project!
Materials
- Thick plush yarn in earth tones (brown, olive green)
- Yarn needle
- 9mm crochet hook
- Two buttons for the eyes
- Fiberfill stuffing
Abbreviations
- MR: magic ring
- ch: chain
- sc: single crochet
- hdc: half double crochet
- dc: double crochet
- inc: increase
- dec: decrease
- sl st: slip stitch
Bed Base
- Using brown yarn, create a magic ring.
- Round 1: 6 sc in the magic ring. (6)
- Round 2: inc in each sc around. (12)
- Round 3: (1 sc, inc) repeated around. (18)
- Round 4: (2 sc, inc) repeated around. (24)
- Round 5: (3 sc, inc) repeated around. (30)
- Round 6: (4 sc, inc) repeated around. (36)
- Round 7: (5 sc, inc) repeated around. (42)
- Rounds 8-18: sc in each stitch around. (42)
Shell
- Switch to brown yarn and create a new magic ring.
- Round 1: 8 sc in the magic ring. (8)
- Round 2: inc in each sc around. (16)
- Round 3: (1 sc, inc) repeated around. (24)
- Round 4: (2 sc, inc) repeated around. (32)
- Round 5: (3 sc, inc) repeated around. (40)
- Rounds 6-10: work using bobble stitches for texture. Finish with a slip stitch.
{image_template}
Head
- Using olive green yarn, create a magic ring.
- Round 1: 6 sc in the magic ring. (6)
- Round 2: inc in each sc around. (12)
- Round 3: (1 sc, inc) repeated around. (18)
- Rounds 4-5: sc in each stitch around. (18)
- Stuff the head lightly and position on top of the shell.
Flippers (Make 4)
- Using olive green yarn, ch 6.
- Row 1: sc in the second chain from the hook, then sc in the next 4 chains. (5)
- Row 2: ch 1 and turn, sc in each stitch. (5)
- Fasten off, leaving a long tail for sewing.
Tail
- Using brown yarn, ch 6.
- Row 1: sc in the second chain from the hook, then sc in the next 4 chains. (5)
- Row 2: ch 1 and turn, sc in each stitch. (5)
- Fasten off, leaving a long tail for sewing.
Face Details
- Sew on button eyes securely to the head.
- Use white yarn to create a small smile with a simple stitch.
Assembly and Finishing
- Attach the head securely to the shell using the yarn tail.
- Sew flippers to either side of the shell.
- Attach the tail to the back of the shell, making sure it is well secured.
For tips on making a cute kitty companion for your new turtle bed, you might consider looking into a simple crochet plush pattern that pairs beautifully with this project. Check out this baby cat amigurumi crochet pattern for inspiration!
Tips for the Best Result
- Ensure your tension is firm, especially for the base, to support your pet effectively.
- Use stitch markers to keep track of your rounds for a smoother crochet experience.
- Stitch the flippers and head symmetrically to enhance the turtle’s cuteness.
Conclusion
This turtle-shaped crochet pet bed not only serves as a cozy nook for your cat but also as a unique handmade decor piece. You can experiment with different colors of yarn to customize it further, making each version uniquely yours. Happy crocheting!



