Intro
A hanging plant is one of the easiest ways to give a bathroom that lush, relaxing urban-jungle look, but ordinary cotton and wool baskets are not ideal around frequent steam and splashes. For this project, the traditional crochet basket is updated with a synthetic cord that absorbs very little moisture and is much easier to clean.
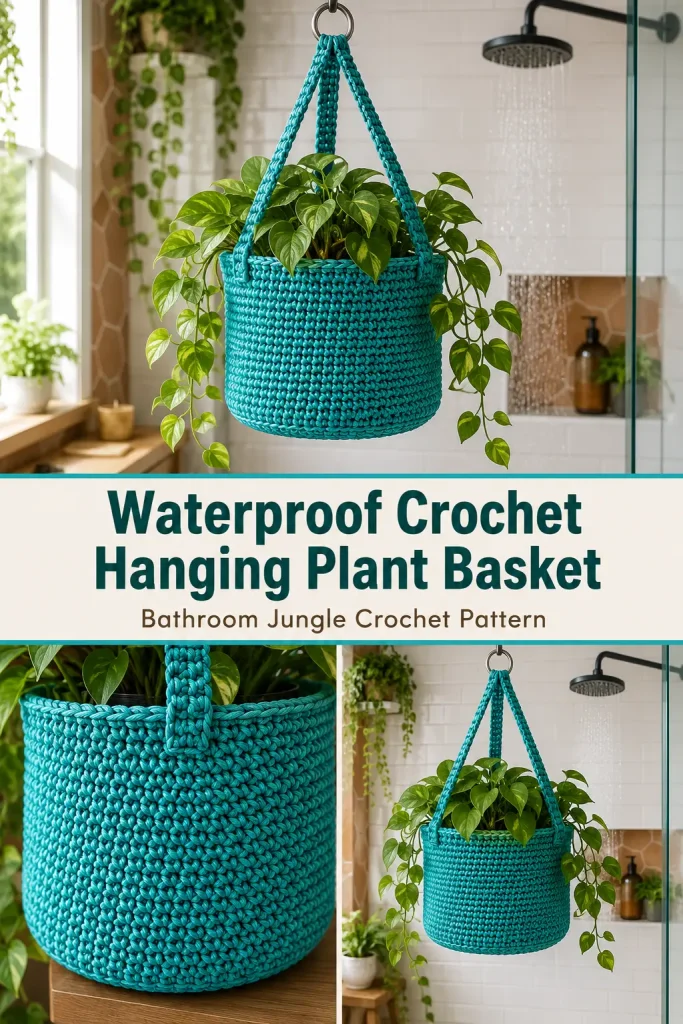
This waterproof-style crochet hanging plant basket has a chunky cylindrical body, a firm round base, and three integrated hanging straps that meet at a corrosion-resistant ring. Slip a nursery pot and waterproof saucer inside, add a trailing pothos or fern, and you have functional crochet decor designed specifically for humid spaces.
Description
The finished crochet plant basket is a compact, structured hanging cachepot sized for a standard 5–6 inch nursery pot. It is crocheted from thick polypropylene or outdoor-grade polyester cord using dense single crochet stitches, creating the chunky woven texture visible in the inspiration. The basket has a flat circular bottom, straight cylindrical walls, a reinforced upper rim, and three narrow suspension straps spaced evenly around the opening. The straps meet at one rust-resistant metal ring above the plant, allowing the basket to hang securely while trailing foliage falls naturally around the sides.
For the bathroom-jungle version, use a rich turquoise, moss green, terracotta, stone, or slate-colored synthetic cord.
Materials
- 4–5 mm braided polypropylene cord or outdoor-grade polyester cord
- Approximately 150–220 m of cord
- 6 mm crochet hook
- 1 stainless-steel, brass, or coated corrosion-resistant hanging ring, approximately 4–5 cm diameter
- Scissors
- Large blunt yarn needle suitable for thick cord
- 3 stitch markers
- Measuring tape
- 5–6 inch plastic nursery pot
- Waterproof plant saucer that fits inside the basket
- Properly rated ceiling or wall hanging hardware for your installation
Important Material Note
For a humid bathroom, do not use ordinary absorbent cotton yarn if your goal is a moisture-resistant basket.
Polypropylene is an especially practical choice because it absorbs very little water and dries quickly. Outdoor polyester cord can also work well.
The crochet stitches themselves are not a sealed waterproof container, so keep the plant in its nursery pot and place a waterproof saucer underneath it. Do not plant directly into the crochet basket.
Abbreviations
- MR – magic ring
- ch – chain
- sc – single crochet
- sl st – slip stitch
- st – stitch
- sts – stitches
- inc – 2 sc in the same stitch
Pattern Notes
- US crochet terminology is used.
- Difficulty: confident beginner.
- The basket is worked from the bottom upward.
- The base is crocheted as a flat circle.
- The sides are worked without increases to create the cylindrical shape.
- Three hanging straps are crocheted separately from marked positions around the rim.
- The straps meet at one metal hanging ring.
- The sample is designed for approximately a 5–6 inch nursery pot.
- Keep the stitches fairly firm so the basket does not sag under the weight of the pot.
- Do not tighten polypropylene cord so much that crocheting becomes uncomfortable; synthetic cord has less give than ordinary yarn.
Finished Measurements
Approximate finished basket:
- Base diameter: 16–17 cm
- Body diameter: 17–18 cm
- Basket height: 15–16 cm
- Strap length: approximately 38–45 cm each
- Overall hanging length: approximately 50–60 cm
Measure your actual plant pot before beginning.
The basket should be approximately 1–2 cm wider than the widest part of the nursery pot.
Step-by-Step Instructions
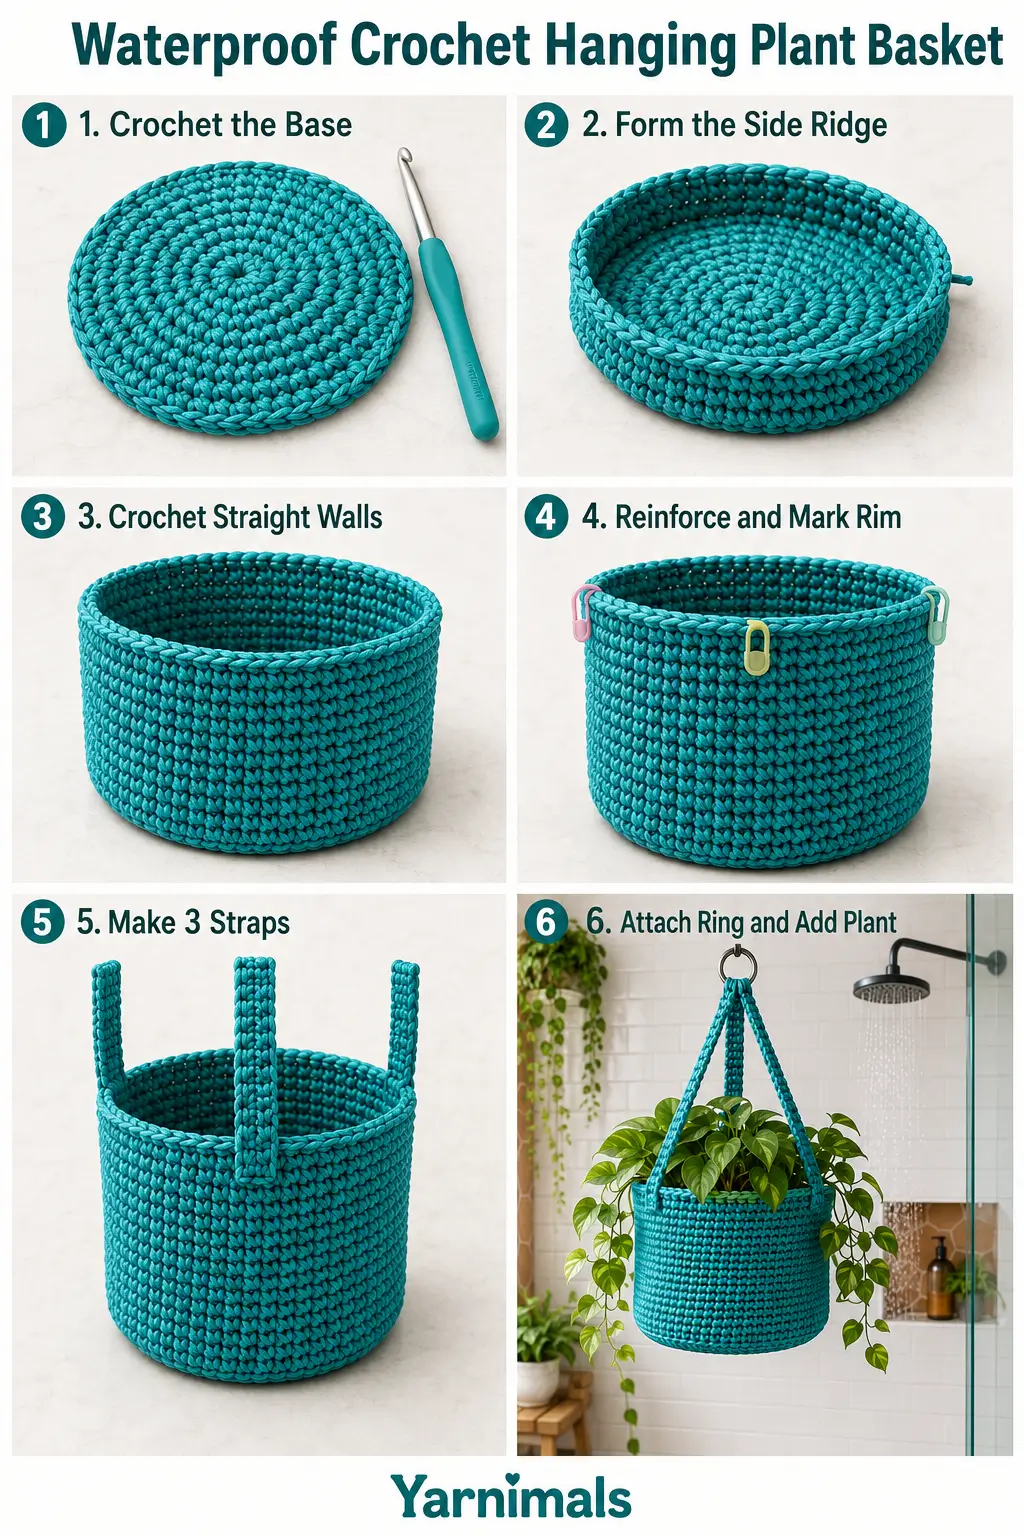
Part 1: Crochet the Round Base
Using the synthetic cord and 6 mm hook, make an MR.
Round 1
Work:
6 sc into MR
Do not join unless you prefer joined rounds.
Place a stitch marker in the first stitch.
6 sts
Round 2
Work:
2 sc in each st around
12 sts
Round 3
Work:
[1 sc, inc] × 6
18 sts
Round 4
Work:
[2 sc, inc] × 6
24 sts
Round 5
Work:
[3 sc, inc] × 6
30 sts
Round 6
Work:
[4 sc, inc] × 6
36 sts
Round 7
Work:
[5 sc, inc] × 6
42 sts
Round 8
Work:
[6 sc, inc] × 6
48 sts
Check the diameter.
For a typical 5–6 inch pot, stop when the base measures approximately 16–17 cm across.
If your base is still too small, continue increasing evenly:
Round 9
[7 sc, inc] × 6
54 sts
Continue only if necessary for your pot.
The base should lie flat.
If it begins to ripple, your increases are too frequent.
If it cups before you begin the sides, you may need another increase round.
Part 2: Create the Lower Basket Edge
To encourage the basket to turn upward cleanly, work the next round through the back loops only.
Turning Round
Work:
1 sc BLO in every st around
Do not increase.
This creates a subtle ridge around the bottom and establishes the beginning of the basket wall.
Part 3: Crochet the Basket Body
Return to working through both loops.
Work:
1 sc in every st around
Continue without increases.
Keep crocheting in a spiral until the side wall measures approximately:
13–14 cm from the turning ridge
The dense single crochet fabric should gradually form a firm cylinder.
Try the nursery pot inside periodically.
The basket should hold the pot comfortably without stretching aggressively.
Part 4: Add a Reinforced Upper Rim
Because the hanging straps will pull on the top of the basket, reinforce the rim before adding them.
Reinforcement Round 1
Work:
1 sc in every st around
Reinforcement Round 2
Work another:
1 sc in every st around
Keep your tension firm and even.
Final Rim Round
Work:
1 sl st loosely in every st around
Do not make these slip stitches extremely tight.
This creates a cleaner, firmer top edge.
Fasten off.
Part 5: Mark the Three Strap Positions
The basket hangs most evenly with three straps positioned approximately 120 degrees apart.
Lay the basket flat and count your stitches.
If you finished with 48 stitches, place markers approximately every:
16 stitches
If you finished with 54 stitches, place them approximately every:
18 stitches
You should have three evenly spaced attachment points.
Check them visually before making the straps.
An uneven strap layout will cause the plant to tilt.
Part 6: Crochet Strap One
Join the cord securely at the first marker.
Ch 1.
Work:
4 sc across the rim
Ch 1 and turn.
Strap Row 2
Sc in each of the 4 sts.
Ch 1 and turn.
Continue:
4 sc per row
until the strap measures approximately:
38–45 cm
Do not stretch the strap while measuring.
The exact length depends on how low you want the plant to hang.
Do not fasten off yet.
Part 7: Attach Strap One to the Hanging Ring
Bring the end of the strap through the corrosion-resistant metal ring.
Fold approximately 3 cm of the strap back against itself.
Using the working cord and hook, sl st through both layers several times to secure the folded section.
Alternatively, fasten off with a long tail and sew the folded section together firmly with several passes through the dense crochet fabric.
The strap should now be firmly locked around the ring.
Fasten off and weave the tail securely into the strap.
Part 8: Crochet Straps Two and Three
Repeat the same process at the other two stitch markers.
For each strap:
- Join cord at the marked position.
- Work 4 sc across the rim.
- Ch 1 and turn.
- Continue with 4 sc per row.
- Match the exact length of Strap One.
- Pass the strap through the same metal ring.
- Fold the end back.
- Secure firmly.
All three straps must be the same finished length.
Before finishing the final strap, hold the basket up by the ring and confirm that it hangs level.
Part 9: Reinforce the Strap Attachments
The area where each strap meets the basket carries the plant’s weight, so reinforce these sections.
Thread a length of matching synthetic cord onto a large yarn needle.
At each strap base, sew through:
- the strap stitches
- the reinforced rim
- the upper basket stitches
Make several passes.
Do not simply knot the cord around one crochet loop.
Repeat for all three straps.
Weave in the ends securely.
Part 10: Add the Plant
Place a waterproof plastic saucer inside the bottom of the crochet basket.
Set the nursery pot on top.
The saucer should be large enough to catch drainage but small enough to sit flat inside the basket.
Arrange the leaves between the three hanging straps.
Trailing plants are particularly effective because their foliage naturally falls over the rounded crochet basket.
Good styling choices include:
- pothos
- heartleaf philodendron
- spider plant
- suitable bathroom ferns
- other plants appropriate to your bathroom’s actual light and humidity
Installation
The completed plant basket can become surprisingly heavy after the plant has been watered.
Use hanging hardware rated for more than the complete wet weight of the plant, pot, saucer, basket, and water.
Do not rely on an adhesive hook or a lightweight decorative hook for a heavy plant.
For a ceiling installation, use hardware appropriate for the ceiling material and secure it to suitable structural support. If you are unsure about the correct fixing for your bathroom ceiling or wall, have the installation checked by someone experienced with that surface.
Keep hanging hardware away from electrical fixtures and other unsuitable wet-area locations.
Bathroom Care
Remove the nursery pot before cleaning the crochet basket.
Synthetic cord can usually be wiped with a damp cloth and mild soap. Follow the care recommendations for the specific cord you purchased.
Allow the basket to dry completely before replacing the plant.
Periodically check:
- the three strap attachment points
- the metal ring
- the ceiling or wall hardware
- the bottom of the basket
- the plant saucer
Replace any component that shows damage or significant deterioration.
Sizing the Basket for Other Pots
Small 4-Inch Pot
Stop increasing the circular base when it measures approximately:
12–13 cm
Make the body approximately:
11–13 cm high
Straps can remain 35–40 cm long.
Medium 5–6-Inch Pot
Aim for:
- 16–17 cm base
- 15–16 cm finished body height
- 38–45 cm straps
This is the size used for the main pattern.
Larger Pot
Continue the base increases until it is approximately 1–2 cm wider than the pot.
Add additional straight body rounds until the side wall reaches just below the upper rim of the nursery pot.
For larger and heavier pots, increase the strap width from 4 sc to 5–6 sc and use stronger hanging hardware.
Tips & Variations
For the bright bathroom-jungle appearance in the inspiration, use vivid turquoise cord with glossy green trailing foliage. The contrast looks especially striking against white, cream, or terracotta bathroom tiles.
For a softer spa look, try stone, sand, warm beige, or slate gray.
Deep moss green works beautifully if you want the basket to visually blend into the foliage.
Terracotta creates a warmer boho bathroom aesthetic.
For a more breathable appearance, you can alternate sections of dense single crochet with simple chain spaces near the upper body, but keep the lower section solid so the nursery pot remains supported.
If the synthetic cord feels stiff, work slowly and relax your grip. A metal crochet hook with a smooth surface may also make thick synthetic cord easier to handle.
Avoid soaking absorbent decorative yarn embellishments onto the basket if moisture resistance is your priority.
FAQ
Is a crochet hanging plant basket really waterproof?
The crochet structure itself is not a sealed waterproof container. Using polypropylene or another suitable synthetic cord makes the basket highly moisture-resistant compared with ordinary absorbent yarn, but the plant should still remain inside a nursery pot with a waterproof saucer.
Can I use cotton yarn instead?
You can use cotton for a basket in a dry room, but it absorbs water readily. For a steamy bathroom or a basket exposed to frequent splashes, a suitable synthetic cord is the better choice.
How do I stop a crochet hanging basket from sagging?
Use thick firm cord, crochet at a fairly tight gauge, reinforce the rim, make three equally spaced straps, and avoid making the basket much larger than the plant pot. Keeping the nursery pot well supported by the round base also reduces distortion.
Conclusion
This waterproof-style crochet hanging plant basket is a practical way to bring handmade texture into a bathroom without relying on traditional absorbent yarn. The chunky synthetic cord, structured round body, three reinforced hanging straps, and simple modern shape work especially well with trailing greenery and an urban-jungle interior. Make it in vivid turquoise for a bold statement or choose a muted earthy shade for a quieter spa-inspired look, then save the pattern for your next bathroom crochet project.



