Beach Cup Capybara Amigurumi Crochet Pattern
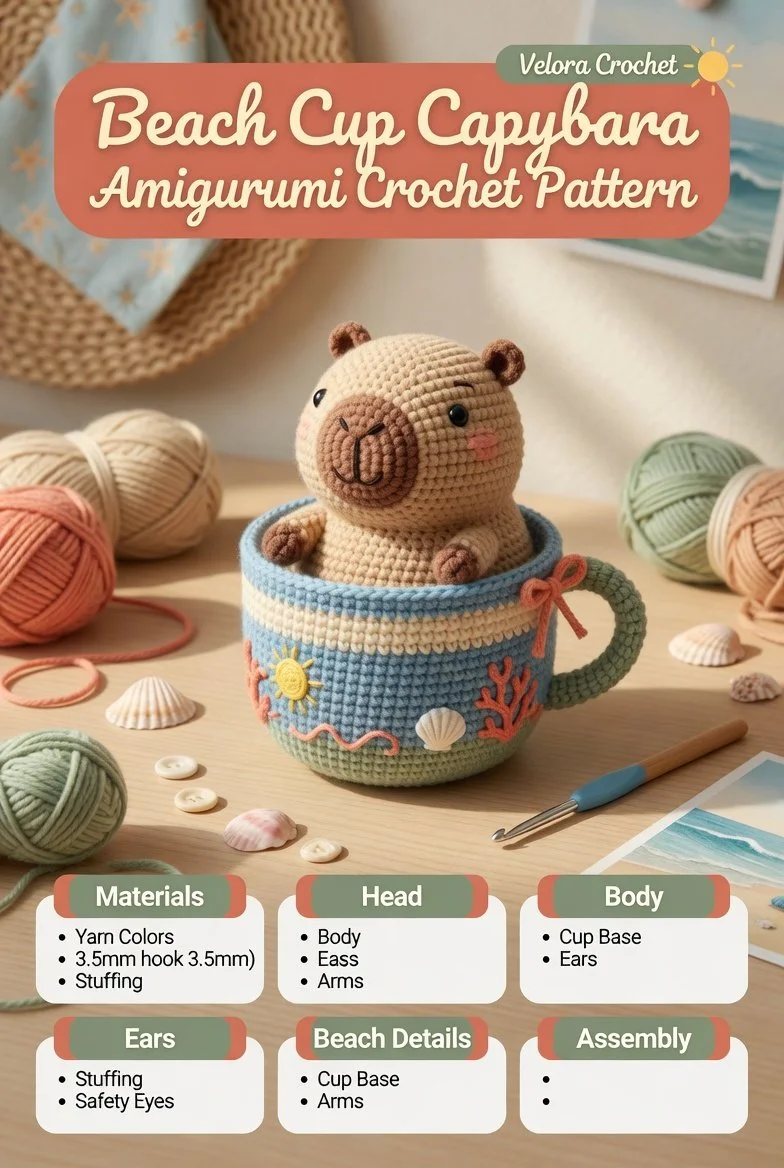
Creating a delightful crochet piece can be both a satisfying and joyful experience. The Velora Crochet pattern features an adorable capybara nestled comfortably inside a tiny beach cup, perfect for summer decorations or gifts. This little character, with its round head, tiny ears, soft muzzle, and small paws resting on the cup edge, evokes sunny days and beach fun. Let’s dive into the materials and the step-by-step instructions for making your very own cozy capybara amigurumi project.
Materials
- Worsted weight yarn in brown, cream, and a color for the cup (such as blue or yellow)
- Crochet hook (size G/4.0 mm)
- Fiberfill stuffing
- Safety eyes (6 mm)
- Yarn needle
- Scissors
- Stitch markers
Abbreviations
- MR: magic ring
- ch: chain
- sc: single crochet
- hdc: half double crochet
- dc: double crochet
- inc: increase
- dec: decrease
- sl st: slip stitch
Head
- Begin with a magic ring and work 6 sc into the ring (6).
- Round 2: Inc in each stitch around (12).
- Round 3-6: Sc in each stitch around (12).
- Round 7: Sc in next 5, inc repeat around (14).
- Round 8: Sc in each stitch around (14).
- Round 9: Sc in next 6, inc repeat around (16).
- Rounds 10-12: Sc in each stitch around (16).
- Add safety eyes between rounds 9 and 10, about 4 stitches apart.
- Round 13: Sc in next 6, dec repeat around (14).
- Round 14: Sc in next 5, dec repeat around (12).
- Round 15: Sc in each stitch around (12).
- Start stuffing the head, then round 16: Sc in next 4, dec repeat around (10).
- Round 17: Sc in next 3, dec repeat around (8).
- Round 18: Sc in next 2, dec repeat around (6).
- Finish stuffing and close the hole by weaving the tail through the remaining stitches and pulling tight.
Body
- Start with a magic ring and work 6 sc into the ring (6).
- Round 2: Inc in each stitch around (12).
- Round 3: Sc in next 4, inc repeat around (15).
- Rounds 4-7: Sc in each stitch around (15).
- Round 8: Sc in next 4, dec repeat around (12).
- Round 9: Sc in each stitch around (12).
- Round 10: Sc in next 2, dec repeat around (9).
- Stuff the body as you work, and finish by closing up, similar to the head.
Cup Base
- With the cup color yarn, start with a magic ring and work 6 sc into the ring (6).
- Round 2: Inc in each stitch around (12).
- Round 3: Sc in next 6, inc repeat around (18).
- Rounds 4-5: Sc in each stitch around (18).
- Round 6: Sc in next 6, dec repeat around (12).
- Round 7: Sc in each stitch around (12).
- Fasten off, leaving a long tail for sewing.
Ears
- With brown yarn, ch 5.
- Row 1: Starting in the second ch from hook, sc in next 3, 3 sc in last ch, working down the other side of the chain, sc in 2, turn (7).
- Row 2: Ch 1, sc in each stitch across.
- Fasten off, leaving a long tail for sewing. Make two ears.
Arms
- With brown yarn, ch 4.
- Round 1: Starting in the second ch from the hook, sc in next 2, sc in last ch, work down the other side, sc in 1 (6).
- Rounds 2-4: Sc in each stitch around (6).
- Fasten off, leaving a long tail for sewing. Make two arms.
Beach Details
- Create mini sun or wave motifs using yellow yarn for sun rays or blue for the waves.
- These can be sewn onto the sides of the cup base for extra decorative flair.
Face Details
- With yarn in a contrasting color, use a yarn needle to stitch a simple smile and eyebrows.
- You can also add some blush spots using a little bit of pink yarn or embroidery thread.
Assembly
- Start by sewing the head onto the body, ensuring it’s securely attached.
- Attach the ears at the top of the head, placing them symmetrically.
- Position the arms along the edge of the cup, securing them in place.
- Finally, attach the cup base to the bottom of the body, ensuring everything is balanced and cozy.
Creating this charming capybara in a beach cup brings a delightful touch of handmade charm to your space. If you’re looking for more fun crochet ideas, you might enjoy this crochet pattern to explore similar projects.
Tips for the Best Result
- When stuffing your pieces, aim for a gentle but firm fill to avoid overstuffing, which can distort the shape.
- Keep your tension even throughout to ensure the structure remains sturdy, especially for the arms and cup.
- Use stitch markers to keep track of rounds to maintain an even count and avoid any confusion during construction.
With a little patience and love, your capybara will soon be a delightful addition to your crochet collection, ready to brighten any room with its sunny disposition!