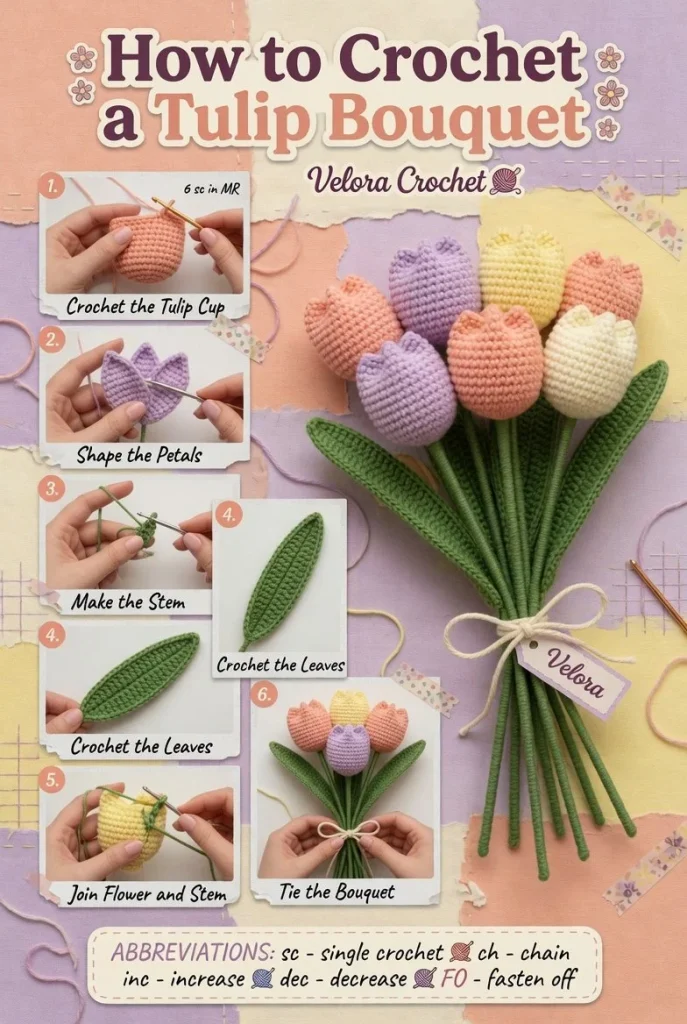
Creating a tulip bouquet with crochet is a delightful way to bring a touch of spring into your home or to offer as a handmade gift. This crochet pattern features a vibrant mix of seven charming tulips in shades of peach, lilac, butter yellow, coral, and cream. Each tulip showcases elegant cup shaping and lovely petal folds, resulting in a stunning and giftable arrangement that will brighten anyone’s day.
Materials
- Cotton yarn in peach, lilac, butter yellow, coral, and cream
- Crochet hook (size appropriate for your yarn, typically 3.5mm to 5mm)
- Fiberfill stuffing
- Floral wire and tape for the stems
- Scissors
- Yarn needle for weaving in ends
Abbreviations
- MR: magic ring
- ch: chain
- sc: single crochet
- inc: increase
- dec: decrease
- sl st: slip stitch
Creating the Tulip Cups
Tulip Base
Start by making the base of each tulip using the magic ring technique.
- Create a MR.
- Work 6 sc into the ring. Pull the tail to tighten the ring.
- Join with a sl st to the first sc.
Tulip Shaping
To shape the tulip cup:
- Round 2: Work 2 sc in each stitch around (12 sc).
- Round 3: 1 sc, inc around (18 sc).
- Round 4: 2 sc, inc around (24 sc).
After completing this, we create the petal folds.
Petal Folds
- For each tulip, switch to a petal color.
- Work sc in the back loops only to create a ribbed effect for each petal.
- Follow the rounding similar to the base, decreasing where necessary to form each petal point.
Constructing the Stems
For the stems:
- Take your floral wire, cut it to your desired length for the bouquet, and wrap it with green yarn, securing with tape as you go.
- Ensure the tension is firm, as this will help the tulips stay upright and maintain the bouquet shape.
Leaf Shaping
To add leaves to your bouquet:
- Create separate leaves using a simple chain and work back with sc or hdc across the chain.
- You can attach them directly to the tulip stems or arrange them separately to enhance the bouquet.
- Make sure to shape them in a way that they curve naturally which enhances the overall look.
Bouquet Wrapping
Once all your tulips are complete:
- Gather your tulips in a pleasing arrangement.
- Wrap the bouquet using a decorative ribbon or fabric, ensuring that the wires are covered for a neat finish.
- This not only gives the bouquet a polished look but also makes it easy to gift.
Remember, the beauty of crochet projects lies in the details; take your time with each tulip to ensure a clean and beautiful finish. If you’re looking to further enhance your crochet skills, consider trying other interesting designs such as the crochet tulip bouquet pattern for more inspiration.
Tips for the Best Result
- Consider blocking the tulips lightly after you’ve created them to help them maintain their shape.
- Use a bit of stuffing to give the tulip cups a fuller appearance without making them too rigid.
- Keep your tension even while crocheting to ensure all your petals look uniform.
- If this is your first time, don’t hesitate to experiment with different colors or sizes for your tulips!
A handmade tulip bouquet can serve not just as decor but a heartfelt gift filled with warmth and care. Enjoy every stitch!



