Sunny Lemon Bunny Amigurumi Crochet Pattern
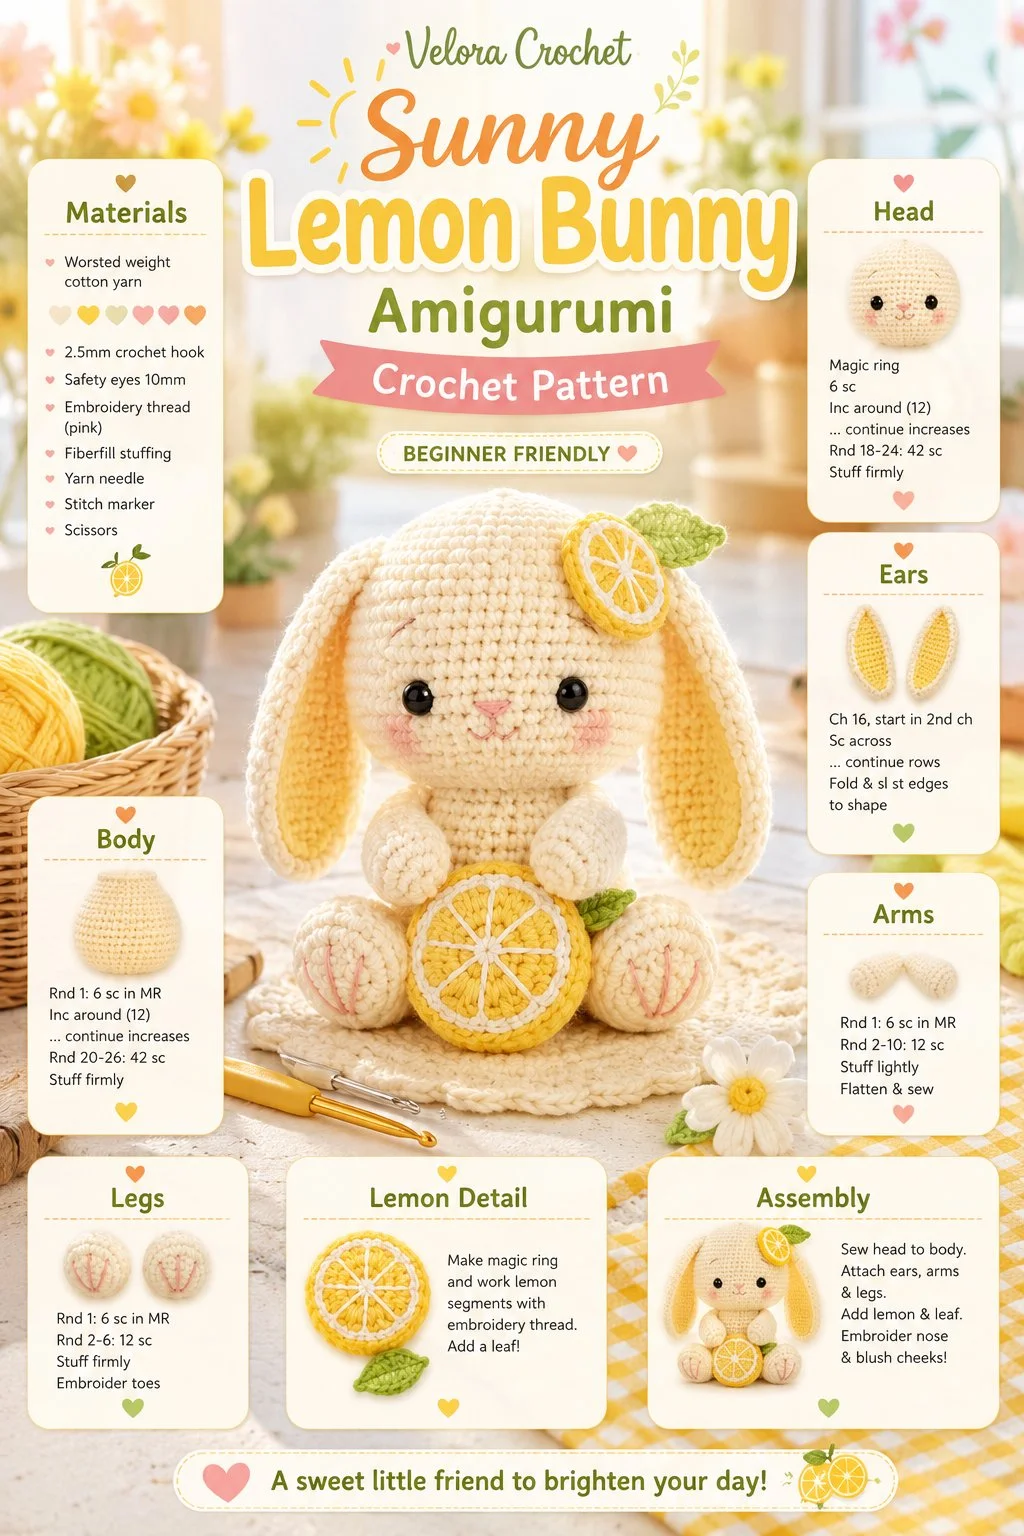
Create a delightful summer character with this charming lemon bunny crochet pattern. This soft and adorable bunny features long floppy ears, tiny paws, and a round tail, perfectly accented by a bright lemon slice with a small green leaf near one ear. Ideal for crafters at any skill level, this pattern will brighten your crochet collection and make a wonderful handmade gift for friends and family.
Materials
- Worsted weight yarn in yellow, white, and green
- Crochet hook (size H/8)
- Safety eyes (size 6mm)
- Fiberfill stuffing
- Yarn needle
- Scissors
- Stitch marker
Abbreviations
- MR: magic ring
- ch: chain
- sc: single crochet
- hdc: half double crochet
- dc: double crochet
- inc: increase
- dec: decrease
- sl st: slip stitch
Instructions
Head
- Start with a magic ring (MR) of 6 sc.
- Round 1: Inc in each stitch (12).
- Round 2: (Sc in next stitch, inc) repeat around (18).
- Round 3: (Sc in next 2 stitches, inc) repeat around (24).
- Rounds 4-6: Sc in each stitch.
- Round 7: (Sc in next 2 stitches, dec) repeat around (18).
- Rounds 8-9: Sc in each stitch.
- Round 10: (Sc in next stitch, dec) repeat around (12).
- Begin stuffing the head and add the safety eyes between rounds 7 and 8.
- Round 11: Dec around (6).
- Finish off and weave in the ends.
Ears (make 2)
- MR of 6 sc.
- Round 1: Inc in each stitch (12).
- Round 2: (Sc in next stitch, inc) repeat around (18).
- Rounds 3-4: Sc in each stitch.
- Round 5: (Sc in next stitch, dec) repeat around (12).
- Continue with the pattern until the desired length is achieved for the ears, then finish off.
Body
- Start with a MR of 6 sc.
- Round 1: Inc in each stitch (12).
- Round 2: (Sc in next stitch, inc) repeat around (18).
- Round 3: (Sc in next 2 stitches, inc) repeat around (24).
- Rounds 4-7: Sc in each stitch.
- Round 8: (Sc in next 2 stitches, dec) repeat around (18).
- Round 9: (Sc in next stitch, dec) repeat around (12).
- Stuff the body firmly and finish off.
Arms (make 2)
- MR of 6 sc.
- Round 1: Inc in each stitch (12).
- Rounds 2-3: Sc in each stitch.
- Finish off and leave a long tail for sewing.
Legs (make 2)
- Repeat the same steps as for the arms but make the legs slightly longer as needed.
Tail
- Create a small MR of 4 sc.
- Round 1: Inc in each stitch (8).
- Finish off and leave a tail for sewing.
Lemon Detail
- In yellow yarn, start with a MR of 6 sc and follow the same pattern as the head.
- After reaching the desired size, switch to green for the leaf, working in the shape you prefer.
Face Details
Use embroidery or safety eyes to bring your bunny to life. You can add a cute little smile and blush accents for a more adorable appearance.
Assembly and Finishing
- Attach the ears at the top of the head, positioning them to drape naturally.
- Sew the arms and legs onto the body, ensuring symmetry.
- Attach the tail at the back of the body.
- Finally, position the lemon near one ear and stitch securely in place.
With this easy lemon bunny crochet pattern, you can create a cute and fresh plushie that’s perfect for summer decor.
Tips for the Best Result
- When stuffing your bunny, avoid overstuffing to keep the shape soft and cuddly.
- Use stitch markers to keep track of your rounds, especially in the increases and decreases.
- For a tidier finish, consider blocking your pieces before assembly; this helps maintain shape.
This delightful lemon bunny will surely brighten up your home or make a lovely handmade gift for someone special!