Colorful Granny Square Sweater Crochet Pattern
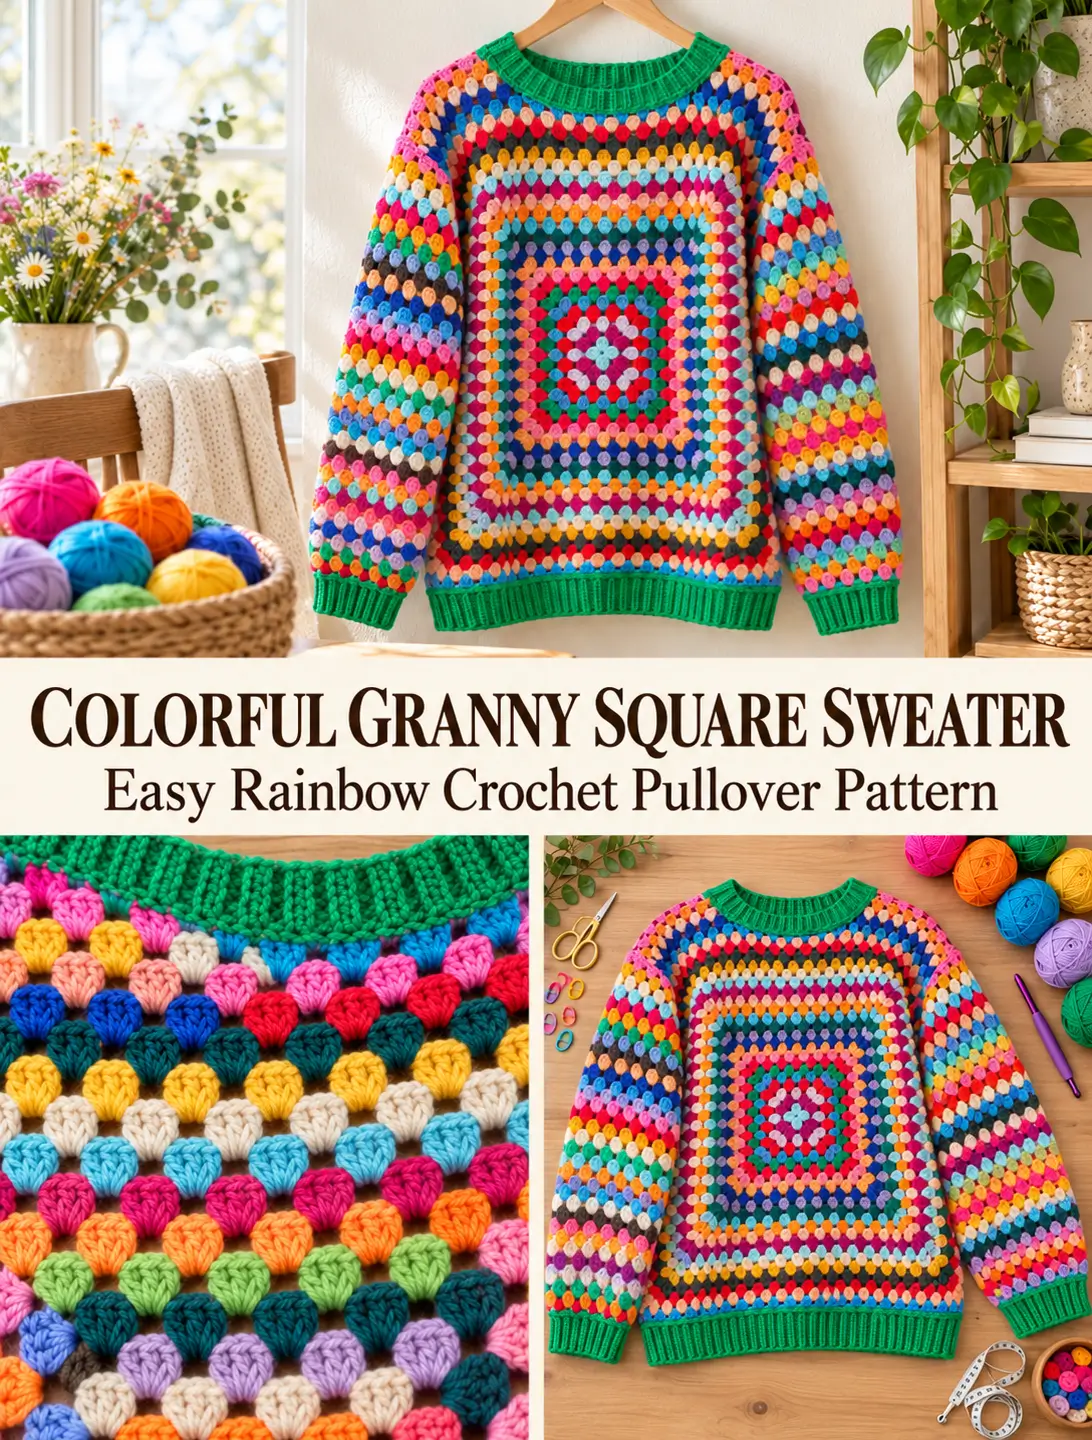
Imagine turning all those colorful leftover yarn balls into one spectacular handmade sweater!
This colorful granny square sweater is bursting with personality. With its cheerful rainbow rows, classic granny stitch texture, relaxed shape, and striking green ribbed trim, it’s the kind of crochet project that immediately catches your eye.
The most surprising part? The main body is made from just two giant granny squares!
Instead of sewing dozens of small motifs together, you’ll crochet two large squares, add shaped shoulder sections, create two sleeves using granny stitch rows, and finish everything with comfortable ribbing.
Whether you love vibrant vintage crochet fashion or simply want a creative way to use your yarn stash, this sweater is a wonderful project to explore.
Why You’ll Love This Granny Square Sweater
- Uses two large granny squares for the main body.
- Beautiful rainbow design made with colorful leftover yarn.
- Classic open granny stitch texture.
- Bright green ribbed neckline, cuffs, and waistband.
- Comfortable long sleeves with gentle shaping.
- Relaxed, slightly oversized fit.
- Easy to customize with your preferred colors.
- A creative project for crocheters who enjoy making their own clothes.
The construction is approachable for adventurous beginners, but shaping the shoulders, sleeves, and neckline requires some previous crochet experience.
Pattern Overview
Project: Colorful granny square pullover sweater
Skill level: Intermediate, or confident beginner with garment-making experience
Terminology: US crochet terms
Construction: Two large granny squares, shaped shoulder extensions, and two flat-worked sleeves
Main stitch: Traditional granny stitch with groups of three double crochet stitches
Yarn weight: Worsted or aran weight, approximately medium #4
Suggested hook: 4 mm or 4.5 mm, depending on gauge and yarn
Fit: Relaxed, slightly oversized
Finishing: Green ribbed cuffs, waistband, and neckline
Sizing: Customizable using your body measurements or a favorite sweater
This is a made-to-measure project, rather than a tested multi-size pattern with one universal stitch count.
Materials You’ll Need
- Medium-weight worsted or aran yarn in a variety of colors
- Extra green yarn for the cuffs, waistband, and neckline
- 4 mm or 4.5 mm crochet hook
- Tapestry needle
- Stitch markers
- Measuring tape
- Sharp scissors
- Blocking mats, if desired
- A favorite sweater to use as a sizing reference
Choosing Your Rainbow Yarn Colors
One of the most exciting features of this sweater is its colorful appearance.
Try combining:
- Bright turquoise
- Grass green
- Fuchsia pink
- Mustard yellow
- Burnt orange
- Lavender
- Royal blue
- Coral red
- Mint green
- Cream
- Deep burgundy
- Chocolate brown
- Peach
- Sky blue
You don’t have to follow a strict color sequence.
In fact, mixing different colors throughout the rounds can create a wonderfully playful vintage look.
For the ribbing, choose one bold coordinating shade. Bright emerald or grass green works beautifully against all the colorful granny stitches.
How Much Yarn Do You Need?
The amount of yarn depends on your size, tension, sleeve dimensions, and total number of colors.
Because this project is designed around your measurements, a universal yarn quantity would be unreliable.
The original designer reports approximately 810 grams and 1,620 meters of yarn for her sample sweater, but that should not be treated as the amount needed for every size.
For better planning, use yarn of similar thickness and keep a generous amount of your chosen green yarn available for the ribbing.
Crochet Abbreviations
All instructions use US crochet terminology.
- Ch: Chain
- Sc: Single crochet
- Dc: Double crochet
- Sl st: Slip stitch
- St: Stitch
- Sp: Space
- BLO: Back loop only
- Rep: Repeat
- RS: Right side
- WS: Wrong side
- Granny cluster: Three double crochet stitches worked into the same space
Understanding the Sweater Construction
Before picking up your hook, it helps to understand how this sweater is built.
There are five major components:
- One enormous granny square for the front.
- One enormous granny square for the back.
- Two shoulder extensions on each panel to shape the neckline.
- Two granny-stitch sleeves worked as flat fabric pieces.
- Green ribbing for the cuffs, bottom edge, and neckline.
After the components are completed, you’ll join the shoulders, attach the sleeves, sew the side and sleeve seams, and finish the ribbing.
The large squares create the beautiful centered rainbow granny pattern visible on the front and back.
The sleeves feature rows of colorful granny stitch clusters rather than separate granny squares.
Step 1: Determine Your Sweater Size
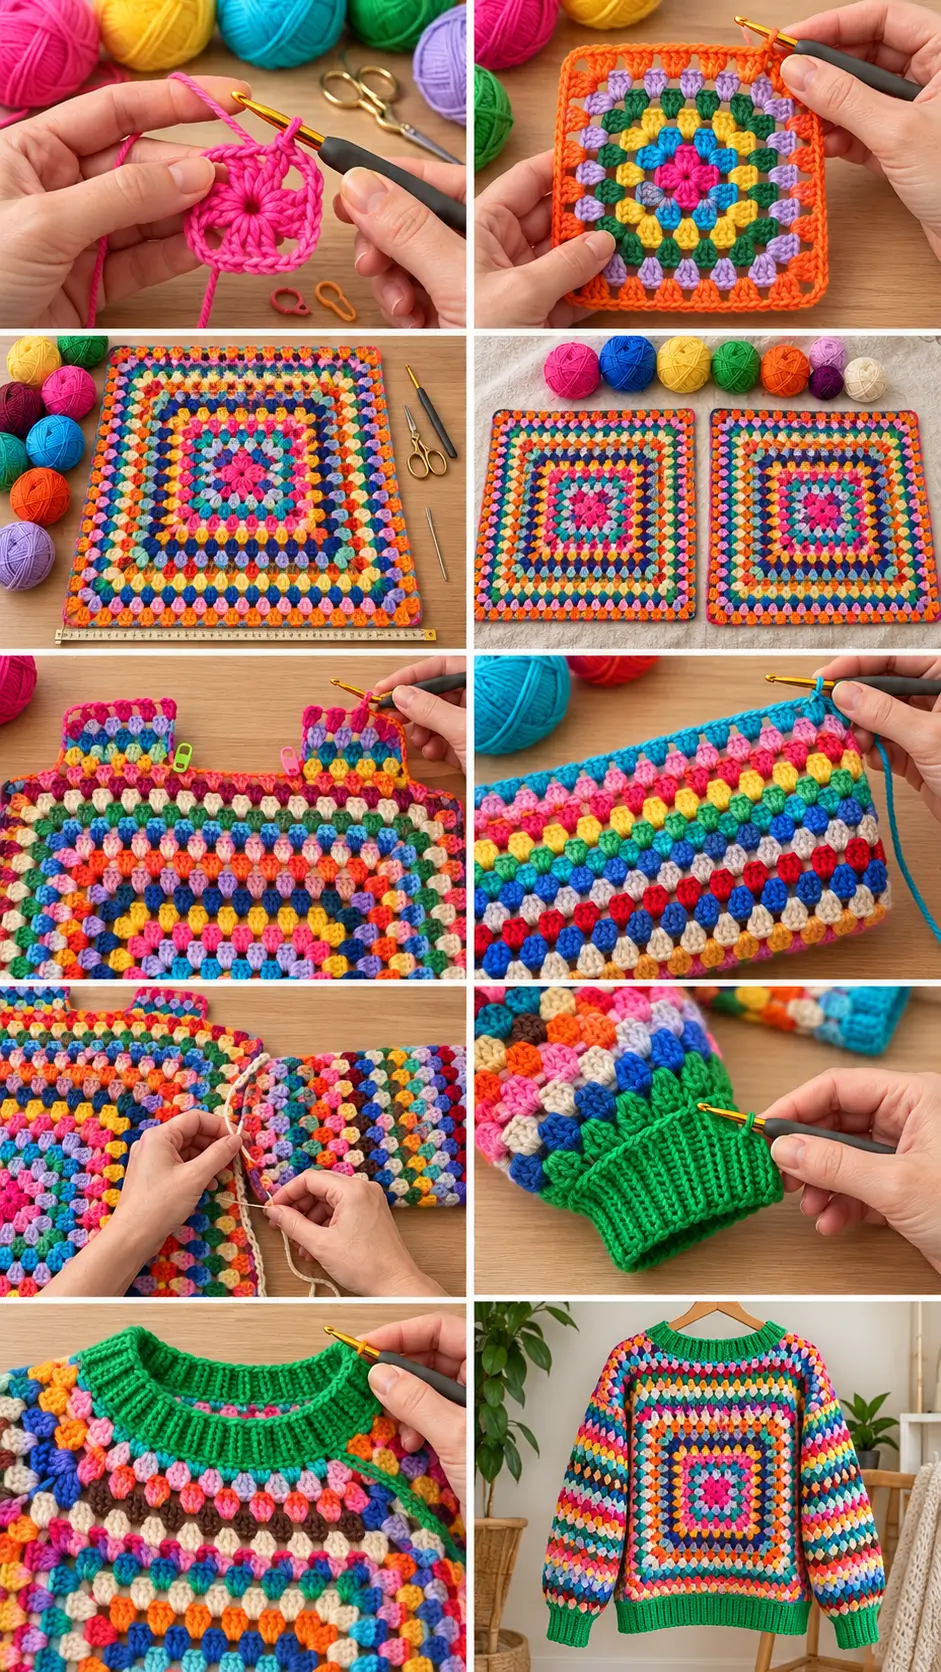
The easiest way to size this sweater is to use a favorite loose-fitting pullover.
Lay the sweater flat and measure:
- Width across the chest, from one side seam to the other
- Length from the shoulder to the bottom edge
- Shoulder width
- Sleeve length
- Upper-arm width
- Wrist circumference
- Width and depth of the neckline
Use the chest width as a starting point for your giant granny squares.
For example, if your favorite sweater measures 21 inches across, you can aim for two granny squares that measure approximately 21 inches wide after blocking.
Remember that the shoulder shaping and bottom ribbing will add length.
Recommended Sizing Method
Measure around the fullest part of your bust or chest and decide how much ease you would like.
For a relaxed sweater, approximately 3–6 inches of positive ease can be a useful starting point, although your preferred fit may differ.
Divide the desired finished chest circumference by two to estimate your panel width.
The actual finished measurement will depend on your seams, blocking, yarn, and tension.
Step 2: Crochet Your First Giant Granny Square
The main front panel begins as an ordinary granny square.
You’ll simply continue adding rounds until it becomes large enough to form the sweater body.
Round 1 – Make the Center
- Make a magic ring.
- Chain 3. This counts as your first double crochet.
- Work 2 double crochet stitches into the ring.
- Chain 2.
- Work 3 double crochet stitches into the ring.
- Chain 2.
- Repeat the three-double-crochet cluster followed by chain 2 twice more.
- Slip stitch into the top of the beginning chain 3.
- Gently tighten the ring.
You should have four groups of three double crochet stitches and four corner spaces.
Round 2 – Build the Square
Slip stitch into the nearest chain-2 corner space.
- Chain 3 and work 2 double crochet stitches into the corner.
- Chain 2.
- Work another 3 double crochet stitches into the same corner.
- Chain 1.
- Move to the next corner and work 3 double crochet, chain 2, and 3 double crochet.
- Chain 1.
- Repeat around the square.
- Join with a slip stitch.
Your square now has four distinct corners.
Round 3 – Add More Granny Clusters
Move into a corner space.
- Work 3 double crochet, chain 2, and 3 double crochet into the corner.
- Chain 1.
- Work 3 double crochet into the next side chain space.
- Chain 1.
- Continue around, placing a single granny cluster in each side space.
- In every corner, work 3 double crochet, chain 2, and 3 double crochet.
- Join at the end of the round.
Round 4 and Beyond – Keep Growing
Continue using the same granny square formula:
Corner: 3 dc, ch 2, 3 dc
Side spaces: 3 dc in each chain-1 space
Between clusters: ch 1
Each new round increases the size of your square while maintaining four straight sides and four corners.
For a colorful sweater, change yarn colors at the start of new rounds.
You can change colors after every round or work a few consecutive rounds in the same shade.
Continue until the square reaches your desired chest width.
Tip for Keeping the Square Flat
Large granny squares sometimes begin to twist or lean.
Turning your work after each round can help keep the fabric balanced.
Also check that each corner has the correct two granny clusters separated by a chain-2 space.
Step 3: Crochet the Second Giant Granny Square
Make another giant granny square using the same method.
The second square must have the same number of rounds and the same finished measurements as the first.
The colors can be different, but the yarn thickness and stitch tension should remain consistent.
You’ll now have two large crochet squares that form the front and back of your sweater.
Lay both squares flat and check their measurements before moving on.
Step 4: Create the Shaped Shoulder Sections
The shoulder sections are important because they help transform the square panels into a wearable sweater.
Without shaping, joining the top edges can create a very basic rectangular neckline.
For this design, you’ll add granny-stitch shoulder extensions to the upper left and upper right portions of both large squares.
Plan the Neck Opening
Lay one square flat with its upper edge positioned horizontally.
Measure the neckline width of your favorite sweater.
Center that measurement along the top edge of the granny square.
Mark the left and right sides of the planned neckline with stitch markers.
The fabric outside the neckline markers forms the shoulder sections.
Crochet the Left Shoulder Extension
Attach yarn at the outer upper corner of the square.
Work granny clusters into the spaces along the upper edge, stopping at the neckline marker.
Turn your work and continue with another row of granny clusters.
For a gently rounded neckline, shorten the rows slightly toward the inner neckline edge while keeping the outer shoulder edge aligned.
Continue until the shoulder extension reaches your preferred depth.
Crochet the Right Shoulder Extension
Repeat the process on the opposite side.
Mirror the placement so both shoulder sections have the same width and length.
Repeat for the Back
Add matching shoulder extensions to the second giant square.
Keep the shoulder seams compatible so they can be joined neatly.
Important: The exact number of shoulder clusters and shaping rows depends on your square size and neckline measurement. The original designer provides visual shoulder diagrams that are especially useful for placing these extensions accurately.
Test the neckline against an existing sweater before fastening everything off.
Step 5: Crochet the Colorful Granny Stitch Sleeves
Unlike the main body, the sleeves are worked in flat rows.
They begin at the wrist and gradually widen toward the upper arm.
The result is a comfortable sleeve with attractive horizontal rows of colorful granny clusters.
Prepare the Sleeve Foundation
Use your green ribbing color or another coordinating shade.
Make a foundation row of single crochet stitches.
For the granny-stitch variation used here, choose a foundation count that is a multiple of 3 plus 1.
The original designer began with 43 foundation stitches for her sample.
This is a reference stitch count rather than a guaranteed size for every person.
First Granny Stitch Row
Turn your work.
Chain 3 to form an edge double crochet.
Skip two foundation stitches.
Work 3 double crochet stitches into the next stitch.
Repeat across, skipping two foundation stitches between granny clusters.
Finish with a double crochet at the opposite edge, maintaining a straight sleeve side.
Continue in Granny Stitch Rows
For the next row, turn your work.
Work the edge stitch, then place groups of three double crochet stitches into the spaces between granny clusters from the previous row.
Continue across, maintaining straight edges.
Change colors whenever desired.
Working the sleeve in rows creates bands of different colors, with each new row adding to the sleeve length.
Shape the Sleeves
As you work from wrist toward upper arm, the sleeve needs to become wider.
Gradually add complete granny clusters at the row edges.
To preserve the stitch pattern, add shaping consistently and make the same changes on both sleeves.
A helpful technique is to increase by one cluster at each edge on selected rows, then work several rows without increases.
Check the width against your preferred sweater as you go.
The original designer’s sleeve widens from approximately 27 cm at the wrist to 40 cm at the upper arm, with 41 granny-stitch rows before the cuff.
Your sleeve dimensions may differ.
Check the Length
Measure from your preferred cuff position to the upper arm or shoulder.
Remember that adding green cuff ribbing will increase the finished sleeve length.
Stop when the sleeve body reaches your desired measurement.
Repeat the entire process for the second sleeve.
Both sleeves should have matching dimensions and compatible shaping.
Step 6: Crochet the Green Ribbed Cuffs
The green ribbing is one of the most recognizable features of this sweater.
It provides a strong color contrast against the rainbow granny stitches and helps the cuffs fit comfortably around the wrists.
You can use a simple back-loop single crochet ribbing technique.
Prepare the Sleeve Edge
Work a row of single crochet evenly along the wrist edge if needed to create a stable attachment row.
Join your green yarn.
Work Sideways Ribbing
- Chain 9.
- Single crochet in the second chain from the hook.
- Single crochet in each remaining chain, making 8 stitches.
- Slip stitch into the next two available stitches along the wrist foundation edge.
- Turn.
- Skip the two attachment slip stitches.
- Work 8 single crochet stitches in the back loops only.
- Turn and chain 1.
- Work 8 back-loop single crochet stitches.
- Attach to the next two unworked foundation stitches.
Continue repeating the ribbing rows across the wrist edge.
After working across, join the ribbing ends when the sleeve is folded and seamed.
This creates a neat, stretchy green cuff.
The source sweater uses a more specialized join-as-you-go ribbing technique combining yarn-over slip stitches and regular slip stitches. This simpler ribbing is an optional alternative.
Step 7: Add the Green Bottom Waistband
The lower ribbing frames the main granny square pattern and helps the sweater sit neatly at the waist or hip.
Use the same green yarn as the cuffs.
Make the Ribbing Foundation
Along the bottom of each giant granny square, work a row of single crochet stitches.
Distribute the stitches evenly so the edge remains flat.
Crochet the Ribbing
Using the same sideways back-loop ribbing technique as the cuffs, make the waistband approximately 1.5–2 inches deep, or adjust to your preferred length.
Use a longer starting chain if you want deeper ribbing.
Work along the bottom of both front and back panels.
Make sure the two ribbed sections have compatible dimensions so they can be seamed smoothly at the sides.
Step 8: Join the Shoulder Seams
Place the front and back panels together with right sides facing.
Align the shoulder extensions.
Use a yarn needle and matching yarn to sew each shoulder seam.
A mattress stitch or neat whip stitch works well.
Leave the neckline opening unsewn.
Check that the neckline is large enough to pass comfortably over your head.
Turn the sweater right side out to inspect the seam placement.
Step 9: Attach the Sleeves
Lay the sweater body open and flat.
Position one sleeve along the side of the body, with the wider sleeve edge against the shoulder and armhole area.
Align the midpoint of the upper sleeve edge with the shoulder seam.
Pin or mark the sleeve position.
Sew the upper sleeve edge to the garment using a neat seam.
Repeat for the second sleeve.
Before completing the side seams, check that both sleeves are aligned evenly.
If the sleeve is wider than the available armhole, adjust the attachment area or sleeve shaping rather than stretching the fabric excessively.
Step 10: Sew the Sweater Together
Fold the sweater with right sides facing each other.
Align the sleeve edges and side edges.
Starting from the wrist cuff, sew along the underside of the sleeve toward the armpit.
Continue down the body side seam to the waistband.
Repeat on the other side.
Keep the yarn tension relaxed so the seams remain comfortable.
Turn the sweater right side out.
You should now have a recognizable long-sleeved pullover.
Step 11: Crochet the Green Neckline Ribbing
The finishing touch is the ribbed green neckline.
Prepare the Neck Opening
Join green yarn at the back neckline.
Work single crochet stitches evenly around the neckline.
Pay particular attention to the shaped shoulder sections.
Place enough stitches to keep the neckline smooth without allowing it to flare.
Add Neck Ribbing
Use the same attached back-loop single crochet ribbing technique as the cuffs and waistband.
For a narrow collar, start with a shorter chain, such as chain 6.
Attach the ribbing around the neckline until you return to the starting point.
Join the two short ends carefully.
Try the sweater on before weaving in the final ends.
The neckline should sit comfortably and stretch enough to pass over your head.
Step 12: Finish and Block Your Sweater
Once all the sections are joined, weave in every yarn end securely.
With a sweater made from so many colors, there may be quite a few ends to hide.
Next, inspect the seams and check for loose stitches.
Wash or block the sweater according to the yarn manufacturer’s recommendations.
Lay it flat and gently shape the body, sleeves, and neckline.
Avoid stretching the garment beyond your desired measurements.
Allow it to dry completely.
Your colorful granny square sweater is ready to wear!
Tips for a Beautiful Finished Sweater
Balance Your Colors
Try spreading bright and dark colors throughout the sweater.
Instead of placing all the dark colors together, alternate them with lighter and brighter shades.
Keep Your Yarn Weight Consistent
Using similarly sized yarns helps the granny stitch rows remain even.
Try on the Pieces Before Joining
Lay the giant squares against a favorite sweater and check the sleeve length before making the final seams.
Don’t Make the Neckline Too Tight
The neckline must be large enough to pull over your head comfortably.
Use Green Ribbing for a Cohesive Look
Repeating the same shade on the neck, wrists, and waistband ties the entire rainbow design together.
Weave in Ends as You Go
A colorful scrap yarn sweater can have many yarn ends. Weaving them in during construction saves considerable finishing work.
Creative Ways to Customize the Sweater
Pastel rainbow: Try mint, lavender, blush pink, pale yellow, and baby blue with ivory ribbing.
Retro rainbow: Combine orange, mustard, avocado green, brown, burgundy, and cream.
Bright festival colors: Use hot pink, turquoise, electric blue, yellow, coral, and vibrant green.
Neutral patchwork: Create a more understated version using oatmeal, tan, cream, taupe, and chocolate brown.
Cropped sweater: Make slightly smaller body squares and add shorter shoulder sections, checking the overall length before assembly.
Oversized sweater: Use larger giant granny squares and sleeves with a relaxed upper-arm circumference.
Frequently Asked Questions
Is this granny square sweater beginner-friendly?
The granny square stitching itself is beginner-friendly, but turning the squares into a garment requires shaping, measurements, and seaming.
How many granny squares do I need?
You need only two giant granny squares for the front and back. The sleeves are worked in granny stitch rows.
Can I use leftover yarn?
Yes! This sweater is especially suited to scrap yarn and stash-busting projects.
What yarn weight works best?
Medium-weight worsted or aran yarn is a practical choice. For a lighter sweater, you can try thinner yarn and adjust the dimensions.
Why are the sleeves worked in rows?
Working the sleeves in rows makes it easier to adjust their width and create the horizontal bands of colorful granny clusters.
Can I make this sweater longer?
Yes. You can enlarge the body squares, add extra length with granny stitch rows, or increase the depth of the lower section, adjusting the overall proportions as needed.
More Crochet Ideas You’ll Love
If you enjoy colorful crochet garments, try these next:
- Cozy granny square cardigan with ribbed cuffs
- Easy granny square tote bag
- Colorful scrap yarn crochet blanket
- Retro granny stitch sweater vest
- Crochet patchwork pullover
- Easy rainbow granny stitch scarf
Final Thoughts
This colorful granny square sweater proves that simple crochet stitches can create a truly eye-catching handmade garment.
With two oversized granny squares, playful rainbow yarn changes, gently shaped sleeves, and coordinating green ribbing, the finished sweater has the perfect combination of vintage charm and modern handmade style.
It’s also a wonderful opportunity to turn leftover yarn into something you’ll actually want to wear.
Take your time choosing your colors, enjoy watching the granny squares grow, and have fun creating a sweater that’s entirely your own.